How to Grow and Care for Jalapenos

Jalapenos

Jalapeno is a type of hot pepper that comes from the same family of plants as cayenne and cherry. This popular pepper originally comes from a place called Xalapa, in the capital of Velacruz, in Mexico. It is often served stuffed with seafood, and cheese and also used as a spice for tacos in Mexican dishes. Jalapeno has a rating in between 2,500 – 8000 Scoville heat units, which is a medium range of chili intensity. Jalapeno looks like a hard plant to grow but you can actually grow it easily by providing adequate sunlight and water.

Planting and Germinating the Seeds

Firstly, you must decide how many jalapenos plants you want to grow. Then, you can prepare the containers for sowing the seeds accordingly. The container should have holes at the bottom so that the water can drain away when you water it. You can use seedling pots or soda bottle as the container. In each container, you can plant 2 – 3 seeds. The seeds are to be sowed at a depth of 1/4 inch. Not all seeds will sprout so you may want to sow extra seeds.

Jalapenos don’t like cold temperatures so you must wait for the temperature to warm up to 75 – 85 before sowing the seeds. It takes 2 – 3 weeks for jalapenos seeds to sprout. After 3 weeks, you can move each seedling that has sprouted to a 3 inch diameter pot. It is to be placed on a sunny spot indoor, for example, the window sill or under the grow lights.

The potting mix of the sprouted seedlings must be kept moist but not too wet so as to damage the roots. You only need to water the seedlings 1 – 2 times per week to maintain the moisture level. You will have to gradually move the seedlings to a few more bigger pots until it grow a young plant. This should take about 8 – 12 weeks. The final container size will be about 2 gallons. Terra cotta container is the best option for the final container. They offer better result compared to plastic containers.

Transplanting the Young Chili Plant Outside

The young chili plant cannot be moved outside immediately. Instead, you will need to slowly expose it to outdoor conditions to allow it to adapt to the new environment. When it is time to move the plant outside, be sure to plant it in a place that get at least 8 – 10 hours of direct sunlight. The transplanted plants should be about 14 – 16 inches apart to ensure that there is enough air circulation.

Caring for the Jalapeno Plant

The best potting soil for jalapenos is organic, rich in nutrition with good drainage quality. Fertilizer should be added about 1 month after you have transplanted the young plant outdoor. You will want to choose a fertilizer with a NPK of 10-10-10. The addition of fertilizer ensures that the chili plant will receive an adequate amount of nutrition after all the existing nutrients in the soil has been used up. New fertilizer can be added on the third watering. There is no need to add any fertilizer if you are using a high quality potting soil. Diluted fertilizer is easier for the plant to absorb compared to solid fertilizer.

Jalapenos are night shade plants just like tomatoes and potatoes so make sure you don’t plant them close to each other. This is because the pests from your tomato and potato plant can go to the jalapeno plant. Some of the common pests are cutworms, aphids, and flea beetles. You can spray neem oil keep it away from these pests. Additionally, you should hand pick the caterpillar, snails, and worms on your jalapeno plant.

Harvesting the Peppers

It takes at least 90 – 120 days for you to see the first crop of your pepper plant. When the pepper plant is mature, it will grow to 2 – 3 feet tall. You may see 30 – 40 pepper pods hanging from the plant. The pods will grow to 2 – 3 inches long before it is ready for harvesting. If it yield too much peppers, you can use a plant cage as support. You can harvest pods from a jalapeno plant for a few times. You can harvest the jalapenos green or red. Or, you can wait until the full time at the end of 120 days to pick the jalapenos when it is ripened to red color.

Picking the peppers early can force more new blossoms. Green jalapenos are not yet ripened so they have milder taste. When it is red, it will have a medium intensity heat flavor. Some people have also picked jalapenos with a mix of red and green color. They make a nice presentation for their dishes. To harvest, you simply pinch the pepper off the vine gently. You can store the pepper fresh in your refrigerator for up to 2 – 3 weeks.

Gardening Guide on Growing Bell Peppers in Container

Growing Bell Peppers in Container

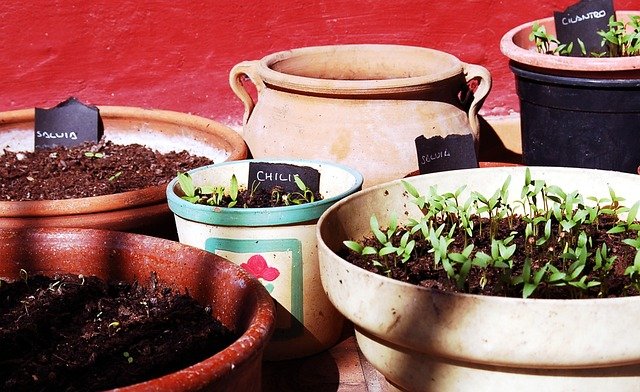
Bell pepper, also known as Capsicum anuum, is a must have vegetable crop in your garden if you live in a place with warmer climate. Bell peppers have a crispy sweet flavor which makes it a great addition to a variety of dishes. It does not taste hot like its relatives the chili hot peppers because it does not contain the capsaicin compound.

There are several varieties of bell peppers. The green bell pepper is the most common and cheapest in the supermarket. Next to green peppers on the aisle are the red, yellow, and purple peppers. Green pepper are often cheaper because they are picked early. All colors of peppers keep their colors when cooked except the purple peppers which turned to dark muddy color when cooked. You can buy bell pepper seeds at your local nurseries or online from amazon. You should always look for varieties that can ripen fast. Some of the recommended varieties are lady bell, gypsy, orange sun, and Golden California Wonder.

When to Sow Bell Peppers

Bell peppers like cool temperature in between 21 – 25 degrees. It will not grow well if it is too hot or too cold. Therefore, the best time to plant it is a few weeks before Spring in February or in the Fall time in September.

Sowing the Seed

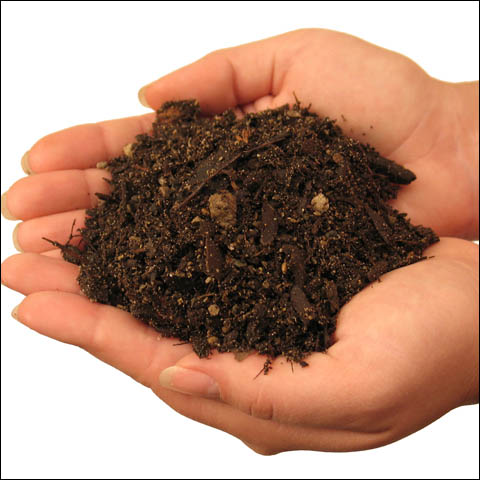
A good pot of seeding mix will consist of cocopeat, vermicompost, and sand. When you plant the seed, make sure you don’t bury it too deep. You only need to bury the seed about 1 cm deep. If the seed is sown too deep, you will not be able to see the leaf when it germinate. The birds always like to eat new seeds that are just sown so you should cover your pot with a polyethylene cloth.

The pot with the newly sown seeds should be exposed to at least 4 hours of sun in order for germination to take place effectively. Bell peppers is like a small tree and it will produce lots of small branches with leaves when mature. So, if you plant in a big pot, you can at most plant only 2 seeds. The seeds should be planted about 6 – 8 inches apart.

Preparing the Soil for Transplanting Bell Peppers


Bell pepper likes loamy soil that is well drained. You can make the soil well drained by lining it with porous landscape fabric or plastic. If you use plastic, makes sure to punch holes on the locations where the drainage holes are. The soil should not be too wet and muddy or else the root will become rotten. It also should not be too dry until it show cracked lines as it will result in blossoms drop.

Prior to transplanting, you can add aged compost into the soil. The aged compost will work as fertilizer and as mulch to assist in the retaining of the water. It is recommended to continue adding other fertilizers for maintaining the bell pepper plant. For example, you can add compost tea or fish emulsion solution every 10 days or so.

High nitrogen fertilizer can prevent the plant from bearing fruits so it should be avoided. Many people also like to add plastic mulch to increase the yields. On the other hand, organic compost mulch can lower the amount of weeds and reduce the need for watering. Organic compost mulch does not help in any way in the fruit yield.

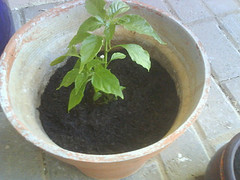
Caring for the Young Bell Pepper Plants

After the young plants are successfully transplanted, you must keep watch for weeds that will spring up every now and then in the planting beds. In addition, you should also don’t forget to water 1 – 2 inches of water every week. You need to keep in mind that pepper is a heat sensitive plant which means you must water daily if you live in an area with warm climate. You can apply a solution that consists of a mixture of detergent and water on your pepper plant to keep away the aphids and whiteflies. It is important to keep the bell pepper plant in a place with the suitable temperature otherwise it will not bear fruits.

Harvesting and Storage

Usually, it takes around 2 months for the bell pepper plant to grow to full size. It is best to harvest the peppers when it has changed to the color you want. For example, if you want to use green pepper in your cooking, then you can pluck it when it is green. However, if you want to use yellow pepper, you should ideally wait until it has changed to yellow color. It will also work if you pluck it green and then keep in place that has sunlight so that it can change to red and then yellow. However, it will not taste as sweet as when you pluck it in yellow color from the plant.

You can store bell peppers in plastic bags in the refrigerator for up to 1 – 2 weeks. You can also store peppers in dried forms. To dry the peppers, you must first remove the seeds and then cut into strips. The strips are to be spread out on a baking sheet and baked for 10 minutes in the oven. After that, you can remove the peppers from the oven and let it cool down. Once cooled, you can put the pepper in bags and store them in the refrigerator.


Check out our great range of chili seeds and products!!

How to Grow Bell Peppers with Mild Flavor

bell peppers

Sweet bell pepper enriched with vitamin C and vitamin A is an ingredient that you don’t want to miss in your cooking. The fruit with a smooth skin, crunchy flesh and white membrane can give a delicious mild flavor. Bell pepper is not difficult to grow. Many people have successfully grown it inbell peppers their backyard whether in garden soil or in container gardening.

Sowing Bell Peppers

The right way of sowing bell pepper seeds is to start them indoor instead of directly sowing them into the ground outside. You can start the germination of the seeds about 5 – 8 weeks before the last frost. You are to fill a seedling tray with well drained potting mix. The seeds are sown at about 1/4 depth in the soil. Soil should be kept moist with a temperature around 70 – 80 degrees Fahrenheit. If the temperature is not hot enough, you can put heating mat under the seedling tray or near the window.

After it sprout, you must watch for the first true leaves to emerge. The cotyledons, the seed leaves, which appear before the first true leaves are to be vibrant and green. If it is yellow, it means that it is not getting enough nitrogen. You can add fertilizers like fish emulsion and kelp mixture into the seedling potting mix to ensure that it grow the true leaves successfully.

Selecting a Plot in Your Garden

 You can first plot the area in your garden where you want to transplant the young bell pepper plants. Ideally, the site you choose should not have been grown with tomatoes or potatoes as they share the same pests with bell peppers. The soil on the site should be well drained and heavy as well as rich in all the essential nutrients including phosphorus, potassium, and calcium. You can aim for a pH around 6.5.

Transplanting

 You can transplant the young bell pepper plant into the garden plot after it has developed 1 – 2 true leaves. To allow the plants to adapt to the new environment, you may want to slowly expose the young plants to the sun by placing the pots outside for a short period of time daily.

When it is time to transplant the peppers, first check and see if the temperature has already reached 60 degrees with no danger of frost. The transplanting day should be a cloudy day with some sun. You are to plant the pepper plants at a distance of about 12 – 20 inches apart.

You can stake or cage the plant if there are lots of wind and you are afraid that they break the stem.

Bell pepper plants usually need a consistent addition of nitrogen on the soil until it successfully develop the fruits. For this reason, you may want to add nitrogen fertilizer into the soil. You will want to be careful not to add too much nitrogen as it can reduce the fruit and increase the leaves growth.

Watering

 You only need to water at least 1 inch of water every week. If the weather is hot, you can add mulch to help retain the moisture. Early blossoms can be pinched off to help direct the energy of the plant so that you get a heavy harvest afterwards. If you keep your bell pepper plant fed and water well, it will have lower chances of developing diseases.

Dealing with Bell Pepper Pests

Bell pepper plants get attacked by different types of pests including cut worms, corn earworms, caterpillars and weevils. To avoid pest infestation, you should avoid using water soluble fertilizer that contains a high level of nitrogen. Using this type of fertilizer can cause the plant to become soft and easier for the insect pests to penetrate.

Whenever you spot weeds, be sure to pull them out. Weeds are habitats to insect pests. You can apply pesticides to prevent the pests population from infesting your plant up to a damaging level. The pesticides should be applied thoroughly including underneath the leaves. If there is too much damage, you will have to discard away the pest infested plant.

Harvest and Storage

A well grown bell pepper plant will produce 5 – 10 large fruits. Bell pepper can be harvested when it is green or purple color. If you want sweeter flavor, you can wait until it ripens to red or yellow or orange. The sweetness and vitamin C will increase as the color changes. Picking the fruits when they are green will encourage more new blossoms and fruits to develop. If the fruit set after late August, it usually will not ripen.

When harvesting the peppers, remember to use hand pruners or small knife to avoid damaging the plant. This is because it can still continue to yield more fruits for you in the next few years. You can keep the fruits in a humid place with a temperature range in between 68 – 77 Fahrenheit degrees in the event that they are picked early because of the cold season. They will change color but they will not grow sweeter. Refrigerating bell peppers can help to retain the firmness and flavor for 3 – 5 weeks.


Check out our great range of chili seeds and products!!

How to Grow Chilies Indoors with LED Grow Lights

Grow Chilies Indoors

Many people like to have some organic chilies to add to their cooking.Grow Chilies Indoors

However, lets face it, you can’t keep spending money on organic chilies as they are expensive.

Growing chilies yourself means you will be able to save a lot of money. The problem is that there is the lack of sunlight in North America and parts of Europe and chillies require a lot of sunlight to grow healthily.

The good news is that you can overcome the problem and grow chilies indoors under LED grow lights.


Temperature

Chili needs a hot temperature around 80F – 90F plus in day time and  at least 70F at night. It has to get at least 6 hours of sun to grow healthily.

The 6 hours of sunlight is equal to 16 hours of LED lights. So, if you have limited space, LED grow light is the best option. You can put it near to the plant without burning the leaves. It is cooler because it releases lesser infrared radiation and uses lesser watts.

LED grow light is a long lasting investment as it can last for up to 50,000 hours which is equivalent to 10 years of use. It offers longer lifespan compared to HID lights which can last in between 10,000 – 18,000 hours.

With LED grow lights, you can expect to save up to 50%-60% of energy. Best of all, it is safe to use and environmentally friendly. It does not contain any mercury, lead or gas.

It doesn’t have any fragile glass bulb and will not shatter like glass.


Varieties

The most common chili varieties that are grown indoor are chiltepins, habaneros and other small varieties.

Small chili varieties have long growing season. This means they take longer time to flower and bear crops. The plant will grow up to a height of 6 – 12 inches. In harvest time, you can easily notice the chili crops from among the leaves.

Chili plant can also make a nice decorative ornament for the house apart from tasting spicy in the mouth.


How Many LED Lights to Install

The amount of LED lights you use depends on your chili grow space. Ideally, you should install 32 watts LED lights for per square foot.

So, if you have 6 square foot of grow space, you should install around 200 watts of LED lights. You can buy a LED light block designated for a specific amount of grow space for convenience.

Because chili comes from places with long hours of sunlight, you will need to let the grow light turn on for many hours at least 12 – 16 hours per day. You can get programmable LED grow lights to help you achieve this.

Programmable lights allows you to schedule the light to turn on and off at a specific time. If it doesn’t have any schedule control, you will have to remember to manually turn on the light every day to ensure you reap a heavy harvest of chili crop.


What Colors of LED Lights to Choose

LED lighting is usually installed in small blocks in the indoor growing spaces.

They come in a variety of colors including red, blue, white, green, indigo, and yellow. Red and blue LED lights are the most important lights. Red light which imitate the heat of the sun enhances stem growth, flowering and fruit.

Blue light is necessary for artificial photosynthesis, and development of strong roots. Green light is not that important and you can exclude it in your LED lighting installment if you want.

You have the option of buying a full cycle LED light or only install a specific color of LED light for enhancing the development of certain aspects.

Many chili growers recommend the use of LSR 865 with a light color of 6500 Kelvin.


How to Set Up an Indoor Growing Area

Firstly, you will need to look for a vacant space where you can use as a growing area. It can be a shelf that you are not using, or the basement or garage.

First, you germinate the seeds in a pot on the window sill. When the seeds sprouts, you can move them to the grow light area. As the chili plan grow bigger, you will have to transplant them to bigger pots. Usually, you only need a pot that is 10 – 12 inches in size for transplantation.

Bigger varieties may need pots that are 16 – 18 inches in size.

You will have to keep watering the chilies plants. Lesser watering is needed as the plants grow bigger.

It takes about 60 – 150 days for the peppers to mature before they start to produce crops. On the seed packet, you can find information on how long the chili plant take to mature.

This refer to the time it takes the plant to mature after it has been transplanted to a pot. It takes about 8 – 10 weeks for a seedling to grow into a plant that is suitable for transplanting.

You can harvest the chili green, orange or red as you like.

There you have it, now get out there and grow chilies indoors.

Troubleshooting: Pepper Plant Problems & How To Fix Them

Pepper Plant Problems

Pepper plant problems are common and they can really scupper your growing efforts.Pepper Plant Problems

Once you get your pepper plants in the ground or a pot, as long as they have sun and water they usually do OK. However, as with all plants, sometimes there are issues.

The good news is, that there are actually as many common fixes as there are common pepper plant problems.

There are lots of ways that you can rescue your pepper plant from completely going over the rainbow bridge.

To help you fix a multitude of pepper plant problems, here’s a lowdown of the most common issues and how to fix them:


Underwatering

Underwatering is usually noticeable by the chilli plant having very droopy leaves that may appear lacklustre. Chronic dehydration in chilli plants can lead to reduced crop quality and yield.

It happens mostly when the days are long and hot, which can be surprising because chilli plants love direct sun. Every plant has its limits though, and sometimes more watering is needed for the plant to keep itself cool and properly hydrate itself.

The best way to avoid common pepper plant problems like underwatering is to never let your chilli plants dry out until the soil is so dry, there is a gap between the substrate and the pot.

You should also water at sunrise, or early morning and dusk which avoids the water getting evaporated before the plant has had a chance to absorb it.

If the plant is showing very droopy leaves midday, water it right near the plant stem and that should help it recover.

If dehydration continues to be a problem you need to create shade for the plant, water it with more water, or water it more often overall.


Overwatering

Overwatering chilli plants presents by it having yellow, floppy leaves. This is usually too much water being given to the plant, and not enough ability for the water to drain away.

To prevent pepper plant problems like this happening when the plant is exposed to lots of natural watering from the rain, provide more aerated soil and better drainage overall.

You should also do this so that there is no salt and water build up from your watering.

It is also important to allow the soil to properly dry out and then continue with a watering regime that allows the soil to be dry for the first few inches before watering each time.


Slugs and Snails

Slugs and snails love a juicy pepper plant and they will get through succulent little pepper shoots at speed if they are not controlled.

When controlling these little critters it is important not to use slug pellets or similar toxic products because they are very bad for the environment.

A slug can eat one, pass away and then get eaten by a garden bird which is eaten by a bird of prey which will die from exposure to the product.

The same chain of issues occurs in all kinds of different ways, as well as family pets getting poisoned by these nasty garden products.

Instead, avoid pepper plant problems like slugs by using more organic methods of slug control such as:

  • Barriers
  • Beer traps
  • Shell pot topper (crush any shells to make a sharp soil topper)
  • Cinnamon
  • Increase garden biodiversity for natural predators


Hornworm

Hornworm caterpillars will present themselves in pepper plants by munching holes in the leaves often from the outside in. These caterpillars can simply be moved off to a more suitable plant that they feed on.


Scalding From The Sun

Scalding from the sun shows up in chilli plants by giving them white leaves that are also a bit droopy. This happens most often when you put a new pepper plant that has been growing in the shade, into a sunny spot.

This can be lethal for the plant if it is very young which is why it is important to prevent this happening. It also happens to pepper plants that have been protected over winter.

To prevent pepper plant problems like scalding happening it is important to gradually introduce the pepper to the new conditions it will be living in, which should stop this scalding occurring.

Simply putting the pots in the sunshine for more and more time everyday until transplanting should help the transition run smoothly.


Calcium Deficiency

The pepper plant will get leaves that are very wrinkly and lacklustre if it gets a calcium deficiency. You can easily rectify this by slowly adding more calcium to the soil.

Clam, oyster or egg shells are cheap and easy ways to do this. You can also work lime, wood ash, calcium nitrate or bone meal into the soil, depending on what you have.

If it is provided in the right amounts then the plant should look better in about a week or so.


Aphids

You can easily see aphids as they are quite large and obvious walking around the underside of the leaves of the chilli plant. They slowly kill the plant by sucking fluid out of it which is why the leaves start to curl or die off with a big infestation.

This is unlikely to be one of the common pepper plant problems you see with pepper plants outside because ladybirds and other bugs will take care of the issue for you.

Indoors though, in the house or a greenhouse, there are no natural predators so if you don’t spot the issue the plants will eventually die.

Even worse, the aphids can also give other plants diseases such as mosaic virus, which is very bad news.

To prevent common pepper plant problems such as plants getting aphid infestations, you need to make them as healthy as possible as a first port of call. Try to make sure the plants you put indoors over winter are properly pruned, are not stressed and properly watered.

A little insecticide wouldn’t go amiss a few days before moving them indoors too. If you do get an infestation, quarantine affected plants and then spray the aphids off before adding more insecticide.

You can try some of the homemade insecticides here and here but do research the use of different products on pepper plants so you feel comfortable with how they work, and any precautions that need to be taken.


Mosaic Virus

Mosaic virus was discovered in the 1800’s and can infect over 350 plant species. It presents in pepper plants by giving them yellow splodges and wrinkly leaves that are not quite crispy, but not soft like a leaf usually is.

This disease stunts the growth of the plants and affects the fruit they produce. If your plant has mosaic virus you need to get rid of it and any surrounding weeds or plants, ensuring that those plants are not composted.

You will also need to dispose of the soil as the virus can live in the soil for over a year. Once that is done, disinfect your pots and tools before using them for other plants, as shown in this video.

Lastly, the virus can be transmitted through your hands and clothes too. Whilst dealing with mosaic virus plants you need to avoid touching any other plants. You should also wash your clothes before wearing them again for gardening.


You’re Ready To Battle All Of The Pepper Plant Problems

The fact is that every plant has its problems and pepper plants are no different.

Most pepper plant problems do have multiple solutions though and if they don’t, there’s a lesson learnt to boost future pepper growing plans. A mistake made I the garden is never a wasted experience.

Hopefully, with more practice, trials and tribulations you will be able to grow healthy, strong pepper plants next season for lots of yummy, sumptuous fruits to use in your family kitchen day after day.

Pickling Chilli: What, Why & How

pickling chilli

If you’re topping up your storage cupboard, or you simply fancy a fun and wholesome afternoon kitchen activity, you’ve come to the right place.pickling chilli

We’ve got all you need to know about pickling chilli like a pro for perfectly preserved spicy treats made to last.

In this article we will look at what pickled chillies are, why you should pickle them and how to get the job done.

By the end, you’ll be ready to get your spicy glut pickled up and ready for using in all kinds of yummy recipes.

Here’s everything you need to know about pickling chilli:


What?

You may have heard about pickled items like gherkins and cucumbers, which account for nearly 60 thousand metric tons of vegetable production coming out of Canada alone.

What you may not have heard of is pickled chillies, which are not as common, but they are just as tasty!

A pickled chilli can be any chilli that is put into a sterilised container with vinegar (different types are used) and then sometimes spices and seasonings are added.

They can be pickled roughly chopped, sliced or whole depending on your preference and the size of the chilli/ receptacle.


Why?

Why try pickling chilli when you can buy pickled chilli?

Firstly, you can save money. If you like to have a larder full of tasty preserves and pickled foods, pickling chilli makes sense.

Globally, the sales of naturally healthy food and drink is worth nearly $260 billion USD, but you can save those dollars for yourself! At least with pickling chilli, which you can do yourself easily.

Secondly, it makes the most of your chilli harvests. We have been pickling our veg pals for 4,000 years to avoid food wastage and to build stocks between harvests. If you grow your own chillies or you get a few at a great price, pickling them stretches out the time that you have to enjoy those hot, spicy, tasty treats.

Another great reason to pickle chillies is for the health benefits. Pickled vegetables lose some nutrition when they are preserved, but they gain really helpful bacteria that boost gut health.

Chillies themselves are also healthful, and although they lose some nutrition when they are pickled, they don’t lose all of it. They contain vitamin C, B6, K1, potassium, copper and vitamin A as well as bioactive plant compounds and antioxidants.

All the benefits above give you an extra bonus of creating great preserves for yourself and to give as gifts to friends and family.

Pickled chilli look great, have a great shelf life and they give your loved one tons of healthy benefits too.


How?

Pickling chillies is really easy and best done if you have a glut of homegrown chillies, or you’ve been lucky enough to have been given a big batch.

To prepare pickle chillies, you should give them a good wash, and you can then either leave them whole or slice them.

Unless you tend to serve them up whole, usually it’s best to slice them and pickle them so they’re ready for use right out of the jar. They can be used in all kinds of yummy dishes like pasta arrabiata, chilli, guacamole and pizza.


Instructions –


Sterilising

We’ll give you instructions for the yummy pickling mixture below. First, here’s how to ensure that you keep the results nice and sterile. This process is essential to stop bacteria being introduced to the pickled chillies, which will then lead them to degrade and deteriorate.

By sterilising them you protect the items inside until you’re ready to open the jar and get stuck in to your tasty spicy treats.

To sterilise you need to:

  • Wash the jars in hot soapy water, rinse them and then leave them to dry naturally on a clean surface
  • Put the jars in the oven at about 175 degrees c for 15 minutes
  • Place your hot pickling mixture into a receptacle that is very easy to pour without spillage, like a spouted kitchen jug
  • Fill the jars leaving around ¼ an inch at the top taking care not to get any mixture on the rim
  • Do not allow the mixture to cool, and instead put the lids onto the jars (with a wax paper seal if preferred) when the mixture is still hot and seal tightly. You can also use a wax paper and cellophane seal secured with an elastic band
  • The mixtures will keep for about 6 months on average if kept in a dark and cool larder if jarred in this way. They should also last about four months in a fridge (once jarred and cooled) unopened


Pickling

To make the pickled chillies please follow these instructions:


Ingredients –

*Adjust according to the amount of chillies/ weight of chillies you are using*

  • One pound of chillies
  • ½ cup of vinegar (usually white or cider vinegar works best)
  • ⅓ cup white sugar
  • 2 tsp high quality salt
  • 1 tbsp mustard seeds
  • 1 tbsp coriander seeds
  • ½ cup of water


Instructions

  • Place the prepared chillies into jars along with a couple of bay leaves
  • In a saucepan mix together vinegar, mustard seeds, coriander seeds, salt and sugar and bring to a boil (open the windows as the mixture can smell really strong!)
  • Follow the instructions above to add the mixture to the jars


Which Peppers Are The Best To Use When Pickling Chilli?

When you are pickling chilli you can choose any chilli pepper you like, there are no restrictions on the veggies that you store.

Jalapeños lend themselves to the process as they are naturally juicy but not too hot, so they go with everything.

If you want to make more of an impact with a jarred gift, pickle some Carolina reapers or ghost peppers for a super hot addition to any meal. Just be sure to warn the recipient of the absolute fire contained in the jar!


You’re Ready To Pickle Chillies!

With all the tips above you are ready to start pickling chilli. Yummy meals and recipes are in your future with this brand new preserving skill!


Scorching Hot: Everything You Ever Wanted To Know About The Worlds Hottest Pepper

Worlds Hottest Pepper

Have you ever wondered about the worlds hottest pepper?Worlds Hottest Pepper

Which pepper is it?

How do they measure its heat?

Is it safe to eat?

In this article we have answered all your questions about the world’s hottest pepper.

We’ve also squeezed in tonnes more interesting and useful information on the topic, so you feel totally clued up on this spicy fruit by the end.

Let’s take a closer look at the world’s hottest pepper:


How Is The Worlds Hottest Pepper Measured?

The world’s hottest pepper is measured in the same way as other peppers, which is with the Scoville Scale, which is often written as SHU which stands for Scoville Heat Units.

The higher the number, the hotter the pepper.

This scale was created by a person called Wilbur L Scoville who created something called a Scoville Organoleptic Test in 1912 whilst working for pharmaceutical company Parke-Davis.

This test was used to measure the amount of capsaicin in any peppers that were tested. Capsaicin is a chemical naturally present in peppers with the highest amounts usually found in the seeds and capsaicin glands (pepper innards).

It is capsaicin that gives you the spicy heat on your tongue when you eat a pepper, and that same heat can also be felt on your skin and other parts of your body.

You might already know this if you have ever accidentally touched your eye after touching a hot pepper!

In this instance Mr Scoville was not testing the heat in peppers for the reasons of cooking, but rather for the use of the peppers in a topical ointment that naturally produces heat when applied.

To find out the amount of capsaicin in any pepper he would dilute an alcohol based liquid mixed with the pepper and sugar until the heat was negligible to those testing the mixture.

This method was then equated to Scoville Heat Units EG: a 1500 SHU pepper would mean a person would need to be diluted with 1500 cups of water to not detect any heat in that water any more.

These days, humans don’t need to go through the same tasting method used by Wilbur in order for a chili to have its heat deciphered.

Instead, something called high-performance liquid chromatography (HPLC) is used, which measures the capsaicin levels inside a pepper, but the numbers created are then converted back into Scoville units.

Interestingly, whilst you might expect that the original Scoville test was widely subjective (depending on a person’s tastebuds) but not the HPLC because it is the most up to date measuring tool.

In fact, the HPLC has been questioned in regards to its ability to accurately measure pepper heat.

Some people feel that the way the test is done, and then converted to Scoville units places the heat of the pepper lower than it would be if it was put through the original Scoville testing method.


What Is The Worlds Hottest Pepper?

At the moment the Carolina Reaper, a cross between a bhut jolokia pepper and a red habanero, is the world’s hottest pepper, officially.

It is tested to have 2,200,000 SHU at its maximum – 200 times hotter than a jalapeño pepper. It was officially the hottest in 2013, but lost its crown until being tested in 2018 where it was found to be even hotter.

Originally named HP22B (Higher Power, Pot 22, Plant B), the Carolina Reaper is bred for its heat and was originally made by Ed Currie.

The fruit must be handled with gloves and although the main source of heat is the capsaicin glands in this pepper, you should use gloves when handling any part of the fruit.

The same can be said for any products with Carolina Reaper powder on, like the Paqui Chips original One Chip Challenge chip that featured all over Youtube a few years ago.

Trust me, this is not the kind of chili pepper you ever want to get into your eye.


Are There Hotter Peppers Than The Official Hottest Pepper?

There is a rumour that something called Pepper X, also created by Ed Currie (Carolina Reaper breeder) could be hotter than the Carolina Reaper and therefore could be the world’s hottest pepper.

Currie has suggested that the pepper could be double the heat of a Carolina Reaper, but it has not yet been tested and confirmed by the Guinness World Records team as of 2021.

You can read more about Pepper X here.

Another chili rumoured to be hotter than the Carolina Reaper (but not as hot as Pepper X which is 3.18 million SHU) is Dragons Breath.

Dragon’s Breath chili pepper was tested to be 2.48 million Scoville Units but like Pepper X, remains unconfirmed by the Guinness World Records team.


Is It Safe To Eat The Worlds Hottest Pepper?

There are all kinds of unconfirmed rumours about people eating the world’s hottest pepper – the Carolina Reaper – and getting severe, permanent physical damage from their experience.

Some rumours even suggest that people have passed away after eating it.

None of those rumours have been confirmed, but all add to the hype of the world’s hottest pepper.

If you’re thinking of trying it yourself it is important to be aware of the risks. There has been a confirmed case of a person getting severe headaches for a short time after eating a Carolina Reaper.

At the very least you should be aware that eating this pepper is guaranteed to put your body through stress.

At the very least this means stomach pain, pain in your mouth and throat, sweating and watering eyes (plus a very difficult toilet time the next day).

At the most, it isn’t out of the question for you to suffer heart issues because of the capsaicin content, as detailed by this scientific paper.

Growers have suggested that the pepper is safe to eat (in a limited quantity) but realistically, even if you are in fantastic health you should be aware of the risks of eating the worlds hottest pepper.


The Paqui One Chip Challenge 2021

The original Paqui One Chip challenge featured Carolina Reaper pepper powder on one chip which you eat as a challenge.

It was featured on British TV and on pretty much every influencers channel. It was so popular, in fact, you couldn’t buy one of the chips for a long time because they were sold out and everybody wanted to try it.

The 2021 Paqui One Chip Challenge is even more extreme because it features a chip with the Carolina Reaper powder AND Scorpion pepper powder, the world’s second hottest chili at 1.2 million SHU’s.

It’s even more dangerous than eating the Carolina Reaper alone so proceed with caution.


Will You Try The Carolina Reaper?

Whether you try the Carolina Reaper or not, the fact is that the world’s hottest pepper has made a real impact on popular culture.

If you try it yourself, the chances are it will make a real impact on your tastebuds too!

If you do choose to give the hottest pepper in the world a try, please do consider the risks – this little fruit is not something to be messed with!


Soil For Chilli Plants

soil for chilli plants

Although chillies can be grown in many varieties of soil and we have compiled some of the best soil for chilli plants to get your chilli plants grounded and fruiting consistently. soil for chilli plants

Growing Chillies in a pot lets you build and maintain the optimal soil conditions. When is the last time you have seen chillies grown in swamps…NEVER!!

Chillies plants are quite fragile and need good draining soil. The top layer of the soil should be a light but moisture holding mulch. Topping up the mulch every 4 weeks or so will keep the nutrition running through the chillies roots.

To Grow Chilli choose a soil or mulch that is higher in potassium. Chilli plants fruit better when potassium is slowly feeding through the roots and plant. Try to avoid nitrogen as the plants will grow soft leaves and minimal fruit will be produced.

If you really want to make your chillies thrive and fruit well as soon as the plants start growing little flowers place some premium organic soil or fertiliser on top of the pot. If you’re on a budget any multipurpose compost is will help out.


soil for chilli plants

Remember that Growing Chillies requires regular watering, once a day they must be watered to keep the soil moist and the roots nourished. And don’t forget Growing Chillies in sunlight will keep them at optimal health.

Grow Chilli – Peter Peppers

growing-chillies-peter-peppers

You have to see this to believe it. Peter Peppers are a conversational piece to say the least!!!!
The peter pepper chilli pods look like “a man’s private parts”. Hence why they are known as the Penis Pepper and Chili Willy.


This chilli is quite rare and comes from the southern states of Louisiana and Texas.

Peter Peppers are listed as a medium heat on the scoville scale ranking. Peter peppers are 5,000 to 30,000 Scoville Units which is hotter than Tabasco and even more hotter than the Jalapeno.

[ad]

Characteristics of the Peter Pepper Plant
Plant height up to 3 feet
Stem color Green
Leaf color Green
Fruit color at maturity green and red
Fruit shape conical
Fruit length 2-4inches
Fruit width at shoulder 1inch
Fruit surface shaped

Peter peppers seeds can be purchased and grown within 6-7 months. Germination tips, soil tips and all other growing chillies from seed guides are available from growing chillies. As with all chillies they need regular watering and plenty of sun for optimal results.

Willy Peppers Chili Pepper

Peter Peppers are a defiant must for the chilli growing enthusiast. They would make great presents for a fellow gardening enthusiast also. Purchase some peter pepper seeds today and let us know how your plant went.

Check out our great range of chili seeds!!


Worlds Hottest Pepper – Naga Jolokia or Bhut Jolokia

Worlds Hottest Pepper

The worlds hottest pepper is officially the Naga Jolokia also known as Bhut Jolokia. When translated in Hindi this means Ghost Chili which is also another common name.

Worlds Hottest Pepper

The chili hails from Bangladesh but is also found in Sri Lanka and India. The Guinness Book of Records officially named it the worlds hottest Pepper (or chili) in 2007.

To give you a idea on how hot it is, Jalapenos are about 6000 Scoville Scale units, while Tabasco measures in at about 195000 scoville scale units. The Naga Jolokia is a burning 1 million scoville scale units.

This is about 400 times stronger then Tabasco. When eating this chili it BURNS!! then it gets worse. Effects can last up to 30min. Milk can help sooth the burning but will not eliminate it.

Characteristics of the Naga Jolokia or Bhut Jolokia Chili plant

Plant height 45–120 cm
Stem color Green
Leaf color Green
Leaf size 10-14.5cm by 5.5-7.5cm
Leaf width 5.4–7.5 cm
Fruit color at maturity Red
Fruit shape Sub-conical to conical
Fruit length 5–9 cm
Fruit width at shoulder 2.5–3 cm
Fruit weight 6–9 grams
Fruit surface Rough, uneven
Seed color Light tan
Seeds per chili 19–35

This chili is so hot, that in 2009, scientists at India’s Defense Research and Development Organisation (DRDO) announced plans to use the chillies in hand grenades, as a non lethal way to flush out terrorists from their hideouts and to control rioters. It will also be developed into pepper spray as a self defense product.

We would love to hear from you if you have tried this chili or grown it. We hope to obtain some Naga Jolokia/Bhut Jolokia Seeds shortly.

Check out our great range of chili seeds!!