Expert Guide to Growing Chillies

Growing Chillies

Growing chillies is a very rewarding process, but often it’s the simplest things that get in the way of a great chili harvest, follow the advice below, andGrowing Chillies with a little care and attention you could be enjoying juicy, great tasting chillies in no time.


Germinating your chili seeds

Many of us struggle with germinating chili seeds and getting them out of the ground!

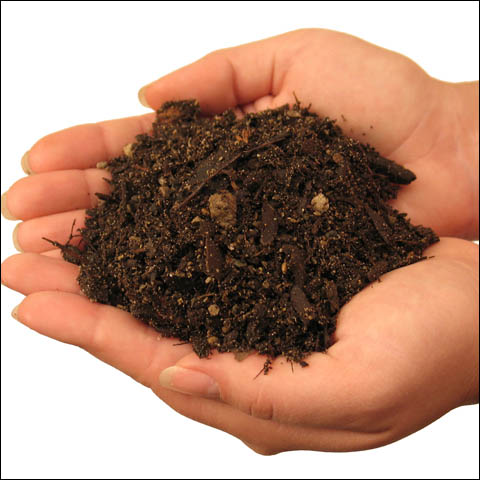
First of all, make sure that you select a good compost or seed mix, and gently work out any hard lumps from the soil.

Then place your chili seeds on top of the soil, planting them roughly 1-2 inches apart if planting multiple chili seeds. Then loosely sprinkle some soil over the seeds, but do not compact.

There are 2 main points that you will need to keep in mind to maximise your chances of germination.

The first one is moisture – you can soak your pot(s) from the bottom using a tray filled with water the first time you water them to saturate the soil and activate your chili seeds.

For maintaining the moisture in the soil it is best to use a fine mist plant sprayer to water from the top. Aim to keep the soil moist but not soggy as this may cause your seeds to rot before them come up – just use your finger to test the surface of the soil.

Watering your seed trays or pots with a plant sprayer causes less disturbance to your germinating seeds.

The second important point to note is temperature. Chili seeds require a constant temperature range of between 27-32 degrees C (80-90 degrees F).

This is easily achieved using a heated propagator, however an airing cupboard works extremely well for this purpose also.

Remember to keep checking your pots to see if any seedlings have emerged, as you will then need to move them to a well lit area such as a sunny window sill, otherwise you will end up with thin and wispy plants.


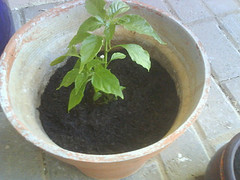
Re-potting your chili plants into larger pots

When your seedlings get 3 sets of leaves and are strong enough to handle, now is the time to pot them on into a bigger pot. Chillies need to be potted on as they grow, otherwise their growth will slow and you may well miss the fruiting season because of this.

Be careful not to damage the delicate roots when moving your seedlings and make sure you take as much soil as you can from the original pot to protect the root ball.

When potting on your chili plant seedlings, it is better to increase the pot size gradually to allow the plant to adapt to the increased space and grow strong roots.

A good way to tell if your chili plant needs replanting into a larger pot is by checking the drainage holes on the bottom of your pot – if you can see any root tips emerging from these holes, then now is a good time to transplant to a bigger pot.

In addition, if your chili plant suddenly droops for no reason and it has enough water, then this could also be a sign that it requires more space.

You can also plant your chili plant outdoors once the danger of last frost has gone, although chili plants usually grow quicker in warmer areas such as a sunny window sill or greenhouse.


When to water your chili plants and how much

Often overlooked is the importance of watering. One of the most common situations is over-watering. Chili plants like their soil to dry out before watering them again – they don’t like wet feet!

You can tell if your chili plant needs water by its leaves – if they are drooping, give it a drink. The best way is to use your finger to test the top of the soil.

Again, moist but not soggy is the goal here and if your plant looks well, then it probably is.

What to do when your chili plant flowers

Once your chili plant starts to produce flowers, you are doing well! Soon you will be enjoying the fruits of your labour, but now is a good time to highlight the importance of plant nutrition.

A lot is going when your chili plant is in the flowering and fruiting stage and you will need to make sure that your plant has the correct nutrients it requires in order to produce big juicy chillies.

You can feed your chili plant with a general tomato fertiliser as chili and tomato plants are very similar, however it is much better to feed your chili plants with a special chili fertiliser, as they do have specific nutritional requirements – Chili Focus fertiliser produces very tasty and juicy chillies and is organic based.

Remember to feed your chili plant twice a week when it is fruiting and once a week at all other times to make sure it has all the nutrients it needs throughout the different stages of growth. This also makes your plants strong when it comes to “overwinter” them for next season.


Pollinating the flowers on your chili plant

Unless your plants are outside where they are naturally pollinated by insects and the wind, then you will need to pollinate the flowers yourself as they open on your plant.

You can do this with a small soft brush by gently dusting each flower. You will then notice over the next week or so that the flowers start to fall off and the fruits will begin to grow.

Chili plants can also easily cross-pollinate with one another by insects or by air if the plants are close to each other, so if you are growing several different varieties, you may want to keep them apart as you will probably end up with some hybrids chillies.

Finally, make sure your plant gets lots of sunlight during this period and you will have some great tasting chillies at the end of the season!


Overwintering your chili plants for next season’s crop

A common misconception is that chillies are annuals, but they can and will come back year after year, producing more and more chillies each season.

Overwintering, as it is called, is the process of making sure your plant is ready to “sleep” for the winter. Feeding your plant well throughout the year can help make it’s roots and stem strong enough for the cold months ahead.

With a little care, a properly over-wintered chili plant can bring a larger harvest, which will also arrive a little earlier in the season compared to growing from seed again.

This is because when your plant “wakes up” in the spring, it already has an established root ball, so has a head start in the growing cycle.

The first thing to do when overwintering your chili plants is to pick all of the chillies from the plant when the growing season is over – this tells the plant to produce more in future.

Next you can prune back the plant to approximately 1/3 of its original height. This may sound harsh, but it allows the plant to conserve its energy for the next growing season by not having to maintain all that extra foliage, a bit like when you prune back a rose.

You will also need to keep your plants somewhere with a warm average temperature, where it doesn’t get too chilly in the night.

Remember that you plant will also require a lot less water while it is dormant – once every 2 weeks is enough. Again, you can use your finger to test this.

Your plant will slow its growth as it goes into hibernation, so don’t worry if you don’t see any new shoots for a while.

Come spring time, give it a few weeks and your plant will start to shoot and burst into life, read for the new years growing season with more chillies than you ever imagined!

So, what are you waiting for, plant your chili seeds now and soon you could be enjoying plentiful fresh chillies that you can cook and entertain with.

Where to Buy Chili Willy Peppers

Chili Willy Peppers

Our site has had so much traffic from the Chili Willy Peppers, that we must do another post with some links to help you purchase some!Chili Willy Peppers

Laugh away, it’s totally ok.

It’s not hard to understand why, this unique chili is rude, crude and outright fantastic.

Also known as Peters Peppers or Penis Peppers, the Chili Willy Peppers have that very distinct shape.

Chili Willy Peter Pepper Appearance

When you see it, you can’t ignore its shape. The chilly willy or peter pepper is accurately named. When fully grown and ripened, the chili pod has a long conical shape and a bulbous end that shares an uncanny resemblance to… well we all know!

It doesn’t only look good but also taste spicy (excuse the pun…)

Attending a dinner or BBQ with this chili is a good conversation starter between your family and friends. The chilli pods go from green to red over time.

Chili Willy Penis Pepper Taste and Heat

Medium-hot to pretty darn fiery (reportedly in the 10,000 to 23,000 scoville scale Units range) and are good tasting (great for spicing up salsa as well as conversation).

Once you get past the laughs, there’s a pretty significant hot pepper here – hotter than a jalapeño.

Where to Buy Chili Willy Peppers & Availability

You might be able to find them at farmer’s markets if you are lucky, but if you really want chili willy peter peppers, you’re going to need to invest time into growing them.

Peter pepper seeds are widely available online, and that’s how this chili has survived and grown its cult following over the years.

This is the trickiest part. These chilies are, in fact, pretty rare to find. Many people grow peter peppers, but, for obvious reasons, they aren’t typically carried in big-box supermarkets. These chilies are too likely to cause an uproar.

Seeds are hard to obtain around the world and are limited. but we have them here!

This is one naughty pepper, that’s for sure. In fact, it gives the popular term “food porn” a whole new meaning.

If you want your own peck of peter peppers, you’ll need to be on the look-out (or get ready to grow them). But, when you do find them, enjoy the laugh along with the good taste.

Anatomy of a Chili Pepper

Growing Chillies

Chili is derived from the term chil given by the Arawak Indians who were the ones that first cultivated it. When Columbus first discovered the chili, he brought it back to Spain where they add the ‘e’ to it. Chili is the oldest spice in the world with archaeological specimens being found that dated to as far back to 7,000 B.C. in New Mexico.

Chili Pepper

Today, there are many variety of chili peppers including color, degree of spiciness, and shapes. Chili not only add spiciness to the food but it is also rich in antioxidant and rich in vitamin A and C. The anatomy of a chili pepper is comprises of many parts including peduncle, calyx, capsaicin glands, placenta, exocarp, mesocarp, endocarp, seed and apex.

Peduncle is the short branch on top of the pepper that remains when you harvest it from the plant.

Calyx is the green crown on top of the fruit where the penduncle is attach to. It is the remnant of the flower that has already transformed into the fruit. Preserving the calyx can keep the fruit fresher for a longer time.

Capsaicin glands is the central seed stem inside of the pepper that is joined to the placenta near the top. It is located in between the placenta and endocarp. Many people wrongly presumed that the seeds are responsible for producing the capsaicin glands.

Placenta is the round part on top where the seeds are attached to.

Exocarp is the outermost layer of the pepper which comprises the skin.

Mesocarp is the fleshy part under the skin of the pepper which is also called exocarp.

Endocarp is the inner membrane layer that surrounds the seeds.

The seed inside the pepper has low level of moisture but a high level of lecithin. Chili pepper seeds are edible. However, most people will prefer to discard the seeds as they are hard to chew and do not add any spicy flavor to the cooking.

The seeds are hot but they are not the hottest part. The white pith or rib that hold the seeds and the part that connect to the shoulder are believed to be the hottest part. The white pith is about 100 times hotter that the pepper flesh.

Apex is the bottom tip of the pepper fruit. The apex and peduncle are two areas that have the least capsaicin so biting these areas first will be less hotter.

When preparing chili pepper, you may want to wear a pair of glove to prevent the capsaicin oil from coming in contact to your skin. The capsaicin oil in the pepper can burn your skin and cause blistering.

If your skin get burned, you can apply some white vinegar to sooth it. Skin burn can occur especially when you are preparing a pepper with high Scoville scale such as Habanero.

Chilli Plant Care: Caring for Sick Chili Plants

Chilli Pepper Plant Care

Pepper plants are usually a quite resistant, and they only require a minimal care.Chilli Pepper Plant Care

That is one of the reasons why many people love to have them in a garden.

However, they are not fully immune to different infections, and there are some types of plant diseases that can harm them. Peppers need to have appropriate conditions for growing. It is the first requirement for their successful development.

Like other plants, they cannot grow without water and Sun. Regardless of their health conditions, they have to be properly exposed to these elements. If they do not receive enough water or Sun, they would be weaker and therefore more susceptible to various illnesses.

Also, if chilies receive too much water on a daily basis, some disease may occur as an outcome.

For example, excessive watering can attract Aphids, which are a real nightmare for chili plants.

They are hard to spot at the beginning, and when you finally notice them, it is usually too late, and your garden is already partially or totally destroyed.

Also, poor pollination can be dangerous for peppers, and like misuse of water, it may cause different problems and attract various plant diseases.

Some of these are Thrips, Viruses, and Spider Mites. Chemical injury can harm chilies too. It often attracts various illnesses, such as Powdery Mildew, Cercospora Leaf Spot, and Viruses among others.

Temperature is also very important for pepper developing. Chilies may have a slow growth if it is too low. They may also fail to ripen because of the same reason. If you notice any of these symptoms, you would know what a potential cause is.

Eliminating the source will eventually cure your sick chilies. Always follow the basic rules to prevent any of these problems. Protect your pepper plants as good as you can. Use enough water and light. Adjust temperature. Expose your plants to sun rays.

Use good soil and enough pollination. Avoid chemical injuries at all cost.

It is all in your hands. If you create good conditions for your chilies, their illness will pass, and you will have no problems anymore.

Wilting Chili Plants

wilted chilli plant
If you notice wilting chili plants, you should pay attention as something is wrong!
Sometimes, chili plants wilt because they’re baking in the hot, hot sun. Another cause of wilting chili plants is the amount of water you are providing them, this can range from too little or too much moisture.wilted chili plants

Why do Chili Plants Wilt?

When we get thirsty, our bodies are letting us know that we need more water. It is a feeling we have. Part of the reason for this is that we have a skeleton structure that keeps us standing straight. Green leafy plants don’t have a similar structure, they use water pressure to keep them standing upright. You can think of the plant leaf as being similar to a garden hose.

With the water turned off, the hose is limp–its wilted. When we turn the water on, the water pressure inside the hose increases and the hose becomes stiff. The stiff hose no longer looks wilted. Plants work exactly the same way. In order for a plant to maintain its normal shape, it needs a certain amount of water pressure inside the leaves.

Water pressure is maintained in the leaves by the roots which are absorbing water from the soil and pumping it up into the leaves. Leaves naturally loose water, especially during photosynthesis. Water is constantly flowing from the roots to the leaves. If roots can’t get enough water, they can’t maintain the correct water pressure in the plant and the leaves drop or wilt.

If the plant is overwatered, fungal wilt is probably to blame. Spotted wilted pepper plants, leaves that are dotted with brown or black spots, yellow marking on the leaves or stem are sigs of fungal wilt.

Damaged Roots During Transplanting

When you move a plant, it will damage some of its precious roots. It is quite normal for such a plant to show wilting right after being moved.
It is quite common for people to water far too much after transplanting chilis in order to try and fix the problem. Too much water does not help the problem. One solution is to move chili plants in spring and fall when the temperatures are lower and plants are not requiring full energy. At these times of the year, water evaporation from leaves is less and you get less wilting.

If you do move a plant in summer, it will wilt much less if it is covered for a week or two so that it receives less sunlight.

How to fix wilting Chili Plants?

Take a careful look at the environment and the soil for clues.
If the weather is hot and the soil is dry, considering covering the chili plant or moving it to an alternate location. Water the soil twice daily ensuring that the soil is moistened and water doesn’t pool. If the soil is already moist watering can make things worse. Do not overwater and considering watering the plant less. Ensure the soil is well-draining.

Prevention is the best cure to avoid wilting chilis. Take precautions to ensure that the disease doesn’t spread or reappear if its fungal wilts from overwater these are soil-borne and can live in the soil for many years. it will take time before planting in the old location is safe again. Choose a new garden location and keep it free of fungus by increasing drainage and only watering when the top 2 inches of soil feel dry to the touch.

How to Grow and Care for Jalapenos

Jalapenos

Jalapeno is a type of hot pepper that comes from the same family of plants as cayenne and cherry. This popular pepper originally comes from a place called Xalapa, in the capital of Velacruz, in Mexico. It is often served stuffed with seafood, and cheese and also used as a spice for tacos in Mexican dishes. Jalapeno has a rating in between 2,500 – 8000 Scoville heat units, which is a medium range of chili intensity. Jalapeno looks like a hard plant to grow but you can actually grow it easily by providing adequate sunlight and water.

Planting and Germinating the Seeds

Firstly, you must decide how many jalapenos plants you want to grow. Then, you can prepare the containers for sowing the seeds accordingly. The container should have holes at the bottom so that the water can drain away when you water it. You can use seedling pots or soda bottle as the container. In each container, you can plant 2 – 3 seeds. The seeds are to be sowed at a depth of 1/4 inch. Not all seeds will sprout so you may want to sow extra seeds.

Jalapenos don’t like cold temperatures so you must wait for the temperature to warm up to 75 – 85 before sowing the seeds. It takes 2 – 3 weeks for jalapenos seeds to sprout. After 3 weeks, you can move each seedling that has sprouted to a 3 inch diameter pot. It is to be placed on a sunny spot indoor, for example, the window sill or under the grow lights.

The potting mix of the sprouted seedlings must be kept moist but not too wet so as to damage the roots. You only need to water the seedlings 1 – 2 times per week to maintain the moisture level. You will have to gradually move the seedlings to a few more bigger pots until it grow a young plant. This should take about 8 – 12 weeks. The final container size will be about 2 gallons. Terra cotta container is the best option for the final container. They offer better result compared to plastic containers.

Transplanting the Young Chili Plant Outside

The young chili plant cannot be moved outside immediately. Instead, you will need to slowly expose it to outdoor conditions to allow it to adapt to the new environment. When it is time to move the plant outside, be sure to plant it in a place that get at least 8 – 10 hours of direct sunlight. The transplanted plants should be about 14 – 16 inches apart to ensure that there is enough air circulation.

Caring for the Jalapeno Plant

The best potting soil for jalapenos is organic, rich in nutrition with good drainage quality. Fertilizer should be added about 1 month after you have transplanted the young plant outdoor. You will want to choose a fertilizer with a NPK of 10-10-10. The addition of fertilizer ensures that the chili plant will receive an adequate amount of nutrition after all the existing nutrients in the soil has been used up. New fertilizer can be added on the third watering. There is no need to add any fertilizer if you are using a high quality potting soil. Diluted fertilizer is easier for the plant to absorb compared to solid fertilizer.

Jalapenos are night shade plants just like tomatoes and potatoes so make sure you don’t plant them close to each other. This is because the pests from your tomato and potato plant can go to the jalapeno plant. Some of the common pests are cutworms, aphids, and flea beetles. You can spray neem oil keep it away from these pests. Additionally, you should hand pick the caterpillar, snails, and worms on your jalapeno plant.

Harvesting the Peppers

It takes at least 90 – 120 days for you to see the first crop of your pepper plant. When the pepper plant is mature, it will grow to 2 – 3 feet tall. You may see 30 – 40 pepper pods hanging from the plant. The pods will grow to 2 – 3 inches long before it is ready for harvesting. If it yield too much peppers, you can use a plant cage as support. You can harvest pods from a jalapeno plant for a few times. You can harvest the jalapenos green or red. Or, you can wait until the full time at the end of 120 days to pick the jalapenos when it is ripened to red color.

Picking the peppers early can force more new blossoms. Green jalapenos are not yet ripened so they have milder taste. When it is red, it will have a medium intensity heat flavor. Some people have also picked jalapenos with a mix of red and green color. They make a nice presentation for their dishes. To harvest, you simply pinch the pepper off the vine gently. You can store the pepper fresh in your refrigerator for up to 2 – 3 weeks.

How to Grow Chilies Indoors with LED Grow Lights

Grow Chilies Indoors

Many people like to have some organic chilies to add to their cooking.Grow Chilies Indoors

However, lets face it, you can’t keep spending money on organic chilies as they are expensive.

Growing chilies yourself means you will be able to save a lot of money. The problem is that there is the lack of sunlight in North America and parts of Europe and chillies require a lot of sunlight to grow healthily.

The good news is that you can overcome the problem and grow chilies indoors under LED grow lights.


Temperature

Chili needs a hot temperature around 80F – 90F plus in day time and  at least 70F at night. It has to get at least 6 hours of sun to grow healthily.

The 6 hours of sunlight is equal to 16 hours of LED lights. So, if you have limited space, LED grow light is the best option. You can put it near to the plant without burning the leaves. It is cooler because it releases lesser infrared radiation and uses lesser watts.

LED grow light is a long lasting investment as it can last for up to 50,000 hours which is equivalent to 10 years of use. It offers longer lifespan compared to HID lights which can last in between 10,000 – 18,000 hours.

With LED grow lights, you can expect to save up to 50%-60% of energy. Best of all, it is safe to use and environmentally friendly. It does not contain any mercury, lead or gas.

It doesn’t have any fragile glass bulb and will not shatter like glass.


Varieties

The most common chili varieties that are grown indoor are chiltepins, habaneros and other small varieties.

Small chili varieties have long growing season. This means they take longer time to flower and bear crops. The plant will grow up to a height of 6 – 12 inches. In harvest time, you can easily notice the chili crops from among the leaves.

Chili plant can also make a nice decorative ornament for the house apart from tasting spicy in the mouth.


How Many LED Lights to Install

The amount of LED lights you use depends on your chili grow space. Ideally, you should install 32 watts LED lights for per square foot.

So, if you have 6 square foot of grow space, you should install around 200 watts of LED lights. You can buy a LED light block designated for a specific amount of grow space for convenience.

Because chili comes from places with long hours of sunlight, you will need to let the grow light turn on for many hours at least 12 – 16 hours per day. You can get programmable LED grow lights to help you achieve this.

Programmable lights allows you to schedule the light to turn on and off at a specific time. If it doesn’t have any schedule control, you will have to remember to manually turn on the light every day to ensure you reap a heavy harvest of chili crop.


What Colors of LED Lights to Choose

LED lighting is usually installed in small blocks in the indoor growing spaces.

They come in a variety of colors including red, blue, white, green, indigo, and yellow. Red and blue LED lights are the most important lights. Red light which imitate the heat of the sun enhances stem growth, flowering and fruit.

Blue light is necessary for artificial photosynthesis, and development of strong roots. Green light is not that important and you can exclude it in your LED lighting installment if you want.

You have the option of buying a full cycle LED light or only install a specific color of LED light for enhancing the development of certain aspects.

Many chili growers recommend the use of LSR 865 with a light color of 6500 Kelvin.


How to Set Up an Indoor Growing Area

Firstly, you will need to look for a vacant space where you can use as a growing area. It can be a shelf that you are not using, or the basement or garage.

First, you germinate the seeds in a pot on the window sill. When the seeds sprouts, you can move them to the grow light area. As the chili plan grow bigger, you will have to transplant them to bigger pots. Usually, you only need a pot that is 10 – 12 inches in size for transplantation.

Bigger varieties may need pots that are 16 – 18 inches in size.

You will have to keep watering the chilies plants. Lesser watering is needed as the plants grow bigger.

It takes about 60 – 150 days for the peppers to mature before they start to produce crops. On the seed packet, you can find information on how long the chili plant take to mature.

This refer to the time it takes the plant to mature after it has been transplanted to a pot. It takes about 8 – 10 weeks for a seedling to grow into a plant that is suitable for transplanting.

You can harvest the chili green, orange or red as you like.

There you have it, now get out there and grow chilies indoors.

Growing Chillies In Pots: Everything You Need To Know When You’re Starting Out

Growing Chillies In Pots

Are you thinking about growing chillies in pots? Yay!
Growing Chillies In Pots

This is an exciting time. What’s not to love about the humble chilli?

Even better, you’re going to get all the satisfaction, mindfulness and self-sufficient gains of growing your own produce.

The only catch is the growing part, but don’t worry, we’ve totally got you covered with these best beginner tips for growing chillies in pots:


First Things First…Why Grow Your Own Chillies In Pots?

Growing any produce takes a little bit of work, so before we give you some great beginner tips for growing chillies, checkout some of the benefits of growing your own little chilli cuties yourself:

Chillies Pack A Healthy Punch

Studies show that chillis contain something called capsaicin, which is thought to decrease inflammation levels and reduce your risk of heart disease. It could even boost your chances of losing weight.

Chillies Work With All Kinds Of Food & Drink

As well as the health benefits of chillies, they also taste delicious, adding a spicy, warming flavour profile to chilli’s, stews, pasta dishes, soups and more.

We particularly love adding warming chilli to a creamy dark hot chocolate when it’s particularly cold. Once you have grown and dried some of your chillies, this spiced hot chocolate recipe is sure to put your tasty produce to good use come winter.

The Environment Benefits From Your Chilli Growing

When you grow your own chillies you actually help the planet. You skip pesticides, shipping and plastic use involved in getting store-bought produce consumer-ready.

Pot Grown Chillies Take Up No Space At All

When you grow chillies in pots and chilli soil you only use up a small amount of space, and can even grow them in your kitchen! So whether you live in a flat, a cottage, cabin or just a dorm room, you can grow your own spicy chilli produce with the space you have.

Gardening Is Great For You

Gardening is proven to be great for your physical and mental health in many different ways, which you can read about in this scientific paper. You don’t have to grow a full veggie garden to get these benefits either. By growing just one chilli plant in a pot you are nurturing both the plant, and your own health.


Beginner Tips For Growing Chillies In Pots

Now you’re super excited for growing chillies in pots, the below tips will help you get the best possible chance of growing healthy, bushy plants that make you plenty of delicious, spicy produce:

Start Early

By sowing your seeds nice and early from the end of winter and as late as the middle of spring, you can enjoy getting chillies sooner, and for longer.

Don’t Grow From Seed If You Lack Time & A Hot Spot

When you start growing chillies in pots, growing chilli from seed is a great idea if you have a nice, sunny, hot growing space that gets maximum sunlight in your home/ greenhouse or polytunnel. If you live in a very hot climate, you can also grow chillies outside.

If you do not have a bright, hot space for growing your chillies from seed, they could end up stunted or weak as seedlings. Rather than struggle with weak chilli plants, skip this part of the growing process and purchase some young, strong chilli plants from a local grower or garden centre in spring.

Give Your Plants All Of The Nutrition

One of the best ways to create strong, fantastic chilli plants when growing chillies in pots is to use the right chilli soil for growing. You’re looking for nice loose soil that supports the plant without compacting or clumping, especially after watering.

At the beginning of the growing process you actually want to use nutrient-poor soil because those nutrients can hinder the growing process. Once you have an active plant, you can then use a more nutrient-rich soil with the following components to support your plants:

  • 75% tomato soil
  • 10% vermiculite
  • 10% perlite
  • 5% sand or fine gravel

You can also purchase chilli soil yourself ready made if that is easier for you when you prepare for growing chillies in pots.

You can then fertilise your plants with a chilli plant fertiliser or diluted fish, seaweed or diluted Epsom salts (once they are established) throughout the growing process.

Always follow the instructions of the fertiliser manufacturer for the best results.

Top & FIM (Fudge I Missed) Your Chilli Plants

When your plants get to around 8 to 10  leaves in size it is time to get your pinch on. By pinching the tips of any new shoot tips that come through you encourage extra branches, which makes a bushy plant that produces lots of yummy chillies.

Experts recommend cutting across (the FIM method) and also cutting the top off the plants. You can checkout how to do both of these methods to your plants in this handy video.

Work With Your Local Climate

Some people grow chillies indoors, some people grow them indoors then move them outdoors, some people have polytunnels and some people can grow chillies outdoors from scratch.

The best way for you to start growing chillies in pots depends on your local climate, and perhaps the outdoor space you have.

Where your chillies will do best in their pots depends on your local climate and by speaking to local growers and gardening clubs, you can best tailor a growing plan for your chillies that works best.

Don’t Be Put Off By Pests & Disease

As a beginner grower it is so easy to feel defeated by all the diseases and pests that seem so desperate to destroy your plans for growing chillies in pots.

Although it can be really difficult to continually find a new pest or problem with your plants, the great news is that there are all kinds of methods, products and practices to combat the attacks.

As a general rule, checking your plants daily (ideally with a loupe or a magnifying glass) will help you catch any problems nice and early, before they overwhelm the plant.

“To nurture a garden is to feed not just the body, but the soul.” – Alfred Austin

Growing your own chilli plants has so many benefits, it has to be worth a try!

Using our tips above, you can get the very best out of your chilli plant growing endeavours, growing chillies in pots that are strong, healthy and delicious this year, and hopefully for many more growing seasons to come.


How To Grow Chillies From Seeds The Eco-Friendly Way

how to grow chillies from seeds

Do you want to know how to grow chillies from seeds whilst also keeping the planet in mind?
how to grow chillies from seeds

That’s great news! You’ve come to the right place, because we have all the tips on growing these spicy, yummy veggies whilst keeping things as green as possible:


Why Grow Chillies From Seeds?

When you learn how to grow chillies from seed you are creating your very own produce, which has a ton of benefits that go far beyond creating many a yummy dish with the fruits of your labour.

For you, learning how to grow chillies from seed is beneficial for your health in multiple ways.

As well as the physical demand of growing any plant giving you a healthy boost, the mental health benefits are quite far-reaching.

Gardening is thought to reduce stress, boost confidence, and it can even help people who are recovering from illness and accidents.

Let’s not also forget that chillies themselves are super-nutritious and contain many vitamins and minerals, including capsanthin, which some studies have suggested could be powerful enough to help fight cancer!

When it comes to the planet, learning how to grow chillies from seeds is actually pretty great before you even adjust how you grow them to be more eco-friendly.

There might be a third of our global population cutting down on meat to help the environment, but it is important to stay mindful that vegetables and fruits can be impactful too, when it comes to the planet.

For every chilli you buy at the store there is an environmental cost for the water, plastic, pesticide, land cultivation and human labour used to grow it, not to mention the air miles it took to get it to your local store.

By understanding how to grow chillies from seeds rather than buying chillies from the store, you reduce the environmental impact of your chilli consumption hugely.

Lastly, there are some practical benefits to getting to grips with how to grow chillies from seeds. Those who live in flats, small homes or apartments can grow chillies from seed in a small space.

As long as you have a bright, warm, sunny spot, you’re good to go. By starting to learn how to grow chillies from seed, you can also create many chilli plants cheaply, giving you a few to sell or give away in the local community.


How To Grow Chillies From Seeds

Once you have the basics of how to grow chillies from seed down, you can make the right adjustments to keep it as eco-friendly as possible. Here is an easy overview of how to grow your chillies from seeds:

  • Step One – Choose The Chilli

To learn how to grow chilli from seeds, you have to have some chilli seeds, but which type will you grow?

You can grow chillies from seeds creating plants that come in many different colours, shapes, sizes and heat levels on the Scoville Scale. The most fun thing to do is choose a mixture of types you like to eat, and types that look fun to grow.

This video has some really great tips on chilli types and the growing conditions they need.

  • Step Two – Prepare Your Trays

You will want to plant your seeds in seed trays indoors with some seeding soil. Leave enough room for watering, and place the trays in a warm, bright spot indoors.

  • Step Three – Sow Your Seeds

When chilli planting season has started (usually January or February) sprinkle your seeds on top of the soil and cover with a thin layer of soil before watering gently to moisten the soil.

  • Step Four – Propagate the seeds if you can or want to, or cover the trays in plastic wrap until they germinate.
  • Step Five – When the seeds have germinated remove any plastic covering.
  • Step Six – Continue to keep the compost moist without soaking it.

As you can see, it doesn’t take a lot to grow chillies from seeds successfully.

If you want some tips on the next stage of growing after chilli planting season has begun, this video has some handy tips on what to do with your newly germinated seedlings to create strong, healthy chilli plants.

Growing Chillies From Seed The Eco-Friendly Way

77% of people want to know how to live more sustainably, which is pretty awesome. If all of us do a little bit, the world will be a lot better off. Today, your eco-friendly efforts are focused on how to grow chillies from seeds.

There are some easy adjustments you can make to reduce your environmental impact, and grow your chillies from seeds as ethically and greenly as possible, here’s how:

Buy Organic Seeds

If you buy your chilli seeds, buy them organic. This means they were grown without harsh pesticides or other chemicals. They are also bred well to create strong, healthy plants that boost the ecosystem.

If you are going to take seeds from chilli peppers when you learn how to grow chillies from seeds, buy organic chilli peppers to harvest the seeds from.

Avoid Peat Compost

Compost, unless it has a peat-free label, contains up to 100% peat. Peat is not an eco-friendly ingredient because the bogs that it comes from contain all kinds of plants and animals unique to that environment.

Harvesting the peat for compost destroys that environment. Luckily, there is a lot of peat-free compost around to use instead when you start to grow chillies from seeds.

Reuse Your Plant Pots

Usually plant pots are made from plastic, especially seed trays and other smaller pots used for growing. Reusing those pots year on year and giving them away/ selling them when you’re done (or recycling them if possible) is much better for the environment than throwing them away, like 91% of all plastic that our society consumes.

You could also reduce more of your single use plastic like water bottles and yogurt pots by cutting them to size and using them as plant pots, rather than throwing them away.

To help you when you grow chillies from seeds, this handy video shows you how to make a completely self enclosed propagation pot using a water bottle.

Catch Rainwater

Rather than using tap water to water your chilli plants, you can save water by catching rain water in a water butt, bucket or tub. Not only will doing this save water, but it will probably boost your plants health as it is more pure than tap water.

Think Carefully About Pest Control

When you grow chillies from seed, they become vulnerable to pests and disease as soon as they germinate. There are lots of different sprays and products you can use to deal with those problems but many of them could be harmful to the environment.

Whilst they may be labelled as safe to use on plants grown for food, certain chemical pesticides and products contaminate the air, ground and water either immediately or eventually.

Some organic, natural pest products have also been called into question, so they can’t always be relied on. Neem oil, for example, is commonly used to kill pests on plants.

It is, however, considered by many studies as toxic to all insects, including bees and other pollinators, which is bad news for the environment.

The best thing to do to grow your chillies from seeds in a way that is eco-friendly is to do your best to avoid any pests and diseases by:

  • Keep soil moist, but not wet
  • Remove dead leaves and detritus from the plant and soil
  • Always disinfect plant pots and tools between uses
  • Rinse your plants down regularly to remove any pests by water pressure

If you have an issue with pests, you might want to look into biological pest control. Alternatively, do your research on sprays and options you have and use the least harmful product available to you.


Are You Ready For Chilli Planting Season?

Now you know how to grow chilli plants in a way that helps you and the planet, it’s time to use our tips and prepare for chilli planting season!

Soon enough you’ll master how to grow chillies from seeds for crop upon crop of tasty, spicy chillies this season.


A Beginners Guide On How To Grow Banana Peppers

banana peppers

It’s fun to grow any kind of chilli pepper, but we have a soft spot in our heart for banana peppers. They are known to have various health benefits,banana peppers they are totally delicious and yep, you’ve guessed it, they’re also really easy to grow.

So if you’re thinking of growing any chilli pepper, banana peppers are the way to go.

Ready to get started? Let’s take a look at how to grow these delicious, spicy yellow fruits:

Banana Peppers – Appearance & Varieties

Banana peppers are a yellow pepper with waxy skin and they come from the chili pepper family. It is named a banana pepper not because of a banana flavour, but because of its color and shape which looks like the tropical fruit from a banana tree.

Most of the time, the fruit banana peppers yield are a deep yellow color when fully mature, but they can also be red or orange in color sometimes.

There are many varieties of banana peppers including mild and hot varieties. Mild banana pepper varieties can be harvested faster than the hot banana pepper varieties, although there’s not too much in it in regards to cultivation time.

Banana Peppers – Culinary Uses

Banana peppers are extremely mild and only sit at 0-500 on the Scoville Scale, so if you only like very mild spice and maximum flavour, you’ll get that with these fruits.

Because banana peppers are so mild you can include them in a huge range of dishes. You can pickle them, chop them and have them in salad, include them in salsa, put them on pizza, fry them off and have them in pasta dishes – the list is endless.

We love stuffing banana peppers with homemade chilli, topping them with cheese and roasting them for a warming family meal.

How To Grow Banana Peppers

Growing banana peppers is really easy if you follow these steps:

Step One – Germination

You can germinate banana pepper plants indoors during the spring or summer when the temperature is warm. The young plant is ready for transplant when it has outgrown the seedling tray. It should be spaced about 18cm – 24 cm apart and each row should be about 24 cm apart.

It is important at this stage of growth that you do not waterlog the seedlings and only water them when the top layer of soil is dry. It is also important to use potting soil as compost is too nutrient rich and can inhibit growth.

Step Two – Transplanting

The temperature should be above 60 degree Fahrenheit outdoors when you transplant the seedlings. They should be transplanted to an area of your garden that is not exposed to too much wind and that receives full sun. In order for them to grow healthily, they need a minimum of 6 hours of sunshine daily and should have around 20 inches of space between each plant.

If you do not have the ideal growing conditions outdoors banana peppers grow really well indoors in a sunny spot. Just make sure that each plant has a whole pot to itself.

Within 60-80 days of good care you should find that you have lots of delicious banana peppers to harvest and enjoy.

Extra tips

To help you get the very best banana peppers from your growing efforts, here are some extra tips to help you:

Fertilizing

If your soil is not fertile, you can mix in compost to increase the nutrients. Nitrogen fertilizer should not be used as it only causes more leaves to grow without increasing the fruit yield. If you do need to add fertiliser to the soil at any point you can use a chilli pepper fertiliser, seaweed and fish emulsion or horse manure.

Watering

The banana pepper plant will become thirsty quickly so you must regularly water it. When watering, just water enough to keep the soil slightly moist. Lack of watering can cause the fruit to taste bitter. Heavy watering can cause the soil to become waterlogged which can eventually destroy the roots.

In addition, adding ingredients like gravel or perlite to your soil mix will encourage better drainage, which can prevent water logging or root rot of your banana peppers.

Support

If the plant grows too tall and becomes lanky, you can set up a trellis or wooden sticks to provide support for it.

Heat

Peppers do best when the temperature is around 60 degrees Fahrenheit. If the temperature reaches beyond 90 degree Fahrenheit, the blossoms of banana peppers can wither away. To protect your plant from the scorching sun, you can set up a shelter to provide some shade.

Pruning

Pruning and topping chilli pepper plants is good practise if you want bushy plants with good ventilation and lots of fruit. You can watch this Youtube video to see a demonstration of how to prune and top your banana peppers to nurture them into the healthiest plants.

Harvesting

You can harvest the banana peppers when they reach full size and the skin is thick and firm. As soon as they become yellow in color you can harvest them or you can wait for them to turn red or orange in color depending on your preference.

When harvesting, use a pair of scissors to nip it off rather than pulling it off the plant by hand.

When Will You Start Growing Your Own Banana Peppers?

It’s so much fun to grow any chilli peppers but banana peppers are so delicious, healthy and easy to grow they really do top the list of growing favourites!

Now you have our tips above and all the information you need to get growing yourself, soon enough you’ll be enjoying multiple banana peppers from your very own plants – how exciting!