How to Grow Chilies Indoors with LED Grow Lights

Grow Chilies Indoors

Many people like to have some organic chilies to add to their cooking.Grow Chilies Indoors

However, lets face it, you can’t keep spending money on organic chilies as they are expensive.

Growing chilies yourself means you will be able to save a lot of money. The problem is that there is the lack of sunlight in North America and parts of Europe and chillies require a lot of sunlight to grow healthily.

The good news is that you can overcome the problem and grow chilies indoors under LED grow lights.


Temperature

Chili needs a hot temperature around 80F – 90F plus in day time and  at least 70F at night. It has to get at least 6 hours of sun to grow healthily.

The 6 hours of sunlight is equal to 16 hours of LED lights. So, if you have limited space, LED grow light is the best option. You can put it near to the plant without burning the leaves. It is cooler because it releases lesser infrared radiation and uses lesser watts.

LED grow light is a long lasting investment as it can last for up to 50,000 hours which is equivalent to 10 years of use. It offers longer lifespan compared to HID lights which can last in between 10,000 – 18,000 hours.

With LED grow lights, you can expect to save up to 50%-60% of energy. Best of all, it is safe to use and environmentally friendly. It does not contain any mercury, lead or gas.

It doesn’t have any fragile glass bulb and will not shatter like glass.


Varieties

The most common chili varieties that are grown indoor are chiltepins, habaneros and other small varieties.

Small chili varieties have long growing season. This means they take longer time to flower and bear crops. The plant will grow up to a height of 6 – 12 inches. In harvest time, you can easily notice the chili crops from among the leaves.

Chili plant can also make a nice decorative ornament for the house apart from tasting spicy in the mouth.


How Many LED Lights to Install

The amount of LED lights you use depends on your chili grow space. Ideally, you should install 32 watts LED lights for per square foot.

So, if you have 6 square foot of grow space, you should install around 200 watts of LED lights. You can buy a LED light block designated for a specific amount of grow space for convenience.

Because chili comes from places with long hours of sunlight, you will need to let the grow light turn on for many hours at least 12 – 16 hours per day. You can get programmable LED grow lights to help you achieve this.

Programmable lights allows you to schedule the light to turn on and off at a specific time. If it doesn’t have any schedule control, you will have to remember to manually turn on the light every day to ensure you reap a heavy harvest of chili crop.


What Colors of LED Lights to Choose

LED lighting is usually installed in small blocks in the indoor growing spaces.

They come in a variety of colors including red, blue, white, green, indigo, and yellow. Red and blue LED lights are the most important lights. Red light which imitate the heat of the sun enhances stem growth, flowering and fruit.

Blue light is necessary for artificial photosynthesis, and development of strong roots. Green light is not that important and you can exclude it in your LED lighting installment if you want.

You have the option of buying a full cycle LED light or only install a specific color of LED light for enhancing the development of certain aspects.

Many chili growers recommend the use of LSR 865 with a light color of 6500 Kelvin.


How to Set Up an Indoor Growing Area

Firstly, you will need to look for a vacant space where you can use as a growing area. It can be a shelf that you are not using, or the basement or garage.

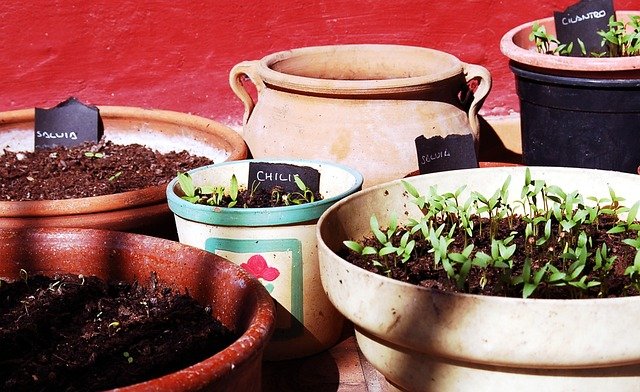
First, you germinate the seeds in a pot on the window sill. When the seeds sprouts, you can move them to the grow light area. As the chili plan grow bigger, you will have to transplant them to bigger pots. Usually, you only need a pot that is 10 – 12 inches in size for transplantation.

Bigger varieties may need pots that are 16 – 18 inches in size.

You will have to keep watering the chilies plants. Lesser watering is needed as the plants grow bigger.

It takes about 60 – 150 days for the peppers to mature before they start to produce crops. On the seed packet, you can find information on how long the chili plant take to mature.

This refer to the time it takes the plant to mature after it has been transplanted to a pot. It takes about 8 – 10 weeks for a seedling to grow into a plant that is suitable for transplanting.

You can harvest the chili green, orange or red as you like.

There you have it, now get out there and grow chilies indoors.

How You Can Grow Your Own Bell Peppers in Pots

bell peppers in pots

It is really nice if you can harvest your own bell peppers in the backyard.bell peppers in pots

Peppers are not cheap and being able to grow your own means you can cut down your grocery expenses.

If you don’t have spaces, you can choose to grow the peppers in containers.

It will still thrive and produce an abundant of crop as long as you meet the right growing condition.


Germination

The seeds of the bell pepper should be planted 6 – 10 weeks before the last spring frost.

You will want to use a premium seed mix instead of the soil from your garden as it can drain more thoroughly.

Quality potting mix can hold moisture and provide proper aeration for the plant. Organic seed mix contains all the necessary nutrients that are required for the plant.

The seeds are to be sown about 1/2 inch depth in the soil. You can sow the seeds in seedling tray with two seeds in each cup.

The peppers will take 2 – 3 weeks to germinate. After 2 – 3 weeks, you can move them to small pots with each seedling occupying one pot. The seedling that has been sprouted should be moved to bigger size pots with the final pot being 10 – 12 inches in size.

The pots you use need to have well draining quality.


Transplanting the Pepper

It is time to move the pepper outdoor when you see at least 1 – 2 true leaves. The ideal temperature for growing pepper plant is 65 – 80 degrees Fahrenheit in the daytime.

The blossoms will drop if the temperature is higher than 85 degrees Fahrenheit. This condition called blossom end rot can be fixed by adding calcium granules to the soil.

The young plant is to be transplanted to a container that is filled with well draining potting and have a pH between 5.5 – 6.8. You can add 5 – 10 grams of neem cake to protect your pepper plant from blight disease.

The container where you plant the young bell pepper plant should be placed in an area that gets ample sunlight and sheltered from the strong winds.

Pepper plant can be quite big when it is mature so you will want to prepare a big pot that is at least 12 inches in diameter. It should get at least 6 hours of full sun in the day time.

Plastic or metal pot is preferred because it grows in consistently moist soil. At first, the young pepper plant will look small when transplanted to the large plant. However, it will eventually fill the large container as it mature to an adult plant.

Watering the Plant

It is important to regularly water the pepper plant to keep the soil moist. The frequency of watering will depend on the weather. Tipping the pot slightly allows you to know whether it needs more watering.

Light pot means that the soil has dried out and need watering. To prevent fungal infection, you should water at the foot of the plant and not over the plant.


When to Add Fertilizer

Imbalanced soil can cause the plants to be weak. This is why you need to improve the soil by adding different types of fertilizers. Nitrogen rich fertilizer can encourage the growth of foliage.

Tomato fertilizer, compost, and mature tea can also be used. Adding Epsom salt can help to improve the yield of your pepper plant. It is recommended that you add new fertilizer every 2 weeks or so.


Controlling the Pests

Aphids is the number one pest of bell pepper plants. Plants that have been attacked by aphids will appear stringy and weak. If you see aphids, you can use a water hose to spray them off.

You will need to continue this for a few days until the aphids don’t come back to the plant.

Another way to control aphid is to use ladybug. Ladybug can lay eggs which will hatch into larvae that devour the aphids. You can get ladybug eggs from your local nursery.

Organic pesticide can also be used to kill caterpillars that are spoiling your pepper plant.


Harvesting Bell Peppers

During harvesting, you can use a knife to cut off the fruit from the stem. There should be a bit of stem attach to the pepper plant after you cut the fruit.

When unripe, picking the pepper fruit by hand may cause the whole branch to be torn off. Unripe peppers are green color. From green color, it can change to red color and then to orange color and finally to yellow color.

You can pick the green peppers as they are safe to eat. Purple bell peppers varieties can change color to dark purple and finally to muddy black color when fully ripened.

When the pepper is fully ripened, it is easy to pluck with the hand in a gentle twist.

How To: Everything You Need To Know About Growing Peter Peppers

Peter Peppers

Peter Peppers are a cutely named pepper that have a phallic shape, so they can be appreciated for both novelty value and flavour. Whether you wantPeter Peppers to grow these cool looking fruits, try them, or you’re just interested in knowing more, we’ve put everything together so you can get the complete lowdown on Peter Peppers.

Let’s take a closer look at these phallic fruits:

 What Is A Peter Pepper Chilli?

A Peter Pepper Chilli is also known by its Latin name – Capsicum Annuum Var. Annuum, or as the penis pepper or willy pepper. It is a Capsicum Annuum chilli type, although it hasn’t been given that official status as of yet as a cultivar of the Capsicum Annuum family.

You can find the pepper growing in Texas and Mexico commonly, as well as some parts of Asia. You can also grow your own Peter Peppers if you want to either in your garden (if you live in a hot climate), in a greenhouse or indoors in a sunny spot.

Peter Pepper Appearance

The Peter Pepper is most known for its appearance, rather than its flavour. It looks like a penis, which gives it a really interesting, and novel look. It is so detailed, in its penile features that it has won an award for being the ‘Most Pornographic Pepper’.

For that reason, the Peter Pepper is often recommended as a plant for display rather than for culinary uses, although you can pickle the fruits.

Pickling Peter Peppers

Pickling peter peppers sounds more like a nursery rhyme than an activity, but it really is possible if you want to make the most of these phallic fruits. You can find easy directions on pickling your chilli peppers in this Youtube video. You can also enjoy Peter Peppers in multiple cooking applications like hot sauce or marinades.

It sits at about 6 times hotter than the average jalapeño, somewhere around the 5-30,000 mark on the Scoville Scale depending on the type. It is similar to the Serrano in that respect but is less meaty and dense in texture making it a great choice for drying, as well as using it freshly prepared.

How To Grow Peter Peppers

You can grow your own peter peppers for fun or for use in cooking. As it is so rare, you may wish to grow this type of pepper if you have prior experience with growing peppers, or if you have the seeds or starter plants at a good price.

Otherwise, cheaper plants or easier-to-come by chilli peppers like jalapeños or serrano chillies could be a better choice.

If you are growing your own peter peppers there are some easy steps to follow to get a great fruit yield:

  1. Around two months before the last frost in your area, plant seeds in potting soil that has been moistened, and keep temperatures above 75 degrees but no higher than around 95 degrees. It is best to keep your seed starts indoors at this point.
  2. Water the soil whenever the surface seems dry and ensure good circulation around your containers particularly when the seeds have germinated.
  3. Once around four leaves have grown you can transplant your starts into larger containers. You’ll want to expose plants going outside to filtered sunlight for a couple of weeks before they go completely out. If growing in pots indoors, plants can be placed in their ‘forever home’ right away.
  4. Create enough space outdoors to plant the chilli pepper plants around 50 centimetres apart. Alternatively they can be placed in individual pots as single plants.

Extra Growing Tips

To grow your peter peppers effectively it is important to grow it in the best soil for chilli peppers. The soil has to be loose, because hot peppers have shallow root systems.

Plenty of perlite (about 10%) in the mixture will help with this, although it is important not to add too much otherwise the water will drain too quickly through the soil and the plant won’t get the nutrients it needs. Vermiculite (about 10%) can help with this issue as it helps to retain nutrients in soil.

If you mix compost into the soil you grow your chillies in they should have plenty of nutrients to help you grow lots of delicious peter peppers. However, if you cannot add compost there is always fertiliser to do the same job.

Magnesium surface and bone meal are a great option to add to the soil when you plant the peppers out from their germination pots. You could also add these nutrients again when the plants show signs of fruiting. Otherwise, you shouldn’t need to add fertiliser more regularly than this.

Lastly, you’ll want to master pruning your peter pepper bushes to make sure they grow as bushy and fruitful as possible. We recommend checking out this pruning video so that you can follow step by step instructions to get your plants in great shape for the growing season.

Will You Be Growing Your Own Peter Peppers This Growing Season?

Now you know everything there is to know about these wonderful willy shaped peppers.

Whether you want to eat them or just marvel at their novelty appearance, peter peppers sure are unique as a table piece, gift or growing project.


The Famous Naga Viper Pepper: One Of The Hottest Chillies Ever Grown

Naga Viper pepper

Are you obsessed with hot chillies like the naga viper pepper? It is a flavour sensation, if you can push past the heat, which sits at about 1 million toNaga Viper pepper 1.5 million Scoville Heat Units. Phew!

To help you understand more about this delicious but totally sweat-inducing chilli pepper, here’s everything you ever wanted to know about the famous naga viper pepper:

What Is The Naga Viper Pepper?

The naga viper chilli has been purposely created by a farmer in England called Gerald Fowler from Cumbria, who crossed the Bhut Jolokia, the Naga Morich and the Trinidad Scorpion and created the naga viper.

The naga viper was known as the hottest chilli pepper in the world in 2011, and although it sits further down the hottest chilli pepper list now, it still packs a real punch.

To determine its heat the pepper had to go through various tests at a special laboratory in Warwick. Those tests rated the heat of the pepper at 1.3 million at the time, a cause for great celebration by its creator Mr Fowler.

Only a year after it was hailed as the world’s hottest pepper the viper was overtaken by one of its parent peppers, no less, the Trinidad Moruga Scorpion. The Scorpion only reigned for a year itself though as the Carolina Reaper took over and remained in top position as the world’s hottest chilli since 2013.

How Does The Naga Viper Pepper Differ From The Naga Morich?

The naga morich is one of the three chilli peppers used to make the naga viper and it sits at about 1-1.5 million on the Scoville Scale.

The peppers are different though as the morich is essentially one of the three parents of the naga viper.

The Naga Viper – A Taste Experience

The naga viper pepper is considered as one of the hottest chili peppers out there. In fact, it takes the fifth place on the Scoville Scale.

Eating this chili pepper is quite demanding and can be a real challenge for the majority of consumers. Those who have tried this hot pepper described the experience as extremely unpleasant. Many say that tears leaked down their face, while their hands and body trembled.

Don’t take our word for it though, you can check out the effects of this super-hot chilli in this Youtube video.

Clearly, this hot chilli is not for kids, and all potential consumers have to be very careful before they try the naga viper. It is a hundred times hotter than some regular hot chili peppers like the jalapeño so it isn’t just a casual spicy treat, it’s a real taste experience to try one.

Side effects of eating the naga viper aside, its flavour profile is actually one of great depth. It smells very sweet and fruity and when you first try it, those are the taste notes that hit you. Of course, it doesn’t take long for the burn to hit and those fruity notes only seem like a far off memory.

Culinary Uses For The Naga Viper Pepper

The naga viper chilli is mostly used for novelty experiences like chilli eating contests and extremely hot sauces. You can use it in cooking but, to make it palatable enough for regular use you would only be able to use the tiniest amounts at a time, so one would last you a very long time.

Instead, we recommend (carefully and in good health) experiencing the naga viper to its full potential and enjoy trying some of it raw, or some food that contains it such as a curry. The inventor who also runs a pub offers naga viper curry eating experiences, but you have to sign a waiver first!

Can You Grow A Naga Viper?

You can’t currently grow the naga viper because the way it was cultivated has no strong and stable method yet. What that means is the chillies that are made using the cross-breeding still don’t produce peppers that are exactly the same as the parent plants.

In essence – the plants can be made from certain processes, but no naga viper stable strains currently exist.

You would not be able to reproduce one yourself at this time. If you can buy the seeds, the chances are you won’t get a pepper plant exactly like the parent plant it came from, so it’s better to spend your money elsewhere.

You could, however, grow a Carolina Reaper chilli plant which is currently the world record holder for the title of world’s hottest chilli plant.

It sits at over 1.5 million on the Scoville Scale and you can grow it yourself at home.

Will Dragon’s Breath Become The World’s Hottest Chilli?

The naga viper and similar peppers have all had their moment in the spotlight as, for a short time, the worlds hottest chilli. Moving forward, the chances are even the famous Carolina Reaper will be pushed off the throne by another chilli. At the moment there is a rumoured plant that could potentially do just that and it is called dragon’s breath.

Dragons breath chillies have been made by Mike Smith, based in St. Asaph and could top 2.48 on the Scoville Scale. The pepper is thought to be so powerful, in fact, it could actually kill you.

Of course, words mean nothing when it comes to breaking records and lots of testing will need to occur before dragons breath can officially take the crown from the Carolina Reaper.

Will You Be Trying The Naga Viper Pepper?

Trying hot chillies is an interest for some, and even a passion for others. It’s a real adrenaline rush and some people truly enjoy the experience.

If that’s you, perhaps the naga viper pepper should be next on your list as it would be a real achievement to try it, especially considering its rarity because of how it’s made.