
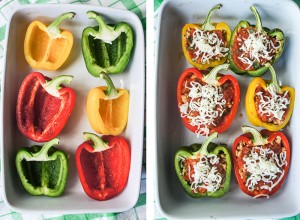
Growing Bell Peppers in your kitchen garden
If you are passionate about growing chillies, then you would be definitely aware of the fact that it is indeed a very challenging process, demanding a

chunk of your time, patience and effort. Nevertheless, at the end, it is also a very rewarding one. Nurturing chilli plants is an extremely delicate process. Certainly, you need to bring it up with care, attention and details. You would find the process to be simple with no iota of complications.
About bell peppers
Bell peppers are tender crops especially grown in warm seasons. So, once you crave for the sweet, spicy and hot touch to your meals, think of growing bell peppers. They come in a range of sizes, shapes and colours. To grow this seed, you have to start your garden for summer. Once you grow them in summers, you can freeze them throughout the winter to add them to soups and sizzlers.
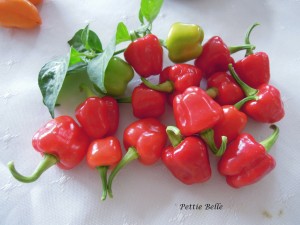
Bell peppers are usually red, green orange and yellow. However, you can also try growing the rarely coloured ones like white, brown, dark purple, lavender, etc. They are most versatile veggies making place in your kitchen and garden, no matter where you are in the world.
Also known as sweet pepper, capsicum or pepper in various corners of the world, bell pepper is a cultivator group of Capsicum annuum species. Besides being a veggie, it is a botanical fruit that has a plethora of culinary and health benefits.
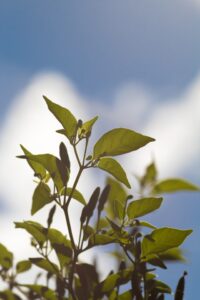
Germinating your chilli seeds
Let’s look into how you can grow bell peppers, a common and spicy chili variety.
- You can start seeding it indoors almost 10 weeks prior to previous spring frost date.
- For germination, maintain temperature of 70 degrees F and keep in warm place for quicker and better results.
- Start with 3 seeds to one pot and thin out the most fragile seedling. Meanwhile, the remaining two will grow as single plant.
- Commence hardening off almost 10 days prior to transplanting.
- Introduce aged compost and fertiliser to the soil a week ahead of transplanting.
- Now, transplant the seeds outdoors with 24 inches in between.
- Maintain 65 degrees F within the soil
- Carefully place match sticks (2-3) in the hole with the plants along with spoonful of fertilisers.
- Drain the soil well and maintain sufficient moisture.
- Fertilise following the initial fruit set.
- Weed carefully.
- Water two inches every week, depending on your regional climate.
Uses of bell pepper
You can spice up your daily and boring meals with such bell peppers grown in your garden. More so, they also add perky crunch and zest to pizzas, wraps, tacos, etc. When roasted, they taste peppy. So, are you already craving to have them? Well, then it’s time to grow them in your garden. Here are some amazing uses of bell pepper.
Bell peppers are known to contain ample of vitamin C that fortifies your immunity and brings glow to your skin. You would find concentration of vitamin C in red bells. They are known to be low in calories and hence bring good news to the health conscious ones. No wonder, it is a great addition to the platter of obese. On gulping down a full cup of bells, you will gain just 45calories.
 Red bell peppers are a jackpot of carotenoids and phytochemicals. The beta-carotene can furnish you with anti-inflammatory benefits and antioxidants. The sulphur content protects certain kinds of cancer. These chillies also contain enzymes like lutein that works wonder in protecting macular degeneration and cataracts.
They are rich in vitamin B6 that lavishes you with a healthy nervous system and renewed cells. The capsaicin content in bell peppers can reduce diabetes, bad cholesterol, inflammation and pain. Bell peppers make great salads and addition to casseroles and soups. Also, they can be grilled, stuffed and placed on sandwiches for crunchy snacks.
Pop some bright coloured bell peppers into your veggie basket and start reaping the amazing benefits.


 the term sierras which refers to the mountains in that region.


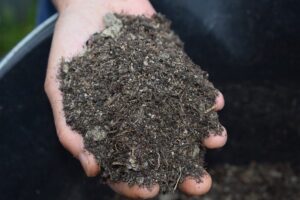 also have less weed among plants. Except in a garden, mulch can be used for flower protection as well. You can find out how to make mulch easily in the text below.

