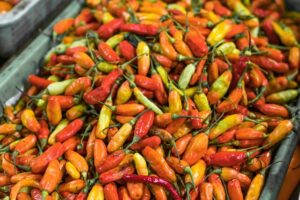
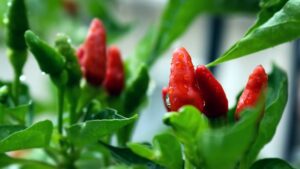
Troubleshooting: Pepper Plant Problems & How To Fix Them

Pepper Plant Problems

Pepper plant problems are common and they can really scupper your growing efforts.Pepper Plant Problems

Once you get your pepper plants in the ground or a pot, as long as they have sun and water they usually do OK. However, as with all plants, sometimes there are issues.

The good news is, that there are actually as many common fixes as there are common pepper plant problems.

There are lots of ways that you can rescue your pepper plant from completely going over the rainbow bridge.

To help you fix a multitude of pepper plant problems, here’s a lowdown of the most common issues and how to fix them:


Underwatering

Underwatering is usually noticeable by the chilli plant having very droopy leaves that may appear lacklustre. Chronic dehydration in chilli plants can lead to reduced crop quality and yield.

It happens mostly when the days are long and hot, which can be surprising because chilli plants love direct sun. Every plant has its limits though, and sometimes more watering is needed for the plant to keep itself cool and properly hydrate itself.

The best way to avoid common pepper plant problems like underwatering is to never let your chilli plants dry out until the soil is so dry, there is a gap between the substrate and the pot.

You should also water at sunrise, or early morning and dusk which avoids the water getting evaporated before the plant has had a chance to absorb it.

If the plant is showing very droopy leaves midday, water it right near the plant stem and that should help it recover.

If dehydration continues to be a problem you need to create shade for the plant, water it with more water, or water it more often overall.


Overwatering

Overwatering chilli plants presents by it having yellow, floppy leaves. This is usually too much water being given to the plant, and not enough ability for the water to drain away.

To prevent pepper plant problems like this happening when the plant is exposed to lots of natural watering from the rain, provide more aerated soil and better drainage overall.

You should also do this so that there is no salt and water build up from your watering.

It is also important to allow the soil to properly dry out and then continue with a watering regime that allows the soil to be dry for the first few inches before watering each time.


Slugs and Snails

Slugs and snails love a juicy pepper plant and they will get through succulent little pepper shoots at speed if they are not controlled.

When controlling these little critters it is important not to use slug pellets or similar toxic products because they are very bad for the environment.

A slug can eat one, pass away and then get eaten by a garden bird which is eaten by a bird of prey which will die from exposure to the product.

The same chain of issues occurs in all kinds of different ways, as well as family pets getting poisoned by these nasty garden products.

Instead, avoid pepper plant problems like slugs by using more organic methods of slug control such as:

  • Barriers
  • Beer traps
  • Shell pot topper (crush any shells to make a sharp soil topper)
  • Cinnamon
  • Increase garden biodiversity for natural predators


Hornworm

Hornworm caterpillars will present themselves in pepper plants by munching holes in the leaves often from the outside in. These caterpillars can simply be moved off to a more suitable plant that they feed on.


Scalding From The Sun

Scalding from the sun shows up in chilli plants by giving them white leaves that are also a bit droopy. This happens most often when you put a new pepper plant that has been growing in the shade, into a sunny spot.

This can be lethal for the plant if it is very young which is why it is important to prevent this happening. It also happens to pepper plants that have been protected over winter.

To prevent pepper plant problems like scalding happening it is important to gradually introduce the pepper to the new conditions it will be living in, which should stop this scalding occurring.

Simply putting the pots in the sunshine for more and more time everyday until transplanting should help the transition run smoothly.


Calcium Deficiency

The pepper plant will get leaves that are very wrinkly and lacklustre if it gets a calcium deficiency. You can easily rectify this by slowly adding more calcium to the soil.

Clam, oyster or egg shells are cheap and easy ways to do this. You can also work lime, wood ash, calcium nitrate or bone meal into the soil, depending on what you have.

If it is provided in the right amounts then the plant should look better in about a week or so.


Aphids

You can easily see aphids as they are quite large and obvious walking around the underside of the leaves of the chilli plant. They slowly kill the plant by sucking fluid out of it which is why the leaves start to curl or die off with a big infestation.

This is unlikely to be one of the common pepper plant problems you see with pepper plants outside because ladybirds and other bugs will take care of the issue for you.

Indoors though, in the house or a greenhouse, there are no natural predators so if you don’t spot the issue the plants will eventually die.

Even worse, the aphids can also give other plants diseases such as mosaic virus, which is very bad news.

To prevent common pepper plant problems such as plants getting aphid infestations, you need to make them as healthy as possible as a first port of call. Try to make sure the plants you put indoors over winter are properly pruned, are not stressed and properly watered.

A little insecticide wouldn’t go amiss a few days before moving them indoors too. If you do get an infestation, quarantine affected plants and then spray the aphids off before adding more insecticide.

You can try some of the homemade insecticides here and here but do research the use of different products on pepper plants so you feel comfortable with how they work, and any precautions that need to be taken.


Mosaic Virus

Mosaic virus was discovered in the 1800’s and can infect over 350 plant species. It presents in pepper plants by giving them yellow splodges and wrinkly leaves that are not quite crispy, but not soft like a leaf usually is.

This disease stunts the growth of the plants and affects the fruit they produce. If your plant has mosaic virus you need to get rid of it and any surrounding weeds or plants, ensuring that those plants are not composted.

You will also need to dispose of the soil as the virus can live in the soil for over a year. Once that is done, disinfect your pots and tools before using them for other plants, as shown in this video.

Lastly, the virus can be transmitted through your hands and clothes too. Whilst dealing with mosaic virus plants you need to avoid touching any other plants. You should also wash your clothes before wearing them again for gardening.


You’re Ready To Battle All Of The Pepper Plant Problems

The fact is that every plant has its problems and pepper plants are no different.

Most pepper plant problems do have multiple solutions though and if they don’t, there’s a lesson learnt to boost future pepper growing plans. A mistake made I the garden is never a wasted experience.

Hopefully, with more practice, trials and tribulations you will be able to grow healthy, strong pepper plants next season for lots of yummy, sumptuous fruits to use in your family kitchen day after day.

Grow, Grow, Grow! How To Grow Chilli Plants Faster

How To Grow Chilli Plants Faster

Would you love to know how to grow chilli plants faster?How To Grow Chilli Plants Faster

In this article we are looking at all things chilli plant, including how to start them off right, how to care for them properly and how to get them zooming up at speed ready to positively gush with fruits and delicious crops.

Keep reading if you want to know how to grow chilli plants faster:


Why Grow Chilli Plants?

There are a few reasons that growing chilli plants is a great idea.

Primarily, you get to grow your own fruits and when you know how to grow chilli plants faster, you get those yummy fruits sooner!

You can then do all sorts with the chillies including: pickling, making hot sauce, whipping up a chutney or using them in everything from curries to guac.

Growing your own then saves you money, and enables you to benefit from the numerous health benefits of chillies with ease.

It’s also important to understand just how phenomenal gardening is for you, no matter what it is you grow. Sure, it is fun knowing how to grow chilli plants faster, to get those spicy fruits and cook up a storm with your crops.

However, the process of growing plants itself is such a worthy activity. It is proven to help you; build strength, stay a healthy weight, keep your memory in check, boost your mood and it can even help beat loneliness.

Lastly, chilli plants are suitable for anybody who wants to grow. You can get bigger plants that need to grow outside like the Hungarian Black or Yellow Scorpion, or more compact chilli plants like a Thai Dragon or Zimbabwe Bird which are perfect for a sunny windowsill.

Many are incredibly easy to nurture, and you can squeeze at least one plant in your home somewhere. Chilli plants really are perfect for everybody.


How To Grow Chilli Plants Faster

If you have decided to give growing chilli plants a go, the great news is that there are lots of things you can do to learn how to grow chilli plants faster.

By learning these tips and putting them into action, it means you get some healthy and happy chilli fruits sooner, which is fantastic news for your cooking plans!

Here are our top tips to help you grow chilli plants faster:


Pick The Right Seeds

Overall it can be assumed that the hotter the chilli is, the longer it will take to grow and then develop, eventually ripening to its spiciest self.

If you choose a milder chilli like a jalapeño, serrano, yellow hot wax pepper or a cayenne you’ll likely get them sooner than your hotter chillies like the habanero and the scotch bonnet.


Invest In The Plants/ Seeds

When you consider how to grow chilli plants faster you might just buy the first seeds or plants you find, thinking they all have an equal chance at strong, speedy growth.

Cheaper seeds and plants are actually more likely to struggle with disease or growth issues, and weak seeds might not even germinate at all.

If you pay a little more for the best possible plants and seeds won’t just grow chilli plants faster, but you’ll also avoid losing your crops and wasting your time on seeds that come to nothing.


Soak Your Seeds (scarification)

One way to get your seeds to germinate faster is to soak them in cold black tea to soften the case that protects the seed. Doing this for about 24 hours before planting your seeds should get them off to a really great start.


​Snuggle Your Seeds

Snuggling your seeds in warmed compost will encourage them to germinate faster. You can use a heated propagator for this, or if it is sunny, leave your compost out in the sunshine for a few hours before planting.

​Don’t Over Water Early On

When your seeds are working hard germinating they are sensitive to overwatering. They do need moist soil to swell and pop open, but too much water will encourage rot, which could kill your chilli right off.

​Consider Grow Lights

One of the key tips when you’re wondering how to grow chilli plants faster, is using grow lights.

Many people swear by grow lights to encourage germination, and to help chilli plants grow faster.

You can get setups that are really cheap and they need to be about 450-495nm in wavelength to help promote early germination and nice healthy root growth.

As the plant grows it will need 680-750nm in wavelength to replicate late summer light. You can get fluorescent lighting, high intensity discharge lights or LED’s that are designed for growing chillies.

They often have easy switches and directions to help you choose the right wavelength for the plants to grow strong and at speed.

It is also worth mentioning that some of the most expensive options do end up being cheaper to run, like LED setups.

This is worth bearing in mind as it can be a bit of a sting to setup a grow light only to receive a hefty electricity bill in exchange for a few beautiful, but very expensive chillies.

Pot Your Chillies On As Soon As You Can

As soon as your chillies have five pairs of leaves they can be potted on, which will help your chilli plants grow faster. Their roots can stretch out and grow, creating a strong system of support for the above soil part of the plant.


Be Careful With Nitrogen

You might be into feeding your chilli plants to help them grow faster, but this can actually inhibit their growth.

Too much nitrogen actually stops a chilli plant fruiting naturally, so it is important to hold back to prevent slowing down those yummy crops coming through.


Do Feed Your Plants

Feeding chilli plants properly helps them to grow big and strong and can help chilli plants grow faster. Do your research and try to use a chilli specific product where possible, or listen to the advice of experts. We like this Youtube video with a secret chilli fertiliser mix recipe.


Water Regularly

Watering your chilli plants as needed, regularly, will prevent stress, which can inhibit growth. If you want to help chilli plants grow faster you have to both avoid them drying out, whilst also keeping the soil moist.

Ideally, the soil is dry for the first couple of inches (with a finger test) when you water it.

​​Trim & Top Your Chilli Plants

When you wonder how to grow chilli plants faster you might not automatically assume trimming them is a good idea. That’s cutting away that precious growth right?!

Well, it is true that trimming the plant does take it back a few steps, but the results will be better airflow, boosted growth and better, bushier growth.

You can see exactly how to trim and top your chilli plants in this handy video.


“Gardens are not made by singing ‘oh how beautiful’ and sitting in the shade” – Rudyard Kipling


Hopefully you now feel confident that you know how to grow chilli plants faster.

With the tips and tricks above, you are sure to have plenty of healthy, juicy, spicy chilli crops sooner rather than later, for endless yummy dishes out of your home kitchen.


The Pro Guide To Help You Freeze Chili…Like A Pro

Freeze Chili

Are you wondering what to do with a big glut of chillies?Freeze Chili

Maybe it’s time to freeze chili to preserve the produce and have a healthy supply of spicy treats to use whenever your recipe calls for it.

In this article we will let you know the what, why and how of freezing chili so that you can get it right every time, and hopefully make it a healthy habit to prolong the life of these delicious fruits.

Let’s take a look at everything there is to know about freezing chilli peppers like a pro:


What Are Frozen Chili Peppers?

Frozen chili peppers are where we freeze chili and then consume the fruits far beyond their usability when they are fresh.

They can be contained in all kinds of containers (see below) and they can be frozen whole, although it makes sense to freeze them sliced up so they can be used right out of the container.


Why Freeze Chili Peppers?

As members of the nightshade family, chili peppers are related to tomatoes and bell peppers and come in a huge range of heat, flavour, texture and colour types. There are multiple reasons to freeze them including:

  • Making the most of a glut of chili peppers you might have grown or been given. They last a lot longer when frozen, which stops them rotting down and helps to prevent your household adding to the 3 billion tons of global food wastage we make as a planet every single year.
  • Further preserving the health of chili peppers, which is far reaching. They are full of vitamin C, B6, K1, potassium and copper, plus antioxidants and active plant compounds. Although some nutrients can be lost with the freezing process (especially if blanching is done before), many are still preserved with freezing.
  • Having the convenience of frozen products in your freezer ready to use in recipes. If you freeze chili peppers (if sliced) you can just chuck them into a red arrabiata pasta sauce or spicy jalapeño chilli without having to prepare them, which is really helpful if you’re a busy person.

Since the pandemic, many people have also spent some time ensuring they have food inside the house that they can use if they are unable to leave the house or if supplies run short.

Freezing chillies and other items can ensure you have lots of fresh produce to lean on if you do need to isolate, or other events happen that mean you are short on food supplies.


How To Freeze Chili Like A Pro

Freezing peppers is a really easy process that you can do anytime you want to, especially because there’s no need to sterilize anything as with pickling.

Even better, is that there are multiple ways for you to freeze chillies so that you can choose the easiest method for you at any time.

As long as the chili is fresh, washed and not showing signs of rotting, it can be prepared to freeze in any of these ways:


Chopped Chillies

To freeze chopped chillies you just need to chop up the chili, remove the stem, seeds and seed membranes. You can then freeze chili by placing them on a baking tray and leaving them in the freezer for a few hours.

Once they are dried out and the water has been removed, they can be placed in any clean sealed freezer bag or plastic tub.


Blanched Chillies

Some people prefer to soften their chillies a little by blanching them before freezing. All you have to do for this method is to put your peppers (ideally sliced) into boiling water for a couple of minutes then allow them to dry and cool before bagging or boxing them up and putting them in the freezer.


Whole Chillies

To freeze chili whole you just need to bag them and box them up as needed. It is important that all the water is removed before you do this to avoid ice forming on the chillies, which can damage them.


Ice Cube Chillies

Some people like to slice up their chillies and then place them into ice cube trays with water so they have individual chili portions to use in cooking.

You can do this just with chili, or you could even make little spicy herb cubes by mixing your chopped chili with basil, oregano and parsley and then you can drop that right into all kinds of dishes with ease.


Extra Tips To Help You Freeze Chili

Here are some extra tips to help you freeze peppers like a pro:

  • Consider using protection for your hands when you prepare to freeze chili because the heat can stay on your fingers and might cause pain if you wipe your eyes or nose. This is particularly important if you are freezing very hot chili, like Carolina reaper.
  • Put the date that you have frozen the chili on the bag or box to make sure that you use it up before around four months.
  • Keep the chili you freeze in small portions so that if any mould or freezer burn affects one batch, it won’t take out the whole batch.


You’re Ready To Freeze Chili!

With all the information in this guide you’re set to freeze chili for use in delicious home-cooked recipes whenever you need a spicy hit.

Whether you slice them, freeze chili whole, or turn them into instant favour cubes, you’re sure to have some delicious, heat-filled meals in the next few months!


The Ultimate Guide To Drying Chillies

drying chillies

Thinking of drying chillies? You’ve come to the right place!drying chillies

In this article we have everything you need to know about what dried chillies are, why to dry them, which chillies work well when dried and how to dry them.

By the end, you’ll be an expert at preserving these spicy fruits.

Here’s your complete guide to drying chillies:


What?

Dried chillies are a type of fruit that is produced and prepared commercially through many different methods. In hot places like India – where 1.74 million tons of dried chillies and peppers are produced – they can often be dried in the sunshine.

Commercial factories might also dry them in large ovens, heat racks and freeze-drying units.

When we talk about dried chillies in this article, we are talking about drying chillies that are fresh. This can be done with many different types of chilli, although some are more suited to drying than others.

For example; jalapeños are better pickled or frozen because the texture is very juicy and succulent, and that juice can be lost during the drying process.

Drying chilies like bird’s eye, cayenne and poblano chili peppers are really great contenders for drying, so if you have a glut that you have grown or been given, it is word considering drying them for use.


Why?

There are many different reasons that you should give drying chillies a go including the following:


To Intensify The Heat

One of the key reasons that people choose to start drying chillies is to intensify the heat. Chillies are hotter once they have been dried and so, you need less in a recipe for the same amount of heat as a fresh chili.


To Avoid Food Waste

Globally we get rid of 900 million tonnes of food of which 17% available to consumers goes in the bin and 60% of that comes from domestic waste. Using methods like pickling, freezing and drying of products like chili helps to avoid food wastage, prolonging the usable time of the produce.


To Create A Beautiful Aesthetic

Dried chillies fall very well into the cottagecore decor trend along with jars of preserves, baking apparatus and dried flowers. Some people like to dry chillies as decorations that add a splash of colour to a neutral aesthetic.


For Convenience

You can use dried chillies in all kinds of recipes, like those in this handy Youtube video.The great thing is, when you have a string of dried chillies you can just take one and use it. No need to get fresh chillies from the store. Just a quick bit of spice right from your store cupboard with minimal effort.


To Make The Most Of A Glut

If you grow chillies you probably already know that you can get a glut, which is loads of chillies at the same time, too much to use. Although you can give those chillies away, it makes good sense to try drying chillies so that you can also store them for yourself for future use. That way your fruit harvest goes way beyond growing season.


To Grind

Dried chili peppers can be ground down to make chili powder, which is a fantastic store cupboard item or gift. You can also use the dried flakes in lots of recipes to add instant heat. We particularly love them sprinkled on top of a salad for a bit of yummy warmth to contrast with the cool, crunch of the produce.

Lastly, it is worth noting that drying chillies is fun. The same as making jam, or baking bread, drying chillies is a little bit of wholesome fun to have with natural produce and your hands.


How?

Drying chillies is really easy, and there are multiple ways to do it. Let’s take a closer look:


Plate Drying In A Polytunnel/ Greenhouse

If you grow your own chillies in a polytunnel or greenhouse you can simply leave the chillies to dry on a plate or rack inside those places.

The only thing you might want to do first is rinse them off if you have used any pesticides on the produce as they have been growing.

It is also important not to leave the drying chillies within reach of areas where water could splash on them, as the chillies will spoil and rot if they are constantly left warm and moist.


Oven Drying

To oven dry your chili peppers you simply need to cut them in half (lengthwise) and then arrange them onto a clean baking tray allowing them to bake in around 120 degree heat for as long as they need to dry out.

If you leave the oven open a bit it will enable the moisture to escape the oven but it isn’t 100% necessary.

Oven door open or not drying the peppers does not have a set time, you simply need to keep checking on them until they are totally free of moisture.


Dehydration

Using a dehydrator at 145 degrees for about 8-10 hours you can dehydrate chillies easily. Just make sure that the chillies are evenly spread out so that they can dry out fully.


Natural Air Drying

You can dry your chili peppers whole by tying up your chili peppers by the stalk and then leaving a few inches between each one until they are all tied up.

You then need to hang them up so they are totally separate and allow them to dry in direct sunlight (kitchen windows are a great choice).

This will take weeks for the chillies to fully dry but they will look great in the meantime. Some people also string their peppers in a way that they are touching, a bit like garlic.

This method can work well too, and you can learn how to do it in this Youtube video.


You’re Ready To Start Drying Chillies!

Hopefully, with all the information above you are completely setup to start drying chillies.

As soon as they’re ready to go you can start making yummy, delicious recipes with these spicy fruits day after day, all whilst enjoying their bright and beautiful aesthetic in your family kitchen.

It’s a win, win!


Healing Fruit: 13 Top Benefits Of Green Chillies

Benefits Of Green Chillies

The benefits of green chillies are many and green chillies are absolutely delicious in all kinds of yummy dishes like green chilli chicken curry, and green chilli chutney.Benefits Of Green Chillies

Green chili plants are also easy to grow and tend to be very cheap to buy.

When you think about the benefits of green chillies, you may not necessarily realise that they are packed full of health benefits, as well as flavour. These little spicy powerhouses are not just yummy, they’re extremely healthy too.

In this article we will take a look at green chillies and their health benefits. No doubt by the end you’ll be looking up all kinds of green chili plant recipes so that you can reap the benefits of green chillies in your diet:


Green Chillies: An Introduction

When we talk about the benefits of green chillies we mean chili peppers often harvested whilst they are still green and tender. As they ripen they become yellow and red (some go brown, black and other shades). At their younger age when they remain green they tend to be much more juicy and tender, and less hot too.

The most common green chillies sold are the Pasilla, Poblao and New Mexico Chilli, jalapeño, Chilaca and Serrano chillies. Some varieties also mature as green and will never become red.


The Health Benefits Of Green Chillies

Green chillies have a wealth of health benefits that make them a really incredible fruit to include in your recipes and meals. Here are just some of the benefits of green chillies:


Green Chillies Have More Nutrients Than Red Chillies

As chillies dry out and turn red they lose some of their nutrients and benefits. Green chillies are thought to be more nutrient rich because they are fresher.


Green Chillies Contain Nearly Zero Calories

Green chillies contain more water than red chillies because they are earlier in their journey of ripening. They also contain nearly zero calories, with a small one gram chilli only registering at around one calorie and 100 grams of green chili only registering at around 15 calories. With such a lot of flavour and so little calories, they’re a great fruit to have in a health conscious kitchen.


Proven To Help With Heartburn

In a study with red peppers, people with heartburn found that although initial spicy food exposure caused more pain at first, over time heartburn and acid reflux symptoms improved. The study also showed chili needed to be consumed regularly afterwards otherwise the benefits quickly waned.

As the results related to capsaicin, the benefits of green chillies are still relevant, but because they are not as potent as green chillies, they might need to be consumed in higher amounts for this particular benefit.


A Boost For Weight Loss Efforts

Green chillies have shown to be helpful in weight loss, in part because they help boost fat burning in both sexes, something proven in multiple scientific studies including this one. There are also studies that show that it can reduce appetite and help you to consume fewer calories overall. The study results can vary, though, and more often than not suggest the benefits of green chillies occur alongside healthy lifestyle changes.


Green Chillies Help Keep You Regular

Green chillies are full of fibre which helps to cleanse your colon and keep you regular. Combined with the capsaicin this can sometimes be an irritating effect that causes such uncomfortable times on the toilet the day after a very hot curry.


Green Chillies Are Full Of Antioxidants

Chillies are full of capsaicin which is a natural antioxidant. Antioxidants are important because they protect the cells in your body against free radicals. Free radicals are generally accepted to be negative and associated with cancer, disease and other bodily harm.


A Scalp Boost For Healthier Hair

Green chillies contain silicon which helps to get your scalps blood vessels more active and stimulated. This helps to promote healthy hair growth and good scalp health.


Green Chillies Can Help In The Fight Against Prostate Cancer

Scientific studies have shown that capsaicin in chili has anti-cancer activities in all kinds of cancer cells, including prostate cancer. This means that it can contribute to causing cancer cell death, a bit like a tiny little soldier in your body working against the enemy.


Green Chillies Boost Cardiovascular System

According to studies, the capsaicin in green chillies can help to reduce hardening in the arteries as well as your blood pressure, which helps with heart health. The antioxidants in the green chili are also helpful in protecting your heart against disease and issues associated with free radicals.


Stimulation Of Lower Body Temperature

One of the most unusual benefits of green chillies is their ability to help you cool down.

Despite these tasty fruits being so widely associated with heating us up causing sweating and hope flushes, green chillies are known to actually be able to help cool you down at your core. This is because they stimulate the hypothalamus in the brain, which is the cooling centre, helping you feel cooler from the inside out. This is the reason lots of green chili is consumed in India, to help people cope with the intense heat.


Stimulation Of Blood Flow In Nose & Sinuses

One key green chili plant benefit is that their fruits boost blood flow which helps fluids in the nose and sinuses to flush out, which helps get rid of bacteria and toxins and helps to improve breathing quality overall.


Relieves Pain

Much like the original Scoville study where capsaicin heat was tested as a naturally warming muscle rub, chilies in prescribed creams can actually help reduce pain with inflamed joints and muscles. There are many other studies being performed on the benefits of green chillies and capsaicin at the moment because of their propensity to help with various other kinds of pain.


Big Vitamin Powerhouse

Green chillies are absolutely full of all kinds of vitamins and nutrients like vitamin C, Beta Carotene and fibre. There are more nutrients like this in green chillies because they haven’t dried up yet.


How Will You Include Green Chillies In Your Diet?

The benefits of green chillies are far reaching. Just one small green chili in your meal can make a huge difference to your health, alongside other healthy lifestyle efforts.

The question is, which yummy green chili dishes will you start to include in your family cooking repertoire?

If you are looking for inspiration we highly recommend green chili chutney, green chili chicken and green chili guacamole.

How To: Everything You Need To Know About Growing Peter Peppers

Peter Peppers

Peter Peppers are a cutely named pepper that have a phallic shape, so they can be appreciated for both novelty value and flavour. Whether you wantPeter Peppers to grow these cool looking fruits, try them, or you’re just interested in knowing more, we’ve put everything together so you can get the complete lowdown on Peter Peppers.
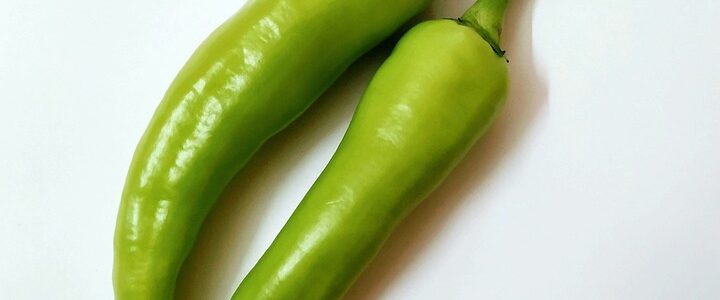
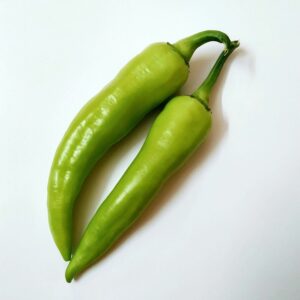
Let’s take a closer look at these phallic fruits:

 What Is A Peter Pepper Chilli?

A Peter Pepper Chilli is also known by its Latin name – Capsicum Annuum Var. Annuum, or as the penis pepper or willy pepper. It is a Capsicum Annuum chilli type, although it hasn’t been given that official status as of yet as a cultivar of the Capsicum Annuum family.

You can find the pepper growing in Texas and Mexico commonly, as well as some parts of Asia. You can also grow your own Peter Peppers if you want to either in your garden (if you live in a hot climate), in a greenhouse or indoors in a sunny spot.

Peter Pepper Appearance

The Peter Pepper is most known for its appearance, rather than its flavour. It looks like a penis, which gives it a really interesting, and novel look. It is so detailed, in its penile features that it has won an award for being the ‘Most Pornographic Pepper’.

For that reason, the Peter Pepper is often recommended as a plant for display rather than for culinary uses, although you can pickle the fruits.

Pickling Peter Peppers

Pickling peter peppers sounds more like a nursery rhyme than an activity, but it really is possible if you want to make the most of these phallic fruits. You can find easy directions on pickling your chilli peppers in this Youtube video. You can also enjoy Peter Peppers in multiple cooking applications like hot sauce or marinades.

It sits at about 6 times hotter than the average jalapeño, somewhere around the 5-30,000 mark on the Scoville Scale depending on the type. It is similar to the Serrano in that respect but is less meaty and dense in texture making it a great choice for drying, as well as using it freshly prepared.

How To Grow Peter Peppers

You can grow your own peter peppers for fun or for use in cooking. As it is so rare, you may wish to grow this type of pepper if you have prior experience with growing peppers, or if you have the seeds or starter plants at a good price.

Otherwise, cheaper plants or easier-to-come by chilli peppers like jalapeños or serrano chillies could be a better choice.

If you are growing your own peter peppers there are some easy steps to follow to get a great fruit yield:

  1. Around two months before the last frost in your area, plant seeds in potting soil that has been moistened, and keep temperatures above 75 degrees but no higher than around 95 degrees. It is best to keep your seed starts indoors at this point.
  2. Water the soil whenever the surface seems dry and ensure good circulation around your containers particularly when the seeds have germinated.
  3. Once around four leaves have grown you can transplant your starts into larger containers. You’ll want to expose plants going outside to filtered sunlight for a couple of weeks before they go completely out. If growing in pots indoors, plants can be placed in their ‘forever home’ right away.
  4. Create enough space outdoors to plant the chilli pepper plants around 50 centimetres apart. Alternatively they can be placed in individual pots as single plants.

Extra Growing Tips

To grow your peter peppers effectively it is important to grow it in the best soil for chilli peppers. The soil has to be loose, because hot peppers have shallow root systems.

Plenty of perlite (about 10%) in the mixture will help with this, although it is important not to add too much otherwise the water will drain too quickly through the soil and the plant won’t get the nutrients it needs. Vermiculite (about 10%) can help with this issue as it helps to retain nutrients in soil.

If you mix compost into the soil you grow your chillies in they should have plenty of nutrients to help you grow lots of delicious peter peppers. However, if you cannot add compost there is always fertiliser to do the same job.

Magnesium surface and bone meal are a great option to add to the soil when you plant the peppers out from their germination pots. You could also add these nutrients again when the plants show signs of fruiting. Otherwise, you shouldn’t need to add fertiliser more regularly than this.

Lastly, you’ll want to master pruning your peter pepper bushes to make sure they grow as bushy and fruitful as possible. We recommend checking out this pruning video so that you can follow step by step instructions to get your plants in great shape for the growing season.

Will You Be Growing Your Own Peter Peppers This Growing Season?

Now you know everything there is to know about these wonderful willy shaped peppers.

Whether you want to eat them or just marvel at their novelty appearance, peter peppers sure are unique as a table piece, gift or growing project.


A Beginners Guide On How To Grow Banana Peppers

banana peppers

It’s fun to grow any kind of chilli pepper, but we have a soft spot in our heart for banana peppers. They are known to have various health benefits,banana peppers they are totally delicious and yep, you’ve guessed it, they’re also really easy to grow.
So if you’re thinking of growing any chilli pepper, banana peppers are the way to go.

Ready to get started? Let’s take a look at how to grow these delicious, spicy yellow fruits:

Banana Peppers – Appearance & Varieties

Banana peppers are a yellow pepper with waxy skin and they come from the chili pepper family. It is named a banana pepper not because of a banana flavour, but because of its color and shape which looks like the tropical fruit from a banana tree.

Most of the time, the fruit banana peppers yield are a deep yellow color when fully mature, but they can also be red or orange in color sometimes.

There are many varieties of banana peppers including mild and hot varieties. Mild banana pepper varieties can be harvested faster than the hot banana pepper varieties, although there’s not too much in it in regards to cultivation time.

Banana Peppers – Culinary Uses

Banana peppers are extremely mild and only sit at 0-500 on the Scoville Scale, so if you only like very mild spice and maximum flavour, you’ll get that with these fruits.

Because banana peppers are so mild you can include them in a huge range of dishes. You can pickle them, chop them and have them in salad, include them in salsa, put them on pizza, fry them off and have them in pasta dishes – the list is endless.

We love stuffing banana peppers with homemade chilli, topping them with cheese and roasting them for a warming family meal.

How To Grow Banana Peppers

Growing banana peppers is really easy if you follow these steps:

Step One – Germination

You can germinate banana pepper plants indoors during the spring or summer when the temperature is warm. The young plant is ready for transplant when it has outgrown the seedling tray. It should be spaced about 18cm – 24 cm apart and each row should be about 24 cm apart.

It is important at this stage of growth that you do not waterlog the seedlings and only water them when the top layer of soil is dry. It is also important to use potting soil as compost is too nutrient rich and can inhibit growth.

Step Two – Transplanting

The temperature should be above 60 degree Fahrenheit outdoors when you transplant the seedlings. They should be transplanted to an area of your garden that is not exposed to too much wind and that receives full sun. In order for them to grow healthily, they need a minimum of 6 hours of sunshine daily and should have around 20 inches of space between each plant.

If you do not have the ideal growing conditions outdoors banana peppers grow really well indoors in a sunny spot. Just make sure that each plant has a whole pot to itself.

Within 60-80 days of good care you should find that you have lots of delicious banana peppers to harvest and enjoy.

Extra tips

To help you get the very best banana peppers from your growing efforts, here are some extra tips to help you:

Fertilizing

If your soil is not fertile, you can mix in compost to increase the nutrients. Nitrogen fertilizer should not be used as it only causes more leaves to grow without increasing the fruit yield. If you do need to add fertiliser to the soil at any point you can use a chilli pepper fertiliser, seaweed and fish emulsion or horse manure.

Watering

The banana pepper plant will become thirsty quickly so you must regularly water it. When watering, just water enough to keep the soil slightly moist. Lack of watering can cause the fruit to taste bitter. Heavy watering can cause the soil to become waterlogged which can eventually destroy the roots.

In addition, adding ingredients like gravel or perlite to your soil mix will encourage better drainage, which can prevent water logging or root rot of your banana peppers.

Support

If the plant grows too tall and becomes lanky, you can set up a trellis or wooden sticks to provide support for it.

Heat

Peppers do best when the temperature is around 60 degrees Fahrenheit. If the temperature reaches beyond 90 degree Fahrenheit, the blossoms of banana peppers can wither away. To protect your plant from the scorching sun, you can set up a shelter to provide some shade.

Pruning

Pruning and topping chilli pepper plants is good practise if you want bushy plants with good ventilation and lots of fruit. You can watch this Youtube video to see a demonstration of how to prune and top your banana peppers to nurture them into the healthiest plants.

Harvesting

You can harvest the banana peppers when they reach full size and the skin is thick and firm. As soon as they become yellow in color you can harvest them or you can wait for them to turn red or orange in color depending on your preference.

When harvesting, use a pair of scissors to nip it off rather than pulling it off the plant by hand.

When Will You Start Growing Your Own Banana Peppers?

It’s so much fun to grow any chilli peppers but banana peppers are so delicious, healthy and easy to grow they really do top the list of growing favourites!

Now you have our tips above and all the information you need to get growing yourself, soon enough you’ll be enjoying multiple banana peppers from your very own plants – how exciting!


How To Grow Chillies From Seeds The Eco-Friendly Way

how to grow chillies from seeds

Do you want to know how to grow chillies from seeds whilst also keeping the planet in mind?
how to grow chillies from seeds

That’s great news! You’ve come to the right place, because we have all the tips on growing these spicy, yummy veggies whilst keeping things as green as possible:


Why Grow Chillies From Seeds?

When you learn how to grow chillies from seed you are creating your very own produce, which has a ton of benefits that go far beyond creating many a yummy dish with the fruits of your labour.

For you, learning how to grow chillies from seed is beneficial for your health in multiple ways.

As well as the physical demand of growing any plant giving you a healthy boost, the mental health benefits are quite far-reaching.

Gardening is thought to reduce stress, boost confidence, and it can even help people who are recovering from illness and accidents.

Let’s not also forget that chillies themselves are super-nutritious and contain many vitamins and minerals, including capsanthin, which some studies have suggested could be powerful enough to help fight cancer!

When it comes to the planet, learning how to grow chillies from seeds is actually pretty great before you even adjust how you grow them to be more eco-friendly.

There might be a third of our global population cutting down on meat to help the environment, but it is important to stay mindful that vegetables and fruits can be impactful too, when it comes to the planet.

For every chilli you buy at the store there is an environmental cost for the water, plastic, pesticide, land cultivation and human labour used to grow it, not to mention the air miles it took to get it to your local store.

By understanding how to grow chillies from seeds rather than buying chillies from the store, you reduce the environmental impact of your chilli consumption hugely.

Lastly, there are some practical benefits to getting to grips with how to grow chillies from seeds. Those who live in flats, small homes or apartments can grow chillies from seed in a small space.

As long as you have a bright, warm, sunny spot, you’re good to go. By starting to learn how to grow chillies from seed, you can also create many chilli plants cheaply, giving you a few to sell or give away in the local community.


How To Grow Chillies From Seeds

Once you have the basics of how to grow chillies from seed down, you can make the right adjustments to keep it as eco-friendly as possible. Here is an easy overview of how to grow your chillies from seeds:

  • Step One – Choose The Chilli

To learn how to grow chilli from seeds, you have to have some chilli seeds, but which type will you grow?

You can grow chillies from seeds creating plants that come in many different colours, shapes, sizes and heat levels on the Scoville Scale. The most fun thing to do is choose a mixture of types you like to eat, and types that look fun to grow.

This video has some really great tips on chilli types and the growing conditions they need.

  • Step Two – Prepare Your Trays

You will want to plant your seeds in seed trays indoors with some seeding soil. Leave enough room for watering, and place the trays in a warm, bright spot indoors.

  • Step Three – Sow Your Seeds

When chilli planting season has started (usually January or February) sprinkle your seeds on top of the soil and cover with a thin layer of soil before watering gently to moisten the soil.

  • Step Four – Propagate the seeds if you can or want to, or cover the trays in plastic wrap until they germinate.
  • Step Five – When the seeds have germinated remove any plastic covering.
  • Step Six – Continue to keep the compost moist without soaking it.

As you can see, it doesn’t take a lot to grow chillies from seeds successfully.

If you want some tips on the next stage of growing after chilli planting season has begun, this video has some handy tips on what to do with your newly germinated seedlings to create strong, healthy chilli plants.

Growing Chillies From Seed The Eco-Friendly Way

77% of people want to know how to live more sustainably, which is pretty awesome. If all of us do a little bit, the world will be a lot better off. Today, your eco-friendly efforts are focused on how to grow chillies from seeds.

There are some easy adjustments you can make to reduce your environmental impact, and grow your chillies from seeds as ethically and greenly as possible, here’s how:

Buy Organic Seeds

If you buy your chilli seeds, buy them organic. This means they were grown without harsh pesticides or other chemicals. They are also bred well to create strong, healthy plants that boost the ecosystem.

If you are going to take seeds from chilli peppers when you learn how to grow chillies from seeds, buy organic chilli peppers to harvest the seeds from.

Avoid Peat Compost

Compost, unless it has a peat-free label, contains up to 100% peat. Peat is not an eco-friendly ingredient because the bogs that it comes from contain all kinds of plants and animals unique to that environment.

Harvesting the peat for compost destroys that environment. Luckily, there is a lot of peat-free compost around to use instead when you start to grow chillies from seeds.

Reuse Your Plant Pots

Usually plant pots are made from plastic, especially seed trays and other smaller pots used for growing. Reusing those pots year on year and giving them away/ selling them when you’re done (or recycling them if possible) is much better for the environment than throwing them away, like 91% of all plastic that our society consumes.

You could also reduce more of your single use plastic like water bottles and yogurt pots by cutting them to size and using them as plant pots, rather than throwing them away.

To help you when you grow chillies from seeds, this handy video shows you how to make a completely self enclosed propagation pot using a water bottle.

Catch Rainwater

Rather than using tap water to water your chilli plants, you can save water by catching rain water in a water butt, bucket or tub. Not only will doing this save water, but it will probably boost your plants health as it is more pure than tap water.

Think Carefully About Pest Control

When you grow chillies from seed, they become vulnerable to pests and disease as soon as they germinate. There are lots of different sprays and products you can use to deal with those problems but many of them could be harmful to the environment.

Whilst they may be labelled as safe to use on plants grown for food, certain chemical pesticides and products contaminate the air, ground and water either immediately or eventually.

Some organic, natural pest products have also been called into question, so they can’t always be relied on. Neem oil, for example, is commonly used to kill pests on plants.

It is, however, considered by many studies as toxic to all insects, including bees and other pollinators, which is bad news for the environment.

The best thing to do to grow your chillies from seeds in a way that is eco-friendly is to do your best to avoid any pests and diseases by:

  • Keep soil moist, but not wet
  • Remove dead leaves and detritus from the plant and soil
  • Always disinfect plant pots and tools between uses
  • Rinse your plants down regularly to remove any pests by water pressure

If you have an issue with pests, you might want to look into biological pest control. Alternatively, do your research on sprays and options you have and use the least harmful product available to you.


Are You Ready For Chilli Planting Season?

Now you know how to grow chilli plants in a way that helps you and the planet, it’s time to use our tips and prepare for chilli planting season!

Soon enough you’ll master how to grow chillies from seeds for crop upon crop of tasty, spicy chillies this season.


Growing Chillies In Pots: Everything You Need To Know When You’re Starting Out

Growing Chillies In Pots

Are you thinking about growing chillies in pots? Yay!
Growing Chillies In Pots

This is an exciting time. What’s not to love about the humble chilli?

Even better, you’re going to get all the satisfaction, mindfulness and self-sufficient gains of growing your own produce.

The only catch is the growing part, but don’t worry, we’ve totally got you covered with these best beginner tips for growing chillies in pots:


First Things First…Why Grow Your Own Chillies In Pots?

Growing any produce takes a little bit of work, so before we give you some great beginner tips for growing chillies, checkout some of the benefits of growing your own little chilli cuties yourself:

Chillies Pack A Healthy Punch

Studies show that chillis contain something called capsaicin, which is thought to decrease inflammation levels and reduce your risk of heart disease. It could even boost your chances of losing weight.

Chillies Work With All Kinds Of Food & Drink

As well as the health benefits of chillies, they also taste delicious, adding a spicy, warming flavour profile to chilli’s, stews, pasta dishes, soups and more.

We particularly love adding warming chilli to a creamy dark hot chocolate when it’s particularly cold. Once you have grown and dried some of your chillies, this spiced hot chocolate recipe is sure to put your tasty produce to good use come winter.

The Environment Benefits From Your Chilli Growing

When you grow your own chillies you actually help the planet. You skip pesticides, shipping and plastic use involved in getting store-bought produce consumer-ready.

Pot Grown Chillies Take Up No Space At All

When you grow chillies in pots and chilli soil you only use up a small amount of space, and can even grow them in your kitchen! So whether you live in a flat, a cottage, cabin or just a dorm room, you can grow your own spicy chilli produce with the space you have.

Gardening Is Great For You

Gardening is proven to be great for your physical and mental health in many different ways, which you can read about in this scientific paper. You don’t have to grow a full veggie garden to get these benefits either. By growing just one chilli plant in a pot you are nurturing both the plant, and your own health.


Beginner Tips For Growing Chillies In Pots

Now you’re super excited for growing chillies in pots, the below tips will help you get the best possible chance of growing healthy, bushy plants that make you plenty of delicious, spicy produce:

Start Early

By sowing your seeds nice and early from the end of winter and as late as the middle of spring, you can enjoy getting chillies sooner, and for longer.

Don’t Grow From Seed If You Lack Time & A Hot Spot

When you start growing chillies in pots, growing chilli from seed is a great idea if you have a nice, sunny, hot growing space that gets maximum sunlight in your home/ greenhouse or polytunnel. If you live in a very hot climate, you can also grow chillies outside.

If you do not have a bright, hot space for growing your chillies from seed, they could end up stunted or weak as seedlings. Rather than struggle with weak chilli plants, skip this part of the growing process and purchase some young, strong chilli plants from a local grower or garden centre in spring.

Give Your Plants All Of The Nutrition

One of the best ways to create strong, fantastic chilli plants when growing chillies in pots is to use the right chilli soil for growing. You’re looking for nice loose soil that supports the plant without compacting or clumping, especially after watering.

At the beginning of the growing process you actually want to use nutrient-poor soil because those nutrients can hinder the growing process. Once you have an active plant, you can then use a more nutrient-rich soil with the following components to support your plants:

  • 75% tomato soil
  • 10% vermiculite
  • 10% perlite
  • 5% sand or fine gravel

You can also purchase chilli soil yourself ready made if that is easier for you when you prepare for growing chillies in pots.

You can then fertilise your plants with a chilli plant fertiliser or diluted fish, seaweed or diluted Epsom salts (once they are established) throughout the growing process.

Always follow the instructions of the fertiliser manufacturer for the best results.

Top & FIM (Fudge I Missed) Your Chilli Plants

When your plants get to around 8 to 10  leaves in size it is time to get your pinch on. By pinching the tips of any new shoot tips that come through you encourage extra branches, which makes a bushy plant that produces lots of yummy chillies.

Experts recommend cutting across (the FIM method) and also cutting the top off the plants. You can checkout how to do both of these methods to your plants in this handy video.

Work With Your Local Climate

Some people grow chillies indoors, some people grow them indoors then move them outdoors, some people have polytunnels and some people can grow chillies outdoors from scratch.

The best way for you to start growing chillies in pots depends on your local climate, and perhaps the outdoor space you have.

Where your chillies will do best in their pots depends on your local climate and by speaking to local growers and gardening clubs, you can best tailor a growing plan for your chillies that works best.

Don’t Be Put Off By Pests & Disease

As a beginner grower it is so easy to feel defeated by all the diseases and pests that seem so desperate to destroy your plans for growing chillies in pots.

Although it can be really difficult to continually find a new pest or problem with your plants, the great news is that there are all kinds of methods, products and practices to combat the attacks.

As a general rule, checking your plants daily (ideally with a loupe or a magnifying glass) will help you catch any problems nice and early, before they overwhelm the plant.

“To nurture a garden is to feed not just the body, but the soul.” – Alfred Austin

Growing your own chilli plants has so many benefits, it has to be worth a try!

Using our tips above, you can get the very best out of your chilli plant growing endeavours, growing chillies in pots that are strong, healthy and delicious this year, and hopefully for many more growing seasons to come.


Easy to Grow Trinidad Scorpion Pepper

Trinidad Scorpion Pepper

Trinidad Scorpion PepperWhen it comes to the world’s hottest pepper that can give you goose bumps and turn you red, nothing can beat Trinidad Scorpion pepper (also called the Trinidad Moruga scorpion pepper). This exceptionally hot chili pepper is especially grown in Australia and is a Capsicum Chinese cultivar.

The Trinidad scorpion pepper is one of the hottest peppers in the world. As is evident from the name, this species is indigenous to Trinidad and Tobago, hence sometimes referred to as the Trinidad Moruga Scorpion pepper.

Being one of the world’s hottest peppers, it finds its use in a number of chili sauce companies. The pointed ends of the pepper apparently resemble a scorpion’s stinger and hence the name scorpion.

This chili is so hot on the pepper scale that you might have to wear protective gear while using this in your food. Without wearing gloves, you might have to endure pumping heat for a couple of days. Also, if you eat this spicy pepper, you can feel your mouth going numb.

Trinidad Scorpion Pepper Uses

  • Trinidad Scorpion contains capsaicin that is of immense use for people suffering from skin disease like psoriasis to inflammation and itching.
  • This ingredient also helps in suppressing appetite, according to some research.
  • Capsaicin also helps in preventing the growth of prostate cancer cells.
  • This is also used to cure arthritis pain as well as neuropathic pain.
  • This red hot chili can also be beneficial for curing and treating ear infections. According to a study, this also helps in treating heartburn.

How to Grow Trinidad Scorpion Pepper

Trinidad Scorpion Pepper

If you are ready to grow some of the reasonably spiciest and hottest peppers in your backyard, then you should definitely go for Trinidad Scorpion pepper. Also, you can easily grow this pepper in your garden and take up this exciting project.

The process is not at all complicated and mainly involves planting, watering and harvesting. All the more, growing Trinidad Scorpion chili is an easy and inexpensive project.

  1. So, as an initial step, you need to fill up a tray with Trinidad Scorpion seeds. Plant the hot chili pepper seeds carefully at a depth of ¼ inch in the tray. You have to plant them almost 10 weeks prior to the last expected cold frost. Following this, water the pepper seeds properly with hot or lukewarm water right after planting the seeds.
  2. Your next step would be to place this tray somewhere with a temperature of 85 degrees F or 30 degrees C and with sound air circulation. The tray should be uncovered. At this chili sprouting stage, temperature becomes more important than light. Hence, place the tray in a dark area. Maintain moisture around the young plants and seeds. The chili pepper soil should not be soggy or wet.
  3. After the Trinidad scorpion seeds have sprouted, move the seedlings to somewhere where they can get access to 10 hours of sunlight. Here, maintain a temperature of 70 degrees F or 22 degrees C.
  4. Now, plant the chili seedlings in your backyard 2 weeks following the last cold weather. By now, the plants must have grown to 12 inches high. The planting bed should get complete sunlight and the temperature should be between 60 to 95 degrees F or 15-35 C. If there are hotter areas in garden, put the growing chili peppers in shade. Maintain a space of 2 feet between the pepper plants in the planting bed.
  5. Now it’s time to fertilize the chili peppers sprinkle granular fertiliser (5-10-10) alongside the rows of chilli plants after they have blossomed. Fertiliser will provide the essential nutrition for the pepper plants to grow fully.
  6. To water your chili plants do so in the early evening or in morning, water your pepper plants well with sprinkler or watering can to simulate rainfall. Maintain dampness in the soil without getting them soggy.
  7. The final stage is to harvest your chili peppers which can occur approximately 40-100 days following the planting of the chili seeds. By now, the young peppers will grow green, yellow and then red. So, now they are ready to be picked.

For best results, provide rainwater or non-chlorinated water to your chili pepper plants. However, care needs to be taken while planting the hot pepper seeds. It’s highly necessary to wear latex gloves and wash hands with soap after planting them.