Growing Chillies – Bhut Jolokia Worlds Hottest Pepper – Part 2

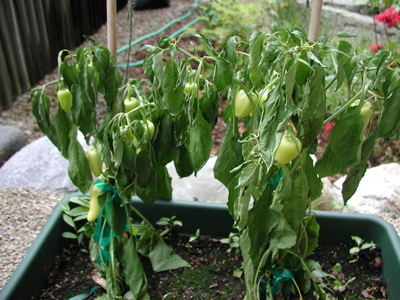
Bhut Jolokia Plant
Bhut Jolokia Sprouts

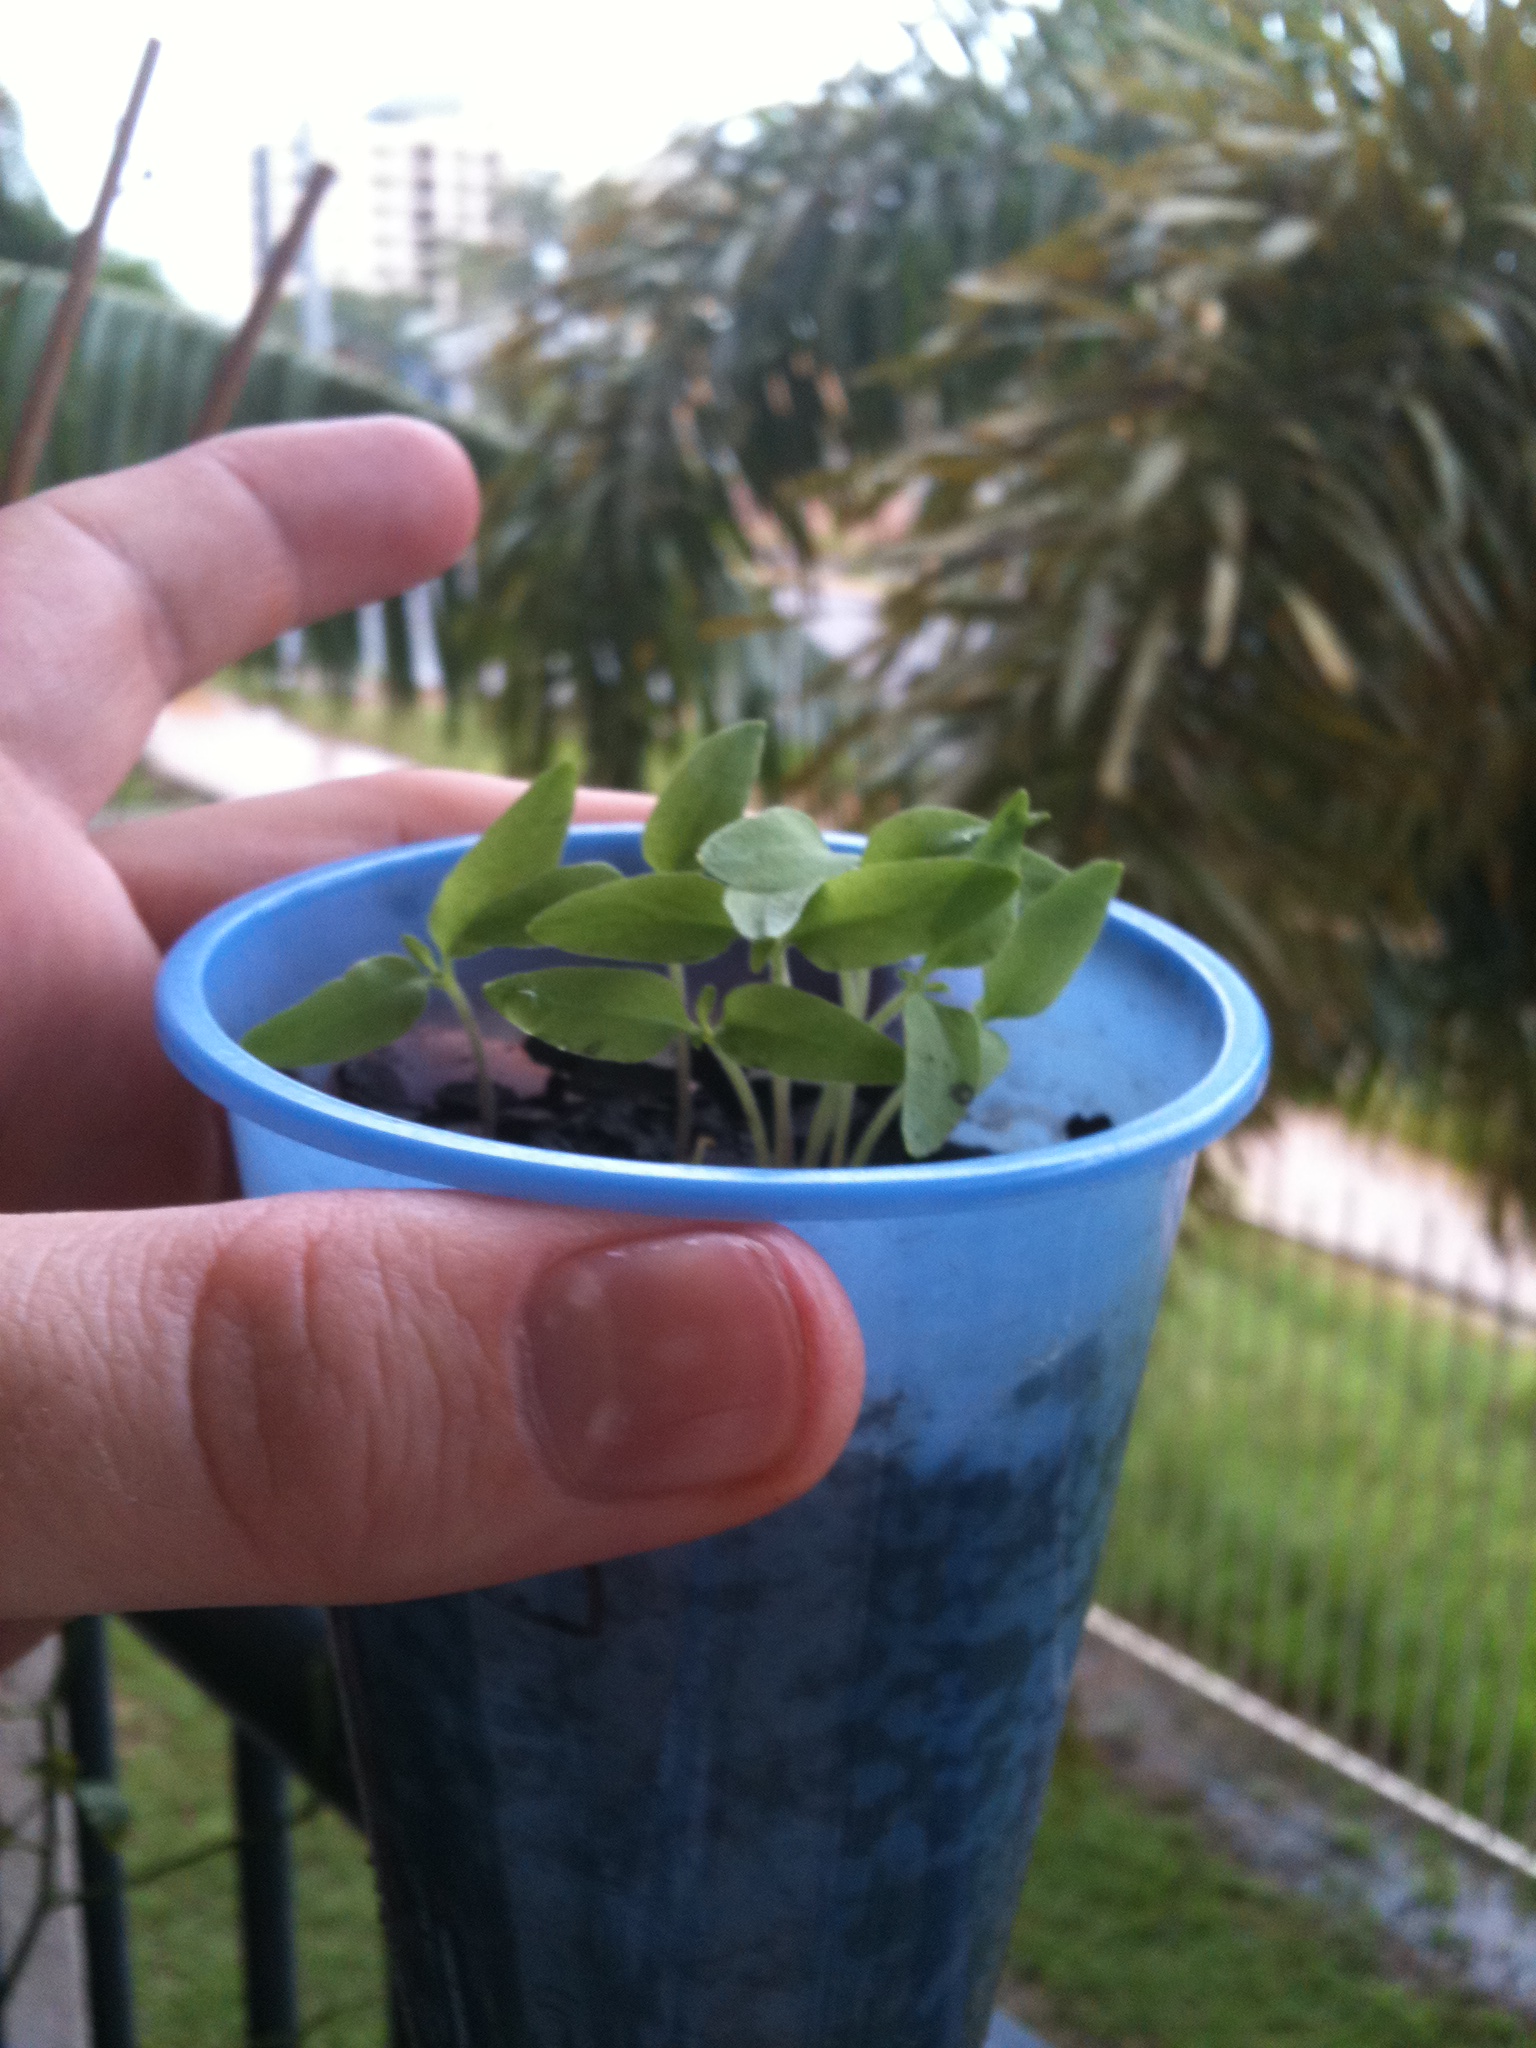
After a long week wait and constant watering the Bhut Jolokia Seeds a single sprout emerged. I was a bit upset to see just 1. After reading my notes on the plant I then decided to leave the sprout and seeds as is and watered waiting for more sprouts to hopefully emerge. I’m glad I did because as the days past I noticed more and more green shoots popping out of the soil. Our Bhut Jolokia plants life has begun.

In fact these leaf looking things are called cotyledons which is part of the seed and serve as food sources until true leaves form. While the plant has no true leaves its not ready to move. I waited another week before i started to notice true leaves growing.

While the chili plant is growing its true leaves the cotyledons are no longer needed, therefor it will die and drop off. This is when the plant begins to photosynthesis (the process that converts carbon dioxide into organic nutarians, using the energy from sunlight) so the sprout container must be moved into a sunny area.

Once the sprouts are healthy with 4 leaves its time for the next big step. We must transplant the young chili trees into their adolescent pots. Choose a pot that is 3-5 inches tall. This will be the plants home for the next couple of months and will allow the growing chili plant to establish a solid root system and grow.

Transplanting a chili plant is delicate work as they are quite fragile especially at this young age. Ensure you minimize the root disturbance when you are separating the sprouts and if there is too much of a tangle it is best to choose the strongest looking ones and chop the other sprout. Do not transplant during the hottest part of the day, pick a cool time such as late afternoon.

Once the chili plants are setup in their new pot and had a few days to settle down fertilization is essential. Use a balanced fertilizer preferably one high in nitrogen and potassium, to encourage good roots and healthy growth.

Going forward the plant should be slowly introduced to full sunlit conditions. The Bhut Jolokia plant will need lots of sunlight and a daily watering. The next step we will need to take is move the plant to a bigger pot but this wont be for 2-3 months.

Follow my steps for transplanting your seedlings.Bhut Jolokia Sprouts

1. Ensure you have setup some new pots for the young plants, they should be about 3-5inches tall to accommodate a few months of growing. It needs to be filled with a good potting mix with plenty of drainage.
2. Loosen the soil that is currently holding the chili plants, do so by squeezing the containers sides. Once loose enough you should be able to carefully tip out the young chilli sprouts.
3. Thin the sprouts if you can but be gentle, if you cant separate the chili sprouts your better off cutting the less healthy looking ones then damaging the roots of all.
4. Only handle the leaves of the chillie plant, the stem is very fragile and if injured will end the plants life, leaves will always grow back.
5. Make a hole in the soil of the new pots with your finger big enough for the sprouts to be placed in. Carefully move the chili sprouts into the new pot and lightly pack the soil in so the plant is held firmly and in a upright position.
6. Water the plant well and and put in a calm but sunny place.
7. A week later fertinilise with a high in nitrogen and potassium product.

Bhut Jolokia Plant

How to make Paprika

How to make Paprika

Paprika is a spice made from the grinding of dried fruits of Capsicum annuum (eg. bell peppers or chili peppers). Paprika is said to be derived from the Hungarian ‘paprika’, meaning pepper (Capsicum).

How to make Paprika

Although paprika is now recognized and produced globally it was first created in Spain and Hungary. Spanish Paprika (Pimentón) is available in three versions, mild (Pimentón Dulce), moderately spicy (Pimentón Agridulce), and very spicy (Pimentón Picante.)

Some Spanish paprika, including Pimentón de la Vera has a distinct smokey flavor and aroma as it is dried by smoking, typically using oak wood.

Paprika is found in most supermarkets around the world. The chili spice is used in many cuisines to add color and flavor to dishes. Paprika can range from mild to hot depending on the peppers used in production.

Paprika varys in colors from bright reds to browns and even yellows thus making it a excellent garnish. Slightly heating paprika with oil will extract the heat from the spice and can add a great punch to a dish. Paprika is also very high in vitamin C even more so then oranges.

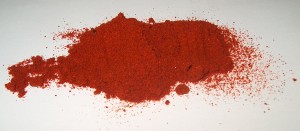
To produce paprika from chili peppers you first must dissect the chili peppers to remove the seeds and stems. Once the chili fruit is isolated you will need to dry the fruit until the skin is extremely dry and brittle.

The peppers then need to be worked into a fine power. Use tools such as mortar and pestle or coffee grinder for this process.How to make Paprika

How to Grow Chillies – Bhut Jolokia Worlds Hottest Pepper – Part 1

Bhut Jolokia

This guide will follow the exact steps I took to grow the Bhut Jolokia. From obtaining the chili seeds to harvesting the first fruit. It should take 4-6 months for the process to be complete and we encourage you to join along with your favorite hot chili.

Thanks to Auki Henry co-founder of HighRPM and the maker of How to make a cosmopolitan for his kind donation of the Bhut Jolokia chili. A nice big fat chili was given to me to remove the seeds and start the growing chili process.

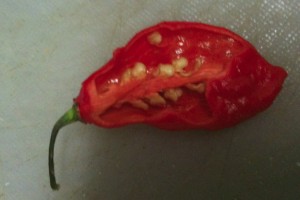
The first step was to cut the chili in half to get the Bhut Jolokia seeds. Great care was taken not to get the chili oils or seeds on my hands. Handling was done from the stem only and a sharp knife was used to remove the bhut jolokia seeds. This was a simple process which involved cutting the chili in half then cutting out the seeds.

WARNING: the Bhut Jonokia / Naga Jonokia is the world’s hottest pepper. The Scoville Scale rating is 1million Scoville Units. Extreme care must be taken to prevent contact with the eyes and other sensitive areas. Handing the chili or the seeds should be avoided and if you need to do so wear disposable gloves.

Bhut JolokiaOnce the seeds were extracted from the chili we had to soak them in water for 20min. This will make the seed softer and water the inner seed to start the growing process.

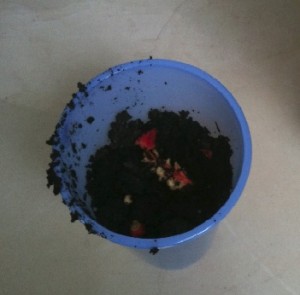
Once the seeds were nice and wet they were ready to plant. We simply used a plastic cup filled with normal potting soil to germinate the seeds. We placed the seeds in the cup and covered them with no more then 5-10mm of soil. We watered the seeds well and ensured all the soil was moist. Keeping the soil moist in the next week or so is vital. The seeds need water to grow and the seeds must stay soft so that the sprout can break out and start to grow.Bhut Jolokia

for the germination process we recommend placing the chili seeds in the most warm and humid location as possible, but not in direct sunlight.

We hope to have half a dozen sprouts penetrate the soil in the next 7-10 days. Please return to the site to see the next installment.

Happy chili growing readers.

Growing Chili Secrets – Fish Emulsion Fertilizer

Fish Emulsion Fertilizer

One of the biggest aids we have encountered when growing chillies is fish emulsion fertilizer.Fish Emulsion Fertilizer

We recommend fertilizing the chili plant every 2 weeks up from the time of germination to when the plant just starts to fruit.

How to Use Fish Emulsion Fertilizer

For best results with the fish emulsion we would suggest these steps.

  1. Ensure that the chili plants had a very good watering the previous day or that morning as we will cut down on water over the next 2 days.
  2. Mix the fish emulsion as per packet instructions.
  3. Water the chili plants at the base with the liquid. Ensure a generous amount is used as this is the plants only drink for the day. Also make sure that the liquid soaks through he soil to the roots so they can consume all the nutrients.
  4. The following day water the plant lightly trying not to disrupt the soaked in fish emulsion mixture under the soil. Feel free to give the foliage a good spray with water though.
  5. Resume normal watering daily.

As said we would only suggest doing this every few weeks. Results we have noticed is the following days after fish emulsion is added that the plants really wake up and grow, they appear greener and fuller and vibrant, it’s amazing when you go outside and notice it.

Do not fertilize while the plants are fruiting.

Also note the fish emulsion has a foul smell, try not to get it onto your hands where possible.

Fish emulsion fertilizer can be purchased from local gardening stores, larger supermarkets and retail stores with gardening section. You can also purchase fish emulsion from Amazon which we would highly recommend.

How to Revive Wilted or Dehydrated Chili Plants

wilted chilli plant

Gardening is known to boost your immune system, build you muscles, help you sleep better and protect your memory as you age – to name just a fewwilted chilli plant benefits.

For delicious, hot produce and easy maintenance, what better plant to home garden than a chilli plant?

Of course, things can go wrong if you don’t care for it correctly, with one of the most common issues seen on these kinds of plants being dehydrated chilli and wilting chilli plant leaves.

If your chilli plant is dehydrated the chances are it is wilting and needs some help. Other issues can also cause a chilli plant to wilt.

This article has lots of information and tips to help you get your chilli plant back to full health so that you can continue to enjoy delicious, plump fruits from it all growing season.

Let’s take a closer look at growing chilli plants, and what to do if they are dehydrated and wilting:


Why Do I Have A Dehydrated Chilli?

A wilted chilli plant is quite a sad sight to see, especially when you have nurtured your plant everyday and you have no idea why suddenly it is so droopy and sad looking.

When this happens it is so easy to react with panic, pouring over more water, moving the plant or smothering it in fertiliser hoping for the best.

If this is you – please stop! You can do so much more harm than good acting reactively without rhyme or reason. With a little bit of troubleshooting you have a much better chance of not only understanding why you have a wilted chilli plant, but also understanding how to fix the problem.

Here are some common reasons that you have a dehydrated chilli plant:

The Problem – Your Plant Is Dehydrated

Surprise, surprise, your dehydrated chilli plant is, well, dehydrated! It happens, especially if you don’t have a watering regime or you have under-estimated the amount of water your chilli plant needs.

You can check this out by using your finger to feel the soil down to about an inch or two from the top. If it feels dry for at least the first inch, you have a dehydrated chilli. You can buy special moisture meters for this job but in reality, they aren’t usually made well and nothing beats a finger for checking moisture levels.

The only exception to the rule is with baby pepper plants which can rot if they are too wet, but should stay consistently moist. Ideally, they will never feel super dry and should be consistently tended to, otherwise they may simply fail and dry up.

The Solution – Water & Apply A Watering Plan

It is so common for chilli plants in containers or in areas prone to heat waves to dry out and require more regular watering. If your dehydrated chilli is dry, adjust your watering regime and keep it regular. Irregular watering of chilli plants can leave them stressed and may hinder their growth. If they are without water for too long they will also die.

Chilli plant constantly drying out in the sun? Add a layer of orchid bark on the top layer of soil to keep evaporation rates down.

The Problem – Too Much Water

This is one of the most common issues with plants, caused by helicopter plant parenting – IE tending to the plants too much! It is easily done but it can cause root rot which if caught in time, won’t fully kill the plant. If it isn’t resolved, however, it can completely kill the plant.

The Solution – Prevention & Perhaps Cure

You can prevent root rot by ensuring you keep to a regular watering regime that stops the chilli plants getting waterlogged. They should also have well draining soil which can be made easily by adding about 10% perlite and 10% vermiculite to your compost. As the chilli plant’s roots are shallow it is important not just to concentrate good drainage on the bottom of the pot/ bed and ensure all the soil that surrounds the plant is loose and well-draining.

If you do find your potted chilli plants are constantly wilted and you suspect root rot you can shake off the saturated compost, trim off any brown or mushy roots and then repot the remaining root ball and plant in fresh, dry, well draining soil. For a demonstration, you can check out a video on trimming off roots in this handy Youtube video.

The Problem – Too Much Sun

Even with a great watering regime too much sun can leave a chilli plant looking dehydrated and wilted. The key is to see when the chilli plant looks wilted. If it tends to be in the middle of the day, but when the sun has gone in it is pert again, the sun is the issue.

This happens because of a process called transpiration which is where the plant removes most of the water it sucks up by moving it from the roots to the stems and out through the leaves. This process is natural but it gets sped up in the hot sun to a degree where the roots can’t keep up and the plant ends up wilting.

The Solution – Try Different Things

It might be that this dehydrated chilli problem resolves itself if you’re having a temporary heatwave. If it doesn’t you can relocate your peppers to an area with partial shade so they get some relief. You can also create temporary shade with shade sails special greenhouse netting. If the plant is inside you can simply move it to a less sunny spot.

The Problem – Pests

Pests like aphids can literally suck the life out of a chilli plant, causing what looks like a dehydrated chilli. Diseases like fusarium and verticillium wilt can also cause a chilli plant to look wilted and eventually die. You’ll see wilting, leaf yellowing and generally sad looking chilli plants if they have pests and diseases.

The Solution – It’s A Personal Choice

With pest control it tends to be a personal choice as to how you decide to deal with them. Some people simply rinse aphids off, and others like to use a store-bought product. One thing that is imperative, though, is that the product or homemade solution is suitable for edible crops and that it is environmentally sound.

With fungal diseases again, there are multiple lines of thinking on how to deal with the issue. There is crop rotation, fungicide and container disinfecting – it all depends on the person. The best thing to do is check out multiple trusted gardener sites on Youtube and what they recommend and make a decision based on your own opinions and feelings on the matter. Even better, speak to a local permaculture club member, or gardening enthusiast who will be able to give you their firsthand tips.

The Problem – Too Much Fertiliser

When you give plants too much fertiliser it causes toxicity which burns the roots of the plant and can eventually kill them.

The Solution – Avoid The Problem, Or Rinse In Response

If this has happened and you can see the dehydrated chilli is because of too much fertiliser, you need to work to flush the fertiliser out of the soil quickly. It is important to know your plant could die and you just have to hope that you acted in time.

If you have gotten away with flushing it, the plant may only suffer some blackened leaf tips, but it will survive the ordeal.

To avoid this happening in the first place you should only fertilise the chilli plant when it needs it, and dilute the fertiliser as much as possible. You can find tips on fertilising your chilli in this Youtube video.

The Problem – Pet Toilet

Sometimes chilli plants can become toilets for wild animals and local cats and repeated exposure to urine in the soil can poison the plant. It isn’t very common but it happens.

The Solution – Protect Your Plants

Try to protect the area around the plant with netting or wire so that animals can’t utilise the bedding for their own personal use.

The Problem – Transplant Shock

If you move chilli plants from inside to outside, or a shaded spot to a sunny spot without hardening them off, they could get transplant shock. It means that they either haven’t had a chance to get used to new light and temperature conditions and so you get a wilted chilli plant, or their roots have been damaged when you planted them into a bigger pot or the ground.

The Solution – Prevent The Problem

The best thing to do is to prevent transplant shock happening because there isn’t much you can do once it is occurring, apart from hoping for the best that the plant is going to be OK.

To prevent transplantation shock you should:

  • Gently introduce your plant to it’s new spot for more and more time everyday until transplanting day
  • Try not to fertilise the plant in the run up to transplanting as this processes can make the plant stressed
  • Keep up with your watering regime up to transplanting day as irregular watering can stress the plant out
  • Be gentle when moving the plant from A to B, taking extra care not to damage the roots
  • Water the plant well after transplanting

The Problem – Neem Burn

Lots of people recommend using neem as an organic solution to pest issues on chilli plants. The problem is that neem can cause the plant to burn in the sun because it is an oil.

The Solution – Don’t Use Neem

Neem oil isn’t a suitable pest treatment for chilli plants, for the reason above, and should be avoided even when it is diluted. In addition, some scientific papers suggest neem is very bad for certain insect populations and some feel it isn’t suitable for use in the garden. You may use it in the evenings but if you are particularly sensitive to protecting the environment and avoiding any negative impact from your gardening, it is best not to use this product.


Now You Can Turn Your Dehydrated Chilli Into A Beautiful Healthy Chilli Plant!

With the tips and pointers above you’re ready to plump out those chilli plant leaves and get your crops back to normal. With the right prevention and cure you can avoid a dehydrated chilli plant and instead, enjoy endless spicy chilli fruits to use in your home kitchen all growing season long.


Bonus: Quick First Aid for sick dehydrated Chili Plants

  1. Fill a bucket, sink, container or basin halfway with water. Make sure the container is large enough to fit the entire pot, all the way to and over the rim.
  2. Plunge the whole pot and plant into the water filled container. The water must cover the whole plant even over the pots rim. It’s all right if water covers some of the foliage. You may need to weigh down the pot with a brick or a stone to keep it from floating in the water.
  3. Keep the plant in the container until bubbles stop rising from the soil. Bubbles indicate air pockets in soil and roots.
  4. Keep the plant in the water for at least a half hour after the bubbles stop, to ensure that the soil is completely saturated.
  5. Remove the pot from the container and allow the plant to drain.
  6. Place the potted plant in a plastic bag and close it tightly. This step will provide much needed humidity to the foliage while the roots go back into action. Keep the bagged plant in a shady area so that the moisture doesn’t dry out.
  7. Remove the plant from the bag and move it back to its original location once it has revived. This could take as little as a few hours, or several days. Do not put the plant back into the sun till its looks healthy and green again as the sun will extract water from the plant.
  8. Give the plant some mulch that will hold moisture and humidity. Remember to water your growing chili plants regularly – Once a day is ideal.
  9. Prune any brown leaves or stems as they are now most likely dead and we cannot save them.
  10. Plants in the ground or in pots too big to shift can be treated by pushing the hose as far into the soil around the roots as possible so that it can soak the roots and eliminate any air pockets or dry root balls. Moisten the leaves when watering as it increases humidity around the plants leaves keeping them moist and reducing dehydration.

Mild Chili Plants – Growing Bell Peppers

Growing Bell Peppers

Growing Bell Peppers

The most common pepper species is the bell pepper named appropriately from the physical shape of the fruit. In British English, the fruit is simply referred to as a “pepper”, or additionally by colour eg. Green pepper. In many Commonwealth Nations, such as Australia, India, Malaysia and New Zealand, they are called “capsicums”.

Another name is the sweet pepper because of the sweet taste. Bell peppers are the mildest form of chili’s. They are listed as zero on the scoville scale and don’t emit any heat at all.

Bell Peppers are native to Mexico, Central America and northern South America. Pepper seeds were later carried to Spain in 1493 and from there spread to other European, African and Asian countries. Today, Mexico remains one of the major pepper producers in the world.

Bell pepper plants are vigorous upright plants producing green ,yellow, orange, red and even purple fruit. Bell pepper skins are glossy and deeply colored, with the flesh being crisp and succulent.

Bell pepper plants measure 18-30 inches in height and are generally very productive. The ‘Jingle Bell’ pepper plant produces miniature bell peppers measuring less than 1 inch long. This variety is excellent for container growing. A tray of stuffed miniature bell peppers is delightful.

Growing Bell Peppers

– Plant seeds eight weeks before the last frost indoor using a pot that is at least 2 inches or slightly larger.

– Transplant young seedlings in the ground or a pot outdoors after the last chance of frost. If the weather is still cool, delay transplanting for a few days. Wait until the soil is 70 to 85 degrees before setting the seedlings out.

– Space the seedlings 9 to 12 inches apart and in rows 12 to 24 inches apart.

– Water the plants regularly, especially in the hot, dry summer months. Pepper plants like moist soil. If you do not water enough, the bell peppers will acquire a bitter taste or even worse get frail and die.

– Surround the peppers with mulch to keep weeds from growing and to retain moisture.

– Harvest the bell pepper at any point after they reach an edible size. Most bell pepper peppers are green when immature and can be harvested at that time. Mature bell peppers can be red, orange, yellow, green or purple depending on the variety. Continue to harvest bell peppers by clipping them off the plant. Bell peppers will continue to grow until the first frost.

growing bell peppers

Bell peppers are delicious eaten fresh in green and pasta salads, and make a wonderful addition to spaghetti sauce. The fruit is also frequently consumed in its unripe form, when the fruit is still green. Green peppers are less sweet and slightly more bitter than red, yellow or orange peppers.

The taste of ripe peppers can also vary with growing conditions and post-harvest storage treatment. The sweetest are fruit allowed to ripen fully on the plant in full sunshine, while fruit harvested green and after-ripened in storage are less sweet.

Compared to green peppers, red peppers have more vitamins and nutrients and contain the antioxidant lycopene. The level of carotene, another antioxidant, is nine times higher in red peppers. Red peppers have twice the vitamin C content of green peppers

Stuffed Bell PeppersGrowing Bell Peppers

One of the most common bell pepper recipes Stuffed Bell Peppers. Dad’s Stuffed Bell Peppers is a very good post detailing how easy and great this disk is to make. I would highly recommend give it a crack.

Buy Chili Seeds

View our Chilli Seeds and other related items!!!

Welcome to Growing Chillies

Growing Chillies

Growing chillies is easy and fun. Young kids to elderly people can grow chillies with minimal effort. Growing chillies does not require much time to mature and you are able to harvest the fruit which makes them a ideal starting plant for your home garden.

Chillies thrive in warmer climates but can grow in colder places also. I have friends in North Europe who grow them on their windowsill to get maximum warmth.

Growing Chillies

Growing chillies means that there is always fresh fruit available for your favorite spicy cooking dish and it’s always a nice gesture to give a friend a few chilies.

Chillies can be grown from simply collecting the seeds from the chillies you would buy at the local supermarket or grocer. it is however recommended that you purchase chili seeds from a specialize store to maximize your results.

There are thousands of different types of chillies and choosing the right ones to grow for your climate and taste is essential.

Chili plants don’t take up much space and can be grown in a pot or in the garden. You can grow them if you live in apartments. We currently have 3 chili pots and our balcony is no bigger then the average family car.

Things to look out for when growing chillies is that the stems are quite thin and sometimes fragile, sometimes you need to aid them with a support stick or something to lean against. Humans are not the only creatures that want to consume chillies. Grubs and other insects like to feed on the leaves and must be dealt with accordingly.

Everything You Need To Know About The Scoville Scale

Scoville Scale

If you love a spicy hot chilli pepper you have no doubt seen or heard of the Scoville Scale before. The higher the amount on the scale, the hotter yourScoville Scale chilli.

As you, like many of us, have been busy enjoying the sumptuous heat of hot chilli peppers you may not have paid much mind to how their heat is measured using this scale.

We know it measures the heat, but how does it do it? How was it invented? Which is the hottest chilli on the scale?

So that you can feel much more clued up on the Scoville Scale, we’ve collected all the information you need to know about it and more:


Scoville Scale – The Measurement of a Chillies Heat

The Scoville scale is the world recognized scale for measuring the heat in chillies and other peppers. The scale was created in the early 1900’s by Scoville Scale pharmacist Wilbur L. Scoville.

Scoville’s method was simple, yet very effective. He soaked each different variety of pepper separately in alcohol overnight. Because capsaicin is soluble in alcohol, the soaking extracted the pungent chemicals from the pod.

He then took a precise measure of the extract and added sweetened water in incremental portions until the heat was barely detectable on his tongue.

This process was groundbreaking in measuring the heat of chillies and no other method has been found to be as effective, which is why the Scoville Scale is still used today, albeit in a different processing format.

Scoville Heat Units (SHUs)

An SHU is the actual number assigned to the heat of a pepper. A chilli with a rating of 0 Scoville Heat Units (SHUs), means that there is no heat detectable.

As an example, in the case of Japanese chillies, it took sweetened water in volumes between 20,000 to 30,000 times the pepper extract before the heat was barely discernible.

The Scoville Scale then rated the Japanese chillies 20,000 to 30,000 Scoville Heat Units. Jalapenos were rated 3,000 to 5,000, and Tabasco 30,000 to 50,000.

The hottest chilli Scoville tested was a naga jolokia which is primarily found native to Bangladesh, which he measured at a massive 850,000-1,000,000 Scoville units.

Scoville’s name has since become closely associated with the measure of pungency (heat), but the oral test is now being slowly replaced by a modern machine.

Using High Pressure Liquid Chromatography, analytical chemistry has now replaced the testing that used to be performed by the sensitive human tongue and, unlike Scovilles original method, numerous tests can be conducted each day.


Which Chillies Should I Grow Based On The Scoville Scale?

When you are considering which chillies to grow based on the Scoville Scale, there are two main factors to consider.

One consideration is what you want to grow the chilli plants for. If you want to grow them to eat, the chances are that there will be a cap as to how hot you like your chillies. Most people love chillies around 2,500 – 8,000 on the Scoville Scale such as the jalapeño, which is fresh, crunchy and delicious.

If you want to go a little hotter, the Serrano chilli pepper is a good choice, although it can reach 23,000 on the Scoville Scale in heat.

True lovers of super hot chillies will move towards the Habanero which can top 200,000 on the Scoville Scale or more.

If you want to grow chillies to sell or make products from, there are two directions to go in. One direction is making hot products most people will love, in which case peppers with good flavour and less overall spice like yellow hot peppers, jalapeños and the like will be a good choice.

If you’re going for the novelty factor, then you should choose the hottest peppers you dare grow, like the Carolina Reaper, which gained much notoriety after the one chip challenge became so famous a few years ago.

The Carolina Reaper can reach over 1.5 million SHU on the Scoville Scale.

If you do want to grow very hot peppers, you have to consider various growing factors that come with growing a product like this.

Handling, for example, of the peppers has to be done with gloves and precautions as to not touch your eyes or skin whilst handling the products.

You may well also have to include a warning with the peppers if you do sell them or products containing them.

They can cause some pretty strong reactions and it is important that anybody buying your produce understands the risks involved in consuming this kind of chilli.


How Hot Will You Go On The Scoville Scale?

Hot chillies are delicious, and knowing where on the scale your favourite peppers sit is really interesting.

There will be many more types to try in the future too, as more and more people have been trying to grow chillies that top the hottest chilli on the Scoville Scale to top the current Guinness World Record holder for hottest chilli – the Carolina Reaper.