How To: Everything You Need To Know About Growing Peter Peppers

Peter Peppers

Peter Peppers are a cutely named pepper that have a phallic shape, so they can be appreciated for both novelty value and flavour. Whether you wantPeter Peppers to grow these cool looking fruits, try them, or you’re just interested in knowing more, we’ve put everything together so you can get the complete lowdown on Peter Peppers.

Let’s take a closer look at these phallic fruits:

 What Is A Peter Pepper Chilli?

A Peter Pepper Chilli is also known by its Latin name – Capsicum Annuum Var. Annuum, or as the penis pepper or willy pepper. It is a Capsicum Annuum chilli type, although it hasn’t been given that official status as of yet as a cultivar of the Capsicum Annuum family.

You can find the pepper growing in Texas and Mexico commonly, as well as some parts of Asia. You can also grow your own Peter Peppers if you want to either in your garden (if you live in a hot climate), in a greenhouse or indoors in a sunny spot.

Peter Pepper Appearance

The Peter Pepper is most known for its appearance, rather than its flavour. It looks like a penis, which gives it a really interesting, and novel look. It is so detailed, in its penile features that it has won an award for being the ‘Most Pornographic Pepper’.

For that reason, the Peter Pepper is often recommended as a plant for display rather than for culinary uses, although you can pickle the fruits.

Pickling Peter Peppers

Pickling peter peppers sounds more like a nursery rhyme than an activity, but it really is possible if you want to make the most of these phallic fruits. You can find easy directions on pickling your chilli peppers in this Youtube video. You can also enjoy Peter Peppers in multiple cooking applications like hot sauce or marinades.

It sits at about 6 times hotter than the average jalapeño, somewhere around the 5-30,000 mark on the Scoville Scale depending on the type. It is similar to the Serrano in that respect but is less meaty and dense in texture making it a great choice for drying, as well as using it freshly prepared.

How To Grow Peter Peppers

You can grow your own peter peppers for fun or for use in cooking. As it is so rare, you may wish to grow this type of pepper if you have prior experience with growing peppers, or if you have the seeds or starter plants at a good price.

Otherwise, cheaper plants or easier-to-come by chilli peppers like jalapeños or serrano chillies could be a better choice.

If you are growing your own peter peppers there are some easy steps to follow to get a great fruit yield:

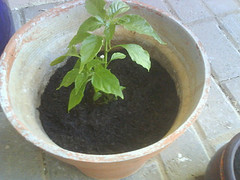
  1. Around two months before the last frost in your area, plant seeds in potting soil that has been moistened, and keep temperatures above 75 degrees but no higher than around 95 degrees. It is best to keep your seed starts indoors at this point.
  2. Water the soil whenever the surface seems dry and ensure good circulation around your containers particularly when the seeds have germinated.
  3. Once around four leaves have grown you can transplant your starts into larger containers. You’ll want to expose plants going outside to filtered sunlight for a couple of weeks before they go completely out. If growing in pots indoors, plants can be placed in their ‘forever home’ right away.
  4. Create enough space outdoors to plant the chilli pepper plants around 50 centimetres apart. Alternatively they can be placed in individual pots as single plants.

Extra Growing Tips

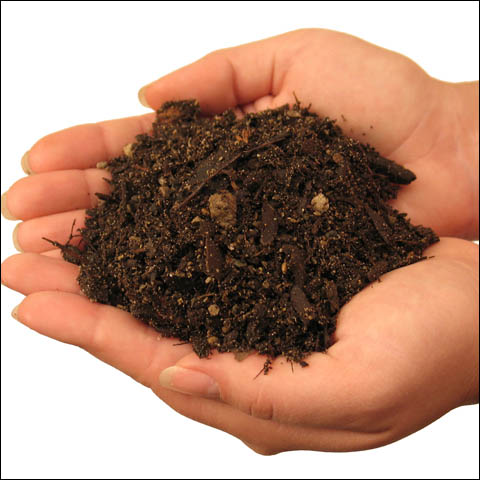
To grow your peter peppers effectively it is important to grow it in the best soil for chilli peppers. The soil has to be loose, because hot peppers have shallow root systems.

Plenty of perlite (about 10%) in the mixture will help with this, although it is important not to add too much otherwise the water will drain too quickly through the soil and the plant won’t get the nutrients it needs. Vermiculite (about 10%) can help with this issue as it helps to retain nutrients in soil.

If you mix compost into the soil you grow your chillies in they should have plenty of nutrients to help you grow lots of delicious peter peppers. However, if you cannot add compost there is always fertiliser to do the same job.

Magnesium surface and bone meal are a great option to add to the soil when you plant the peppers out from their germination pots. You could also add these nutrients again when the plants show signs of fruiting. Otherwise, you shouldn’t need to add fertiliser more regularly than this.

Lastly, you’ll want to master pruning your peter pepper bushes to make sure they grow as bushy and fruitful as possible. We recommend checking out this pruning video so that you can follow step by step instructions to get your plants in great shape for the growing season.

Will You Be Growing Your Own Peter Peppers This Growing Season?

Now you know everything there is to know about these wonderful willy shaped peppers.

Whether you want to eat them or just marvel at their novelty appearance, peter peppers sure are unique as a table piece, gift or growing project.


Soil For Chilli Plants

soil for chilli plants

Although chillies can be grown in many varieties of soil and we have compiled some of the best soil for chilli plants to get your chilli plants grounded and fruiting consistently. soil for chilli plants

Growing Chillies in a pot lets you build and maintain the optimal soil conditions. When is the last time you have seen chillies grown in swamps…NEVER!!

Chillies plants are quite fragile and need good draining soil. The top layer of the soil should be a light but moisture holding mulch. Topping up the mulch every 4 weeks or so will keep the nutrition running through the chillies roots.

To Grow Chilli choose a soil or mulch that is higher in potassium. Chilli plants fruit better when potassium is slowly feeding through the roots and plant. Try to avoid nitrogen as the plants will grow soft leaves and minimal fruit will be produced.

If you really want to make your chillies thrive and fruit well as soon as the plants start growing little flowers place some premium organic soil or fertiliser on top of the pot. If you’re on a budget any multipurpose compost is will help out.


soil for chilli plants

Remember that Growing Chillies requires regular watering, once a day they must be watered to keep the soil moist and the roots nourished. And don’t forget Growing Chillies in sunlight will keep them at optimal health.

Grow Chilli – Peter Peppers

growing-chillies-peter-peppers

You have to see this to believe it. Peter Peppers are a conversational piece to say the least!!!!
The peter pepper chilli pods look like “a man’s private parts”. Hence why they are known as the Penis Pepper and Chili Willy.


This chilli is quite rare and comes from the southern states of Louisiana and Texas.

Peter Peppers are listed as a medium heat on the scoville scale ranking. Peter peppers are 5,000 to 30,000 Scoville Units which is hotter than Tabasco and even more hotter than the Jalapeno.

[ad]

Characteristics of the Peter Pepper Plant
Plant height up to 3 feet
Stem color Green
Leaf color Green
Fruit color at maturity green and red
Fruit shape conical
Fruit length 2-4inches
Fruit width at shoulder 1inch
Fruit surface shaped

Peter peppers seeds can be purchased and grown within 6-7 months. Germination tips, soil tips and all other growing chillies from seed guides are available from growing chillies. As with all chillies they need regular watering and plenty of sun for optimal results.

Willy Peppers Chili Pepper

Peter Peppers are a defiant must for the chilli growing enthusiast. They would make great presents for a fellow gardening enthusiast also. Purchase some peter pepper seeds today and let us know how your plant went.

Check out our great range of chili seeds!!


Growing Peppers – Tabasco Pepper

Tabasco Chillies

One of the world’s most recognised chillies is the Tabasco. It’s no doubt that Tabasco is most famous for the sauces that these chillies are made into. This is possible because Tabasco peppers are not dry, the inside of the fruit is wet. Tabasco chilis rate between 30,000 and 50,000 on the scoville scale.

The Tabasco plant is quite distinctive as its very bushy and unlike most chilis the Tabasco fruits grow up rather then hanging down from the stems.

The Tabasco peppers grow to about 4cm and change colour from light yellow and green to orange then eventually ripen at a bright red colour.

Characteristics of the Tabasco bush
Plant height – 4-5 feet
Stem color – Green
Leaf color – Green
Leaf size – medium
Fruit color – light yellow and green to orange and bright red at maturity
Fruit shape – long and conical
Fruit length – 4cm
Fruit width at shoulder .5 cm
Fruit surface smooth

Tabasco Planting tips

Tabasco chillis like most other chillies grow best in warmer weather. People in colder climates should plant the seeds indoors in a warm spot during the winter month. The seeds will germinate and start to grow. When the winter is over the plants can be moved outside ready for the spring and summer months.

When potting Tabasco plants make sure that there is good water drainage. They also like sandy soil conditions so don’t be afraid to add in some sand.

Regular watering is required and if ensure the Tabasco plant has good sunlight and daily watering you should see fruits appear in about 120 days.

Once you have some Tabasco chillies try to make some Tabasco sauce. A simple recipe is provided.

[ad]

Homemade Tabasco Sauce

Ingredients:
1 pound fresh red Tabasco peppers, chopped
2 cups distilled white vinegar
2 teaspoons salt
1 clove garlic (optional)
Directions:
Combine the chiles, garlic and the vinegar in a saucepan and heat. Stir in the salt and simmer for 5 minutes. Remove from the heat, cool, and place in a blender. Puree until smooth and place in a glass jar. Allow to steep for 2 weeks in the refrigerator. Remove, strain the sauce, and adjust the consistency by adding more vinegar if necessary.

Check out our great range of chili seeds!!

Growing Pepper – Habanero Chili

Habanero Chilis

The Habanero chili is one of the worlds hottest peppers!!! The chili’s name  derived from the name of the Cuban city of La Habana, which is known as Havana in English. Although it is not the place of origin, it was frequently traded there. Mexico is the largest consumer of this spicy ingredient but its flavor and aroma have become increasingly popular all over the world.

The Habanero chili most likely originated in the Yucatán Peninsula of Mexico and even to this day the crop is most widely cultivated there. In fact about 1,500 tons of Habaneros are harvested each year in Mexico. Panama, Costa Rice and several states in the USA also grow and produce the chilly. It is often mistakenly referred to as the hottest pepper in the world and once upon a time it was until the mighty Bhut Jolokia came along! Habanero chili peppers are rated 200,000–350,000 on the Scoville scale.


A ripe habanero is 2–6 centimetres (0.8–2.4 in) long, 3-5cm (1 to 2 inches) in diameter and they are lantern-shaped, round or oblong. Habanero’s are green until maturity when they then turn to colours such as orange, red, white, brown, and pink.

Habaneros are similar to most other chilies and thrive in hot weather. Morning sun is ideal with slightly moist soil. In tropical regions the Habanero is one growing chilli that can produce all year round. Colder climates the plant will die off in the winter.

The Habanero’s heat, its fruity citrus-like flavor, and its floral aroma have made it a popular ingredient in hot sauces and spicy foods. In some cases, particularly in Mexico, Habaneros are placed in tequila bottles for a period ranging from several days, to several weeks, to make a spiced version of the drink.

Check out our great range of chili seeds!!

Easy to Grow Trinidad Scorpion Pepper

Trinidad Scorpion Pepper

Trinidad Scorpion PepperWhen it comes to the world’s hottest pepper that can give you goose bumps and turn you red, nothing can beat Trinidad Scorpion pepper (also called the Trinidad Moruga scorpion pepper). This exceptionally hot chili pepper is especially grown in Australia and is a Capsicum Chinese cultivar.

The Trinidad scorpion pepper is one of the hottest peppers in the world. As is evident from the name, this species is indigenous to Trinidad and Tobago, hence sometimes referred to as the Trinidad Moruga Scorpion pepper.

Being one of the world’s hottest peppers, it finds its use in a number of chili sauce companies. The pointed ends of the pepper apparently resemble a scorpion’s stinger and hence the name scorpion.

This chili is so hot on the pepper scale that you might have to wear protective gear while using this in your food. Without wearing gloves, you might have to endure pumping heat for a couple of days. Also, if you eat this spicy pepper, you can feel your mouth going numb.

Trinidad Scorpion Pepper Uses

  • Trinidad Scorpion contains capsaicin that is of immense use for people suffering from skin disease like psoriasis to inflammation and itching.
  • This ingredient also helps in suppressing appetite, according to some research.
  • Capsaicin also helps in preventing the growth of prostate cancer cells.
  • This is also used to cure arthritis pain as well as neuropathic pain.
  • This red hot chili can also be beneficial for curing and treating ear infections. According to a study, this also helps in treating heartburn.

How to Grow Trinidad Scorpion Pepper

Trinidad Scorpion Pepper

If you are ready to grow some of the reasonably spiciest and hottest peppers in your backyard, then you should definitely go for Trinidad Scorpion pepper. Also, you can easily grow this pepper in your garden and take up this exciting project.

The process is not at all complicated and mainly involves planting, watering and harvesting. All the more, growing Trinidad Scorpion chili is an easy and inexpensive project.

  1. So, as an initial step, you need to fill up a tray with Trinidad Scorpion seeds. Plant the hot chili pepper seeds carefully at a depth of ¼ inch in the tray. You have to plant them almost 10 weeks prior to the last expected cold frost. Following this, water the pepper seeds properly with hot or lukewarm water right after planting the seeds.
  2. Your next step would be to place this tray somewhere with a temperature of 85 degrees F or 30 degrees C and with sound air circulation. The tray should be uncovered. At this chili sprouting stage, temperature becomes more important than light. Hence, place the tray in a dark area. Maintain moisture around the young plants and seeds. The chili pepper soil should not be soggy or wet.
  3. After the Trinidad scorpion seeds have sprouted, move the seedlings to somewhere where they can get access to 10 hours of sunlight. Here, maintain a temperature of 70 degrees F or 22 degrees C.
  4. Now, plant the chili seedlings in your backyard 2 weeks following the last cold weather. By now, the plants must have grown to 12 inches high. The planting bed should get complete sunlight and the temperature should be between 60 to 95 degrees F or 15-35 C. If there are hotter areas in garden, put the growing chili peppers in shade. Maintain a space of 2 feet between the pepper plants in the planting bed.
  5. Now it’s time to fertilize the chili peppers sprinkle granular fertiliser (5-10-10) alongside the rows of chilli plants after they have blossomed. Fertiliser will provide the essential nutrition for the pepper plants to grow fully.
  6. To water your chili plants do so in the early evening or in morning, water your pepper plants well with sprinkler or watering can to simulate rainfall. Maintain dampness in the soil without getting them soggy.
  7. The final stage is to harvest your chili peppers which can occur approximately 40-100 days following the planting of the chili seeds. By now, the young peppers will grow green, yellow and then red. So, now they are ready to be picked.

For best results, provide rainwater or non-chlorinated water to your chili pepper plants. However, care needs to be taken while planting the hot pepper seeds. It’s highly necessary to wear latex gloves and wash hands with soap after planting them.

5 Red Chilli Plant Recipes To Spice Up Your Kitchen

Red Chilli Plant

Are you growing a lush red chilli plant?

If you are, you have no doubt been delighted with the process of growing your own spicy, hot fruits.Red Chilli Plant

Even more exciting is the next step – using your yummy home grown produce!

There’s a world of tastiness ahead with meals, drinks and snacks featuring your very own super hot pepper as the star of the show.

To inspire you to use your red chilli plant produce in your home cooking, here are 5 delicious recipes that make the most of your red chilli plant fruits:

1.   Chilli Pepper & Tomato Pasta

This recipe creates a delicious spicy sauce that you can batch cook and freeze for use at a later date. It’s perfect for pasta, but can also be used with rice, as a base for stews and even watered down with stock and enjoyed as soup.

Serves 2

Ingredients:

  • Two tins of plum or chopped tomatoes
  • Crushed garlic cloves (to taste)
  • One large finely chopped onion
  • One vegetable stock cube
  • One super hot pepper from your red chilli plant (finely chopped)
  • Pinch of salt and pepper
  • A TBSP of cooking oil & olive oil for drizzling
  • Two servings of your pasta of choice

Method:

  • Heat your cooking oil in a frying pan on a medium heat before adding your super hot pepper, onion and garlic.
  • At the same time, boil your pasta as per the packet instructions, drain and cover when cooked.
  • In your frying pan cook the ingredients until the onions are translucent. If the garlic begins to catch, add a little bit of water to the pan.
  • Once the garlic, onions and super hot pepper have cooked down add the tinned tomatoes and crumble the stock cube in. Allow to cook down for at least ten minutes on a low to medium heat so the mixture is bubbling.
  • After around 10-15 minutes the mixture should be thick and saucy. You can always add some water to thin it down. You can now season the sauce to taste with salt and pepper.
  • Add the drained pasta to the frying pan and mix the pasta and sauce together.
  • Serve up on a plate or bowl with a few splashes of olive oil.
  • To jazz the dish up you can also sprinkle dried chilli flakes, cheese and fresh basil when serving.


2.   Chilli Chocolate Avocado Mousse

This recipe is a fantastic option if you need a vegan, gluten free dessert for your family, or guests to enjoy. It’s also very easy to make, so it impresses without exhausting your cooking skills or free time.

Serves 4

Ingredients:

  • Two medium avocados that are ripe (find out how to check the ripeness of avocados here) with the flesh scooped out
  • ½ cup of dark vegan cocoa powder
  • 3-4 TBSP soya milk or dairy free milk
  • ½ TSP vanilla extract
  • A pinch of salt
  • ¼ cup vegan suitable liquid sweetener such as agave
  • 1 super hot chilli chopped into thin slivers or slices if the pepper is thick. If it is thin and/ or small in size you can dry it whole.

Method:

  • Preheat the oven to around 180 degrees
  • Place the chilli from your red chilli plant on a non-stick oven sheet or tray and allow to dry in the oven for at least four hours. It makes sense to do this with a batch of multiple peppers to save energy. If you haven’t done this before, here’s a video to show you how to dry your red chilli plant
  • Place one of your dried chillies chopped into small pieces into the blender along with all the other ingredients and blend in full until you can no longer see any green from the avocado.
  • Place into ramekins or small bowls in the fridge and allow to set for a few hours (ideally overnight).
  • Serve with one of your dried chillies on top (for display) and a few vegan chocolate chips or a square of dark vegan chocolate on top.

3.   Spicy Sauerkraut

Sauerkraut is incredibly delicious, but Healthline tells us it is also incredibly nutritious too, so it’s a great recipe choice when it comes to making the most of your red chilli plant fruits.

Ingredients:

  • One medium white or savoy cabbage roughly shredded
  • 2 TBSP good-quality salt (IE not table salt)
  • 1 large white onion roughly chopped and shredded
  • 1 grated carrot
  • 1 large super hot pepper from your red chilli plant finely chopped
  • 1 TBSP mustard seeds

You will also need a sterile jar with a lid to put the sauerkraut in.

Method:

  • In a bowl mix together the cabbage, carrot, chilli pepper, salt, onion and mustard seeds.
  • Massage the mixture until the veggies soften and water is released into the bottom of the bowl.
  • Put the veggies into your sterilised jar, squishing it down until all veggies are underneath the juices that have been released.
  • Leave at least an inch of space at the top of the jar for expansion.
  • Seal the jar with a lid and leave in a room/ cupboard without any extreme temperatures or direct sunlight.
  • After a few weeks the fermentation process will be well underway and you can eat the sauerkraut. You will want to pop it in the fridge at this point, and eat it up within 4-6 months if you ensure it stays bacteria free (sealing the lid after use and using clean utensils to serve it).

4.   Chilli Martini

For a little grown up fun, this chilli martini is a spicy, yummy twist on the traditional martini cocktail.

Serves 1

Ingredients:

  • 1 super hot chilli from your red chilli plant striped of seeds
  • 1 TBSP of sugar and water mix (in equal parts)
  • 1 generous shot of vodka
  • 2 shots of pineapple juice
  • Half a cup of ice

Method:

  • If you have a cocktail shaker, shake the chilli and sugar/ water mix together. If you don’t, mix them well together in a jar or glass.
  • Add the vodka and pineapple juice to the chilli and sugar/ water mix.
  • Mix everything together either stirring or shaking well for around half a minute.
  • Strain or sieve the mixture into a nice glass, adding sugar to the wet rim of the glass if desired.
  • Garnish with one of your chillis split and placed on the side of the glass.

5.   Sun Dried Tomato Chilli Ketchup

This recipe is a great option if you want to stretch the use of your red chilli plant produce and enjoy their flavour time and time again.

Ingredients:

  • 1 TBSP of any flavourless oil
  • 1 super hot chilli from your red chilli plant, chopped
  • 4 TBSP tomato purée
  • 2 TBSP paprika
  • ⅓ cup red wine vinegar
  • ¼ cup brown sugar
  • 1 TSP good quality salt
  • 1 TSP black pepper
  • 2 cups of ripe tomatoes
  • Chopped garlic cloves (amount to taste)
  • ½ TSP hot chilli powder
  • A few sun dried tomatoes

Method:

  • Heat the oil in a saucepan or deep frying pan on a medium heat.
  • Cook the onion, garlic and chilli until the onion is translucent, then add the tomatoes, tomato purée, chilli powder, paprika, salt, pepper and cook until thick (about 15 minutes).
  • Blend the tomato mixture with the sun dried tomatoes, vinegar and sugar and cook for 15 more minutes.
  • Allow to cool, covered.
  • Decant into a sterilised jar with a lid and place in the fridge.
  • Use the ketchup within around 4 weeks.

What Will You Cook With Your Super Hot Chillies?

Hopefully our above recipes have you feeling incredibly inspired to make all kinds of yummy meals and drinks with your spicy fruits. Before long, you’ll wonder how you even ate before you grew your own red chilli plants!

Bon Appétit!


Hotter Than Hot: Everything You Need To Know About Growing Carolina Reaper

growing Carolina Reaper

Over the last few years the Carolina Reaper chilli has found fame as its scorching 1,569,300 score on the Scoville scale found heat seekers from allgrowing Carolina Reaper over the world wanting to see if it’s heat is really as hot as it’s famed to be.

There was that famous Carolina Reaper nacho challenge, but there are also multiple videos of people trying the chillis themselves, if you’re in the mood for seeing some suffering!

Since it found fame, the amount of people growing Carolina Reaper has soared, as gardeners old and new look to grow the world’s hottest chilli at home.

If you’re thinking of growing Carolina Reaper, there’s a lot to know to make sure your Carolina Reaper plant grows successfully.

To help you, we’ve created an easy guide to growing Carolina Reaper well, so you can enjoy your very own scorching hot chilli peppers at home:


Why Grow Carolina Reaper Chilli Pepper?

Growing Carolina Reaper plants is a great idea if you want to create a plant that is a bit of a legend. If you truly want the hottest of fruits, it is the plant to choose.

If you’re still not sure, here are some benefits to growing Carolina Reaper plants:

Gardening Is Good For You

Many studies tell us that gardening is incredibly good for us. Physically it gets you stretching and moving. Mentally it can decrease stress and anxiety, give you hope and help you with mindfulness. Growing Carolina Reaper plants is just as beneficial as nurturing a whole veggie patch too, because it’s still gardening.

Chilli Peppers Are Good For You

Chilli pepper, like those grown on the Carolina Reaper plant, is known to be really good for you, offering benefits such as; reducing headache pain, helping reduce non-allergic rhinitis symptoms, boosting your metabolism and even soothing arthritis, to name a few.

If You Want To Grow The Hottest Chilli Pepper, This Is The One

The reason that we know Carolina Reaper plant pepper is the hottest is because it is measured with the Scoville Scale. The Scoville Scale was named after Wilbur L. Scoville who made the test whilst trying to find a chilli to use in a warming topical skin cream.

The scale actually focuses on how much Capsaicin is in a chilli pepper, which is the part of the pepper that causes the sweating, burning and general discomfort.

As Carolina Reaper reaches on average 1.5 million on the Scoville Scale, it is currently the hottest pepper currently grown and requires latex or plastic gloves to handle it safely.

There Are Multiple Recipes To Enjoy With Carolina Reaper

You can use Carolina Reaper plant pepper as it is in recipes, but it is generally best used in preserves and sauces. We particularly love this 25 year old hot sauce recipe and this Carolina Reaper plant chilli recipe. You can also experiment integrating it into meals and sides you usually make.

You’ll Probably Do Well Selling Them

The Carolina Reaper plant pepper is still famed for being the hottest pepper, which means many people still want to try it. So if you do intend to sell your produce locally, or even do produce swaps, your Carolina Reaper chillies will probably do really well. Everybody wants to try the famously hot chilli!


Top Tips For Growing Carolina Reaper Peppers Well

If you do feel ready to start growing Carolina Reaper peppers, here are some useful tips to help you grow a healthy Carolina Reaper plant:

Start Indoors First

You should grow your Carolina Reaper plant indoors in potting soil for the first six weeks (in a poly tunnel, greenhouse or at home) before you put it in its permanent growing position.

Don’t worry if the seeds haven’t germinated right away as it can take up to a month or more with the Carolina Reaper plant.

To speed up germination, some people swear by freezing the seeds a few days before planting, which mimics the winter to spring temperature change and can spur the seeds to start growing. Another great tip is to soak the seeds in tepid brewed black tea for half an hour before planting, as it softens the seeds up and again makes it more likely for the germination process to happen.

Keep Your Seeds Safe

Carolina Reaper plant seeds can sometimes cost a lot of money, and you may well want to keep some aside until you have your own fruits to take seeds from. To keep unplanted seeds safe, keep them in a dry, dark place that doesn’t see any huge temperature changes.

Ensure Good Drainage

All plants do well with good drainage, but it is especially important when growing a Carolina Reaper plant. A clear drainage hole, lots of horticultural grit and regularly emptied trays are important to prevent root rot and disease.

Pick A Sunny Spot

Whether indoors or outdoors a Carolina Reaper plant requires full sun for 10-12 hours a day and temperatures 20 degrees Celsius or higher in the day and no lower than 10 degrees Celsius at night. Most people grow chillies indoors so that they get the warmth and sun that is needed.

Fertilise With Consideration

So many gardeners disagree over when and how much to fertilise a Carolina Reaper plant. The fact is that they don’t need to be fertilised more than twice. Once when the seedlings are planted in their final space, and once when the fruits begin to appear.

However, many gardeners swear by using special types of fertiliser at different times and they get good results.

For that reason, when you start growing Carolina Reaper plants it is best to do your own research on fertilisation so that you can decide the best approach for your particular plants.

As long as you fertilise sparingly and with consideration, you’re at a much lower risk of burning your plants through fertilising too much.

Prune With Fruit Abundance In Mind

There are certain pruning methods that tend to produce better yields of peppers when growing Carolina Reaper plants, or other hot chilli peppers.

This video takes you through the process of pruning your Carolina Reaper plant step by step to get the best possible fruit yield.


Are You Ready To Start Growing Carolina Reaper Peppers?

If you now feel ready to start growing Carolina Reaper in your home, follow our tips above and have fun! If your first attempt at growing Carolina Reaper fails, you can always try again.

Soon enough, you’ll have plenty of scorching hot Carolina Reaper fruits to enjoy in your recipes keeping things truly spicy in your home kitchen!

How to Grow Chillies – Bhut Jolokia Worlds Hottest Pepper – Part 1

Bhut Jolokia

This guide will follow the exact steps I took to grow the Bhut Jolokia. From obtaining the chili seeds to harvesting the first fruit. It should take 4-6 months for the process to be complete and we encourage you to join along with your favorite hot chili.

Thanks to Auki Henry co-founder of HighRPM and the maker of How to make a cosmopolitan for his kind donation of the Bhut Jolokia chili. A nice big fat chili was given to me to remove the seeds and start the growing chili process.

The first step was to cut the chili in half to get the Bhut Jolokia seeds. Great care was taken not to get the chili oils or seeds on my hands. Handling was done from the stem only and a sharp knife was used to remove the bhut jolokia seeds. This was a simple process which involved cutting the chili in half then cutting out the seeds.

WARNING: the Bhut Jonokia / Naga Jonokia is the world’s hottest pepper. The Scoville Scale rating is 1million Scoville Units. Extreme care must be taken to prevent contact with the eyes and other sensitive areas. Handing the chili or the seeds should be avoided and if you need to do so wear disposable gloves.

Bhut JolokiaOnce the seeds were extracted from the chili we had to soak them in water for 20min. This will make the seed softer and water the inner seed to start the growing process.

Once the seeds were nice and wet they were ready to plant. We simply used a plastic cup filled with normal potting soil to germinate the seeds. We placed the seeds in the cup and covered them with no more then 5-10mm of soil. We watered the seeds well and ensured all the soil was moist. Keeping the soil moist in the next week or so is vital. The seeds need water to grow and the seeds must stay soft so that the sprout can break out and start to grow.Bhut Jolokia

for the germination process we recommend placing the chili seeds in the most warm and humid location as possible, but not in direct sunlight.

We hope to have half a dozen sprouts penetrate the soil in the next 7-10 days. Please return to the site to see the next installment.

Happy chili growing readers.

Growing Chillies – Bhut Jolokia Worlds Hottest Pepper – Part 2

Bhut Jolokia Plant
Bhut Jolokia Sprouts

After a long week wait and constant watering the Bhut Jolokia Seeds a single sprout emerged. I was a bit upset to see just 1. After reading my notes on the plant I then decided to leave the sprout and seeds as is and watered waiting for more sprouts to hopefully emerge. I’m glad I did because as the days past I noticed more and more green shoots popping out of the soil. Our Bhut Jolokia plants life has begun.

In fact these leaf looking things are called cotyledons which is part of the seed and serve as food sources until true leaves form. While the plant has no true leaves its not ready to move. I waited another week before i started to notice true leaves growing.

While the chili plant is growing its true leaves the cotyledons are no longer needed, therefor it will die and drop off. This is when the plant begins to photosynthesis (the process that converts carbon dioxide into organic nutarians, using the energy from sunlight) so the sprout container must be moved into a sunny area.

Once the sprouts are healthy with 4 leaves its time for the next big step. We must transplant the young chili trees into their adolescent pots. Choose a pot that is 3-5 inches tall. This will be the plants home for the next couple of months and will allow the growing chili plant to establish a solid root system and grow.

Transplanting a chili plant is delicate work as they are quite fragile especially at this young age. Ensure you minimize the root disturbance when you are separating the sprouts and if there is too much of a tangle it is best to choose the strongest looking ones and chop the other sprout. Do not transplant during the hottest part of the day, pick a cool time such as late afternoon.

Once the chili plants are setup in their new pot and had a few days to settle down fertilization is essential. Use a balanced fertilizer preferably one high in nitrogen and potassium, to encourage good roots and healthy growth.

Going forward the plant should be slowly introduced to full sunlit conditions. The Bhut Jolokia plant will need lots of sunlight and a daily watering. The next step we will need to take is move the plant to a bigger pot but this wont be for 2-3 months.

Follow my steps for transplanting your seedlings.Bhut Jolokia Sprouts

1. Ensure you have setup some new pots for the young plants, they should be about 3-5inches tall to accommodate a few months of growing. It needs to be filled with a good potting mix with plenty of drainage.
2. Loosen the soil that is currently holding the chili plants, do so by squeezing the containers sides. Once loose enough you should be able to carefully tip out the young chilli sprouts.
3. Thin the sprouts if you can but be gentle, if you cant separate the chili sprouts your better off cutting the less healthy looking ones then damaging the roots of all.
4. Only handle the leaves of the chillie plant, the stem is very fragile and if injured will end the plants life, leaves will always grow back.
5. Make a hole in the soil of the new pots with your finger big enough for the sprouts to be placed in. Carefully move the chili sprouts into the new pot and lightly pack the soil in so the plant is held firmly and in a upright position.
6. Water the plant well and and put in a calm but sunny place.
7. A week later fertinilise with a high in nitrogen and potassium product.

Bhut Jolokia Plant